Pages

Monday, December 31, 2012

Ice Cream # 10: Eggnog


Last year was the first time I made homemade eggnog and ever since then I've been wondering why I didn't make it sooner! This year, I thought instead of making vanilla ice cream to go with our pies this Christmas, I'd mix it up and try making eggnog ice cream. When I was looking at my recipe the other day for old fashioned eggnog, I realized it was basically the same base recipe I would use to make ice cream. How serendipitous!


The methods for making eggnog ice cream are the same as when making the beverage. You heat the milk and cream and then temper it with the eggs, cook it until it coats the back of a spatula, and voila: you have your custard base. Of course, you can't add as much liquor as you would in the beverage (otherwise the ice cream wouldn't freeze), but other than that, the methods are the same. 


As always, we had far too many sweets for dessert this Christmas, but none could resist the eggnog ice cream. I think it's sure to become a holiday favorite. Wishing everyone a happy and healthy new year!


EGGNOG ICE CREAM

Ingredients:
5 egg yolks
1/2 cup sugar
1/8 tsp. kosher salt
2 cups heavy cream
1 cup whole milk
2 tsp. freshly grated nutmeg (plus extra for garnish)
1/8 tsp. vanilla extract
2 tsp. spiced rum, bourbon, or brandy 

Begin by filling a large metal bowl with about 2-inches of ice water. Place a slightly smaller metal bowl inside. Put a fine mesh strainer or sieve over the two bowls and set aside.

Using a handheld or stand mixer, beat the egg yolks, sugar, and salt until pale yellow in color and the sugar has dissolved. Set aside.

In a medium saucepan, combine the heavy cream, milk, and nutmeg and cook over high heat until the mixture comes just to a boil, stirring often. Remove from heat and slowly pour the hot milk mixture into the beaten eggs and sugar, whisking constantly. Using a rubber spatula, scrape the mixture back into the saucepan and cook until it is thick enough to coat the back of the spatula (or 160 to 170 degrees F on an instant read thermometer). 

Remove the custard from heat and pour through the sieve into the prepared metal bowl. Stir the custard until cool. Stir in the vanilla extract and liquor. Place a sheet of plastic wrap directly on the surface of the custard and another over the bowl. Refrigerate for several hour until cold, preferably overnight.

Process the ice cream in an ice cream machine according to the manufacturer's instructions. Transfer the ice cream to quart containers and freeze until ready to use. Garnish each serving of ice cream with a sprinkling of freshly grated nutmeg.

Yield: About 5 cups

Sunday, December 30, 2012

Herb Breakfast Sausage


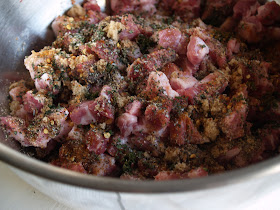
There is something so satisfying about making homemade sausage. Don't be deceived, it may sound complicated, but it's really quite easy (as long as you own a meat grinder- don't worry they're cheap and they'll last you a lifetime). You simply grind your meat of choice with spices and herbs and that's all there is to it! I like to mold this sausage into patties and avoid casings (although I hear the vegetable casings are easy to use). Freezing a bunch of patties at once allows you to always have them on hand.


The original recipe for these breakfast sausages comes from Alton Brown. I've played with it over time, eventually leaving out the fatback (which is called for in the original recipe). I find there's enough fat on a nicely marbled cut of pork butt and that the extra fat isn't necessary. The herbs give just the right balance to the pork without overwhelming the entire sausage. 


This herb sausage is mild with just a touch of heat, making it versatile for all kinds of stuffings. I use this sausage every year in my Thanksgiving stuffing and used it again last week in a sausage, apple, and chestnut stuffing for our Christmas goose. My mouth is watering just thinking about it! 


HERB BREAKFAST SAUSAGE 
Adapted from Alton Brown, Good Eats

Ingredients:
2 lb. pork butt (2 1/2 lb. bone-in), cut into 1/4-inch pieces
2 tsp. kosher salt 
1 1/2 tsp. freshly ground black pepper
1 tbsp. minced fresh sage leaves
1 tbsp. minced fresh thyme leaves
1 tsp. minced fresh rosemary leaves
1 tbsp. light brown sugar
1/2 tsp. ground nutmeg (fresh if you have it)
1/8 to 1/4 tsp. cayenne pepper
1/2 tsp. red pepper flakes

In a large mixing bowl, combine the diced pork with the rest of the ingredients. Mix well, cover, and refrigerate for an hour. Using the large blade of a meat grinder, grind the seasoned pork (use a large bowl or a tray lined with waxed paper to catch the ground pork). Repeat the same process on the same blade size, or remove it and replace it with a finer blade. 

Once the sausage has been ground twice, either mold it into small patties or refrigerate for another use for up to 1 week. If cooking patties, saute the sausage over medium-low heat. Cook until brown and cooked through, about 10 to 15 minutes. 

Yield: 2 lb. sausage

Friday, December 21, 2012

Ice Cream #9: Peppermint Chocolate Chip


Now that candy canes are "in season," it's the perfect opportunity to make peppermint ice cream. This cool and refreshing ice cream is a great dessert option for winter dinner parties or  just to get in the holiday spirit. Sometimes I don't have the patience to eat candy canes because I hate it when my hands and lips get sticky. Peppermint ice cream solves that problem with all the delicious flavor and no mess!


I've adapted this recipe from ice cream king, David Lebovitz, from his book, The Perfect Scoop. Swirling layers of melted chocolate over the churned ice cream, and then breaking it up with a spoon, creates perfect little bits of chocolate that easily melt in your mouth and don't distract from the delicious peppermint flavor. I'm not one for huge chunks of chocolate in ice cream, so the layering of melted chocolate is a great alternative.


Melting candy canes in the warm milk mixture turns the ice cream a delightful pink color, which I find particularly festive and fun to eat. It tastes like Christmas in a bowl! I think 

I've found a new holiday tradition... 


PEPPERMINT CHOCOLATE CHIP ICE CREAM
Adapted from David Lebovitz, The Perfect Scoop

Ingredients:
2 1/2 cups heavy cream
1 1/2 cups whole milk
3/4 cups sugar
1/4 tsp. salt
1 cup (about 6 oz.), divided, crushed candy canes or other hard peppermint candy (see notes below)
8 large egg yolks
2 tsp. peppermint extract
4 to 5 oz. semisweet chocolate, chopped

Pour the heavy cream into a medium size metal bowl placed inside a larger bowl filled with a couple inches of ice water. Set a fine-mesh sieve over the top.

In a medium saucepan, combine the milk, sugar, salt, and 1/2 cup crushed candy canes and warm over medium-low heat until all the sugar and candy canes are dissolved (do not let boil). 

Meanwhile, in a separate bowl, whisk together the egg yolks. Slowly pour the warm milk mixture into the egg yolks, whisking constantly (don't worry if the color looks strange when you mix the colored milk with the egg yolks, it will turn pink again when added to the cream). Using a rubber spatula, scrape the warmed eggs back into the saucepan. Cook the mixture over medium heat, stirring constantly, until it is thick enough to coat the back of the spatula, about 5 to 7 minutes. 

Pour the custard through the fine-mesh strainer and stir it into the cream. Continue stirring the mixture over the ice bath until cool. Stir in the peppermint extract and taste to see that the peppermint is strong enough (at this point, you can also add a drop or two of red food coloring to make the ice cream even pinker). Place a sheet of plastic wrap directly over the surface of the custard and use another sheet over the bowl. Refrigerate for several hours, preferably overnight. 

Process the ice cream according to the manufacturer's instructions. While the ice cream is freezing, melt the chocolate in a small heatproof bowl set over a pot of simmering water. Place two plastic containers in the freezer. 

When the ice cream has finished freezing, fold the remaining 1/2 cup of crushed candy canes into the ice cream. Remove the plastic containers from the freezer and drizzle some of the chocolate all over the inside of the containers (you can use a spoon, or for more control, transfer the melted chocolate to a plastic squeeze bottle or pastry bag). Add a layer of ice cream to the container, drizzle with more chocolate, and then quickly stir it in to break up the chocolate. Continue layering the ice cream with more chocolate and stirring as you go (use as much or as little chocolate as you'd like). When finished, cover and freeze the ice cream until firm. Sprinkle more crushed candy canes over the top of each serving of ice cream. 


Yield: about 6 cups (1 1/2 quarts)

Notes:
  • To crush the candy canes or other hard peppermint candy, remove any wrappers and place them in a gallon size zip-top bag. Cover the bag with a kitchen towel and crush the candies with a kitchen mallet or hammer.
  • If you're making the ice cream without chocolate, add an additional 1/2 cup crushed candy canes to the churned ice cream.

Thursday, December 20, 2012

Mulling Spices


Need a last minute gift idea? Mulling spices make great stocking stuffers and can usually be made entirely from ingredients already found in your spice cabinet. Don't be tricked into buying some "fancy" package of mulling spices at the store (which more often than not are ridiculously overpriced). Make it yourself! All the recipient has to do is drop the bag in a pot, add a little orange zest, and heat it up (just attach some directions to the bag so they'll know what to do).


Mulled wine and cider have always been a holiday tradition, a particular favorite at Christmas in Victorian England. There are hundreds of versions of mulled beverages in all parts of the world, so it's safe to say everyone agrees a mulled drink is a good thing!


Mulling spices aren't just limited to Christmastime, they can be enjoyed in wine and apple cider throughout the fall and winter. But I'm particularly fond of using them around Christmas. I've always liked mulling spices or homemade teas in stockings. They fill the room with smells of spicy goodness. Whether or not the recipient puts it to good use is another story, but they'd be stupid not to! Merry Christmas! 


MULLING SPICES

Ingredients:
2 cinnamon sticks (I like to use Ceylon cinnamon if you can find it)
1/8 tsp. whole black peppercorns
1 tbsp. whole cloves
1 tbsp. whole allspice berries
5 cardamom pods
1 star anise pod
3 1-inch x 3-inch pieces of orange peel or 2 tsp. dried orange zest

Combine all the ingredients (use dried orange zest if giving as a gift, or tell the recipient to add 3 pieces of fresh orange peel) in a spice bag and tie off (or place the ingredients on a double layer of cheesecloth and tie into a bundle using butcher's twine.

Add a 750 ml bottle of wine or a half gallon of cider and the spice bag to a large pot and heat to a simmer. Reduce the heat to low and lightly simmer, covered, for 15 to 20 minutes. Ladle the mulled beverage into mugs and garnish each with a cinnamon stick and piece of orange peel and enjoy!

Notes:
  • If you prefer slightly sweeter mulled wine, add 1/2 cup sugar to the pot.

Monday, December 10, 2012

Tom & Jerry


Tom & Jerry, which predates the lovable cartoon of the same name, is cousin to eggnog and a delightfully festive holiday drink. I first learned about the Tom & Jerry while rummaging through a weekend flea market in NYC, when I spotted a large bowl and set of mugs (akin to an eggnog bowl) labeled "Tom & Jerry." I went home and did some research and learned all about this delicious sounding beverage. The drink takes its name from its creator, famed bartender and "Professor" Jerry Thomas, who's considered by many to be the father of American cocktail mixology. Legend has it, he wouldn't make his beloved Tom & Jerry until after the first snowfall. Today, the drink is still drunk in the Midwest, while the rest of the country has been pretty much deprived. In fact, it's so popular in parts of the Midwest, you can find Tom and Jerry "mixes" in the supermarket. However, I've spotted an article on the Tom and Jerry in the recent edition of Edible Manhattan (which I've pulled inspiration from) so hopefully it's beginning to catch on!


To get in the holiday spirit, I made a batch of Tom & Jerry for Aaron and I to enjoy while decorating our Christmas tree. This year, we thought ahead and started decorating our tree early in the evening. In years past, we'd forget how long it actually takes to decorate a tree and start at 10 pm. We'd usually give up in the wee hours of the morning and finish it the following day. I'm happy to say, we did it all in one night (a small accomplishment, I know). I think the Tom & Jerry's made decorating the tree especially jolly this year!


If you're feeling burnt out on eggnog this holiday season, give the Tom & Jerry a try. It's prepared in much the same way as eggnog, but includes more spices and both brandy and rum. I've concocted the recipe below from many different sources, but feel free to play around with it a bit. Some recipes call for more brandy to rum, rum to brandy, or equal measurements. I've opted for equal parts rum and brandy, but let your taste buds be your guide!


TOM & JERRY
Adapted from Joe Wilfer, Edible Manhattan Nov./Dec. 2012 and various other sources 

Ingredients:
6 large eggs, separated
1/2 tsp. ground cinnamon
1/2 tsp. ground cloves
1/2 tsp. ground allspice
1/2 tsp. freshly grated nutmeg (plus extra for garnish)
1/2 tsp. cream of tartar
1/2 lb. (about 2 cups) sifted confectioner's sugar
1 bottle dark rum
1 bottle brandy
Hot milk or water

In a medium size bowl, whisk together the egg yolks, cinnamon, cloves, allspice, and nutmeg. Set aside.

In a large bowl, beat the egg whites using a handheld or stand mixer until stiff peaks form. Mix in the cream of tartar. Add the confectioner's sugar in batches. Using a rubber spatula, fold the egg yolk mixture into the beaten whites. 

Ladle a scoopful of batter into each mug. Stir 2 tbsp. each brandy and rum into each mug and top with hot milk or water. Stir well, garnish each mug with freshly grated nutmeg, and imbibe! 

Yield: 10 to 15 servings (depending on the size of your mugs)


Notes:
  • Be sure to use good quality eggs for your Tom & Jerry, ones that come from vegetarian grain fed hens and are free of antibiotics, hormones, and other additives. I get my eggs at the farmer's market from Feather Ridge Farms. You can also use pasteurized eggs if you're worried about consuming raw egg. 
  • Leave the liquor out of some of the mugs to serve to the kids! For the faint of heart, feel free to decrease the liquor to 1 tbsp. each brandy and rum.

Thursday, December 6, 2012

Apple Cider Jelly


Jelly. When most cooks think of making jelly, they envision a long process of boiling fruit and dripping it through a jelly bag for hours on end. While I'm all for traditional methods, sometimes we just don't have enough time to do things the old fashioned way. By using pectin, this jelly is lightning fast to make and will save you loads of time. 


While in college, living in Massachusetts, every fall a group of us would take a bus to Keown Orchards to go apple picking. Last year I shared my recipe for spiced apple butter, which was inspired by those lovely apple picking adventures at Keown Orchard's and their delicious jams, jellies, and fruit butters. However, if you're feeling crunched for time this holiday season, apple cider jelly is much faster to make than apple butter and you still get that same appley goodness. Apple butter or jelly make great edible gifts for the holidays!


The secret to this jelly is using the best apple cider you can get your hands on. For me, that means moseying on over to my local farmer's market and picking up a jug of freshly made cider. One of my favorite ciders comes from Terhune Orchards, in Salt Point, NY. If you live in NYC, you've likely seen them at your local farmer's market, as they've been coming to greenmarkets in the city for over 30 years. The use of unfiltered apple cider will make a cloudier jelly, but I find it's much more flavorful. There's nothing quite like a morning started out with buttered toast slathered in apple cider jelly!


A quick side note: if you live in the midwest or northeast, you may have noticed many apple products going up in price, especially at farmer's markets. This was a very bad year for apple growers, with many farmers in the New York state area losing nearly 90% of their apple crops. Unseasonably warm weather early in the season, followed by a severe frost, hail storms, and drought have had a devastating effect on these farmers' income. Keep them in your thoughts this holiday season and let's all hope for a bountiful apple harvest next year! 

APPLE CIDER JELLY
Adapted from Pamona's Pectin pamphlet & Lucy Baker, Serious Eats

Ingredients:
1/2 tsp. whole cloves
1/2 tsp. allspice berries
1 cinnamon stick
4 cups unfiltered apple cider
1/4 cup lemon juice
2 cups granulated sugar (or substitute with 1/2 to 1 1/3 cups honey)
1/2 cup light brown sugar, packed
1 package Pamona's Universal Pectin (see notes below)
Spice bag

Fill the spice bag with cloves, allspice, and cinnamon stick. 

In a large pot or Dutch oven, combine the apple cider and lemon juice and stir to combine. Stir in 4 tsp. calcium water, then add the spice bag. Bring the mixture to a boil over medium heat, stirring occasionally. 

Meanwhile, in a small mixing bowl, combine the granulated sugar (or honey) with 4 tsp. pectin powder. Whisk to combine. 

Once the cider mixture begins to boil, add the sugar and pectin mixture and stir vigorously for 1 to 2 minutes to dissolve the pectin. Return the mixture to a boil and stir in the brown sugar. Allow the mixture to return to a boil once more and remove from heat. 

Ladle the jelly into hot, clean jars, leaving a headspace of ¼-inch (don't worry if the jelly begins to congeal a bit, this is normal). Wipe rims and apply lids and rings. Process for 10 minutes in a boiling water-bath canner (for 4 oz. jelly jars or 8 oz. half pint jars). Turn off heat and let jars sit in canner for 3 to 5 minutes before removing. Allow jars to rest on a dishtowel undisturbed for 6 to 8 hours or overnight. Check seals, label, and store in a cool dark place for up to a year. If any jars did not seal properly, place them in the fridge and use first. For more information, see my step-by-step guide to canning here.

Notes:
  • Each box of Pamona's Pectin will include a packet of pectin powder and calcium powder. This recipe calls for 4 tsp. of calcium water and 4 tsp. of pectin powder. To make the calcium water, combine 1/2 tsp. calcium powder with 1/2 cup of water in a small jar with a lid and shake to combine (refer to Pamona's Pectin pamphlet for more information).
  • You can find Pamona's Pectin at well-stocked grocery stores such as Whole Foods. You can also purchase it on the world wide web here.

Thursday, November 29, 2012

Ice Cream # 8: Pumpkin


The first time I had pumpkin ice cream was at the Nut Tree in Vacaville, CA. If you grew up in northern California, chances are you went there too. For those that are unfamiliar, the Nut Tree began in 1921 as a roadside fruit stand and evolved over time to become a mini amusement park which attracted families for generations. As kids, every fall my family would make our way to the Nut Tree and ride the train and explore the pumpkin patch. Each year we had our picture taken sitting on a hay bail or posing next to a scarecrow (the incriminating photos still exist). But hay bails and scarecrows aside, the highlight of course was pumpkin ice cream! 


I remember being overjoyed at the big scoop of pale orange colored ice cream. Like most kids, my eyes were bigger than my stomach, so I had a hard time finishing it all. Such pressure, as I knew I wouldn't taste it again until the next fall! Though the Nut Tree is no longer in the same incarnation I knew as a kid, some relics still remain. It's been many years since I've had pumpkin ice cream, in fact, the last time I had it may have been at the Nut Tree. 


You can roast the pumpkin yourself or use canned pumpkin. I used a combination of both, as I had some leftover pumpkin puree I froze from a couple months ago. This ice cream is SO good and made me feel like a kid again. The medley of spices give this ice cream  so much flavor, it's basically pumpkin pie in the form of ice cream. A yummy seasonal treat to enjoy all fall and winter long!


PUMPKIN ICE CREAM
Adapted from David Lebovitz, davidlebovitz.com and Karen DeMasco & Mindy Fox, The Craft of Baking 

Ingredients:
1 1/2 cups whole milk
1 cup heavy cream
1/3 cup plus 2 tbsp. granulated sugar
1/2 tsp. freshly grated ginger
1 tsp. ground cinnamon
1/2 tsp. freshly grated nutmeg
1/4 tsp. ground cloves
1/4 tsp. ground cardamom 
1/4 tsp. kosher salt
5 large egg yolks
1/4 cup packed dark brown sugar
3/4 cups pumpkin puree (canned or homemade- see notes below)
1/2 tsp. vanilla extract
1 to 2 tsps. Grand Marnier, rum, or brandy (optional)

Start by making an ice bath: place some ice and a cup or two of water in a large bowl and place another slightly smaller metal bowl inside it. Place a fine-mesh strainer over the top and set aside.

In a medium size saucepan, mix the milk, cream, granulated sugar, ginger, cinnamon, nutmeg, cloves, cardamom, and salt. Heat the mixture over low heat until hot and the edges  begin to bubble. Remove from heat.

In a medium size bowl, whisk the egg yolks. Gradually whisk in half of the hot milk mixture, whisking constantly. Using a rubber spatula, scrape the warmed yolks mixture back into the saucepan. Cook over low heat, stirring constantly and scraping the bottom to prevent sticking. Cook until the mixture is thick enough to coat the back of the spatula (if using an instant-read thermometer, it should read between 160-170 degrees F).

Immediately pour the mixture through the fine-mesh strainer into the metal bowl set inside the ice bath. Stir in the brown sugar, pumpkin, vanilla extract, and liquor (if using). Stir until the mixture is cool and remove from ice bath. Place a sheet of plastic wrap directly on the surface of the custard and another sheet over the entire bowl. Refrigerate for several hours, preferably overnight. 

Place a fine-mesh strainer over an ice cream maker and pour the pumpkin custard into the machine (you may need to use a rubber spatula to work it through). Process according to the manufacturer's instructions. Transfer ice cream to plastic containers and freeze until ready to use. 

Notes:
  • If you plan to make the pumpkin puree yourself, look for "sugar" or "pie" pumpkins, which are ideal for roasting/eating (steer clear of the large Halloween carving pumpkins). Using a large kitchen knife, cut off the pumpkin stem and the base. Split the pumpkin in half and scoop out the seeds (save for roasting later) and discard the pulp. Line a sheet pan with foil and lightly grease with olive oil. Place the pumpkin cut-side down and roast at 400 degrees F, until the skins begin to blister and the flesh is very soft, about 45 to 55 minutes, depending on size. Let the pumpkin cool, scoop out flesh and puree in a food processor until smooth. 
  • If using canned pumpkin, be sure to buy 100% pure pumpkin, not pumpkin pie filling which has sugar and spices already added.
  • This ice cream takes well to many different toppings, such as: chopped toasted walnuts or pecans, candied ginger, and crumbled gingersnap or gingerbread cookies. You can also fold these toppings into the ice cream itself.

Tuesday, November 27, 2012

Acorn Squash Soup


There are some dishes you make that are so special they become tradition and their taste becomes synonymous with family, friends, and good eating. Not to get sappy, but this acorn squash soup has become just that. Sometimes the simplest things are the best. The original recipe comes from family friend, Marion Hover, which she complied from a number of recipes. I emailed her for the recipe in college and have been making it ever since. It has now become a staple at our yearly Dia de los Muertos dinner. Nearly everyone has come to expect it and they're disappointed if I don't make it. I always make extra to have on hand for those wintry nights, when all you want to do is hunker down and be comforted by a delicious bowl of soup.


I love the use of curry powder in this soup. In a way, it makes acorn squash taste more like acorn squash but without overpowering the entire soup. Most people don't even know it's in there, but it adds a great flavor. The crème fraiche garnish makes for a lovely presentation and it's fun for the cook to test their drawing skills. I once attempted piping a skull onto the surface of the soup for Day of the Dead, but it came out looking more like a Salvador Dali painting gone awry. I've stuck to a simple swirl here, but feel free to get creative. If I remember correctly, Marion made this soup for my brother and sister-in-law's engagement dinner and piped hearts onto each bowl of soup. Have fun with it!


I always think this soup tastes better the following day. So if you're serving it for company, make it the day before and refrigerate overnight. Simply reheat on the stovetop before dinner. This is a fall and winter soup that is sure to please! A great option to serve before Thanksgiving dinner too. I'm so excited to share this recipe with everyone and hope you enjoy! 


ACORN SQUASH SOUP
Adapted from Marion Hover

Ingredients:

For the soup:
4 acorn squash
2 tbsp. butter
2 yellow onions, chopped
2 tsp. garlic, minced
½ tsp. curry
½ tsp. ginger
½ tsp. nutmeg (fresh if you have it)
7 to 8 cups chicken or vegetable stock
½ cup half & half
Salt and freshly ground pepper to taste

For the crème fraiche garnish (optional):
1/2 cup crème fraiche
2 tbsp. half & half or milk
1 tsp. brown sugar
A dash of cinnamon

For the soup:
Preheat oven to 400 degrees F. Cut squash in half and seed (save the seeds and toast them later). Drizzle a little olive oil on two foil-lined sheet pans. Place the squash cut-side down on the pans and cook for 40 to 50 min until skins have blistered and squash is soft to the touch. Cool and peel off outer skin. Roughly chop the squash and set aside.

In a large Dutch oven or stainless steel pot, melt the butter and saute the chopped onions over medium heat, until translucent. Add the garlic and cook for 1 minute more. Add curry, ginger, nutmeg, chopped squash, and chicken stock (or vegetable stock). Bring to a boil, then reduce to a simmer and cook for 15 minutes. Remove soup from heat and let cool slightly.

Puree the soup in a blender (or use a stick-blender). Pour through a fine mesh strainer back into the Dutch oven or large pot. Return the soup to a simmer, add half and half and season to taste with salt and pepper. If the soup appears too thick, thin it with a little more stock until you've reached the desired consistency. Serve immediately or make ahead and reheat.

For the crème fraiche garnish:
In a small bowl, whisk ingredients together until creamy. Spoon a dollop onto each serving of soup or place in a piping bag or small zip-top bag, snip the end, and pipe a design onto the surface of the soup. Keep refrigerated until ready to use. 

Yield: About 3 quarts

Notes:
  • Feel free to substitute other winter squash for the acorn squash. Sometimes I like to use a combination of acorn and butternut etc. This soup is very versatile so feel free to play around a bit.
  • For a vegan alternative, substitute the half and half for coconut cream or coconut milk.