Pages

Wednesday, July 31, 2013

Strawberry Shortcake


I've been making strawberry shortcake since college, when each summer one of our professors, Mary Saunders, would invite a group of us students to a barbeque at her home in beautiful Manchester, Massachusetts. Year after year it became a tradition for all of us to take the train from Boston, and visit with her in the quint New England seaside town. I always made sure to bring along some freshly baked shortcakes, strawberries, and homemade whipped cream for dessert. Mary would always say, "Michael, it's not everyday you get homemade whipped cream." And you know what, she's right! This dessert is always a treat, and one that I look forward to every season. 


Strawberry shortcake, not to be confused with the animated character or the English-style cookie, is a beloved classic American spring and summer dessert. However, the first published recipe for "shortcake," a type of unleavened cookie, dates back to 16th century England when it appeared in an Elizabethan cookbook. Several centuries later on the other side of the Atlantic ocean, shortcake has become more akin to a biscuit than a cake or cookie. In 19th century America, baking soda was introduced and the rest is history. 


My shortcake recipe has evolved a lot over the past few years, but I finally think I've got it just right. To be honest, I'm not even sure where the original recipe originated. The shortcake is not too sweet, letting the strawberries and cream really shine. It's nice and crumbly, and absorbs all of the delicious moisture provided by the berries, without becoming soggy or mushy. It's just a reminder that sometimes the simplest things are the most delicious. It's no wonder it remains a beloved American classic after all these years.


STRAWBERRY SHORTCAKE

Ingredients:

For the strawberries
2 pounds fresh strawberries, washed, hulled, and quartered
1/4 cup sugar

For the shortcakes
2 cups all-purpose flour
2 teaspoons baking powder
1/4 teaspoon baking soda
3/4 teaspoon kosher salt
3 tablespoons sugar
5 tablespoons cold unsalted butter, cut into 1/2-inch pieces
1 1/4 cups heavy cream, plus more as needed
Sparkling sugar, as needed (optional, see notes below)

For the whipped cream
1 1/2 cups heavy cream
1/4 cup plus 1 tablespoon sifted confectioner's sugar
1 teaspoon vanilla extract


For the strawberries
Put the strawberries in a medium bowl and toss with the sugar. Cover and refrigerate until ready to use.

For the shortcakes
Preheat the oven to 425 degrees F. Line a sheet pan with parchment paper or a Silpat and set aside. 

Sift together the flour, baking powder, baking soda, salt, and sugar over a large bowl and whisk to combine. Add the butter to the dry ingredients, toss with the flour, and rub it between your fingers to blend it with the flour. It should resemble coarse sand.

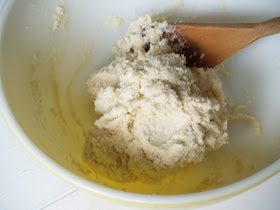
Pour the buttermilk in all at once and stir with a wooden spoon until the mixture just comes together. The dough should hold together nicely and still be slightly sticky. Drop the dough by spoonfuls onto the prepared sheet pan (for large shortcakes evenly divide the dough among 6 scoops, for smaller shortcakes, evenly divide the dough among 8 scoops). Lightly brush the tops of the shortcakes with heavy cream and sprinkle with sparkling sugar, if desired. Place the pan in the oven and bake for 15 to 20 minutes, until the tops are lightly golden brown and a toothpick inserted into the center comes out clean. Transfer the shortcakes to a drying rack to cool. Serve within an hour or two after baking, for them to be at their best.

For the whipped cream
Place a mixing bowl and whisk attachment (or whisk) in the freezer for 10 to 15 minutes to chill. Remove the bowl from the freezer and add the heavy cream, confectioner's sugar, and vanilla extract. Whip the cream on medium speed using an electric mixer (or by hand if you want the workout) until soft peaks form. Cover with plastic wrap and place in the refrigerator until ready to use.

Assembly 
Using a serrated knife, carefully cut the shortcakes in half. Place the bottom potion of the shortcake on a plate and spoon on some of the sweetened strawberries, being sure to add some syrup that has accumulated at the bottom of the bowl. Add a couple of spoonfuls of freshly whipped cream to the strawberries. Place the top portion of the shortcake on top. Repeat with the remaining shortcakes and serve immediately. 

6 to 8 servings

Notes:
  • Sparkling sugar is a type of coarse-grain sugar that can be found at most cake and baking supply stores, or online

Tuesday, July 30, 2013

Summer Squash Frittata with Fresh Basil


One of my favorite summer dishes are frittatas, which can be enjoyed at any meal of the day. When the heat wave broke for a couple days in NYC this past week, I took the opportunity to use the god forsaken oven, and bake a summer inspired frittata. I love to eat them warm right out of the oven, or cold right out of the fridge. With a simple side salad, they make a great breakfast, lunch, or dinner.


Frittatas are a great way to use up any leftover veg you may have tucked away in your refrigerator. You can add just about anything to the egg base and voila, you have a meal made! I first made this summer squash frittata with some leftover vegetables I had from cooking ratatouille. Now I look forward to it every season. 


There are many different techniques to making a good Italian frittata. They can be done entirely on the stovetop and flipped in the pan, started on the stovetop and finished in the oven, or the simplest method is to bake them in the oven from start to finish. The last method is the one I've used here; it's fool proof and keeps you from being glued to the stove. Most importantly, it comes out perfect every time. Light, fluffy, and delightfully eggy. Experiment with all types of leftover vegetables and meats. The possibilities are endless!


SUMMER SQUASH FRITTATA WITH FRESH BASIL
Adapted from Marcella Hazan, Essentials of Classic Italian Cooking

Ingredients:
1/4 cup plus 1 tablespoon extra virgin olive oil
2 yellow onions, sliced into 1/8-inch thick half-moons
1 garlic clove, minced
1 small zucchini (about 6 ounces), sliced into 1/8-inch thick coins
1 small yellow squash (about 6 ounces), sliced into 1/8-inch thick coins
8 large eggs
1/4 teaspoon kosher salt, or more to taste
Freshly ground black pepper, to taste
3/4 cup grated parmigiano reggiano cheese
10 fresh basil leaves, torn into pieces
2 tablespoons unsalted butter

Preheat the oven to 350 degrees F. 

Heat 3 tablespoons of the olive oil in a 10-inch saute pan (non-stick works great for this if you have it) over medium heat. Add the onions to the pan and a sprinkle with a dash of salt. Reduce the heat to low and saute, stirring occasionally, until the onions are lightly brown and caramelized, about 25 to 30 minutes. Add the garlic and cook about 1 minute more. Transfer the onions and garlic to a plate or sheet pan and set aside to cool.

Wipe out the saute pan you used for the onions and garlic using a paper towel. Add the remaining olive oil to the pan and heat over medium heat. Add the zucchini and yellow squash, sprinkle with salt, and toss occasionally until lightly golden brown, about 5 to 6 minutes. Transfer the squash to the plate or sheet pan with the onions, and set aside to cool. Drain off and discard any oil or liquid that has accumulated in the pan. 

In a large bowl, use a whisk to beat the eggs. Add the salt and pepper and whisk to combine. Add the onions and garlic to the eggs and mix with a fork to incorporate. Next, add 1/2 cup of the parmesan and mix again. Gently fold in the cooked squash and torn basil.

In the same saute pan you used for the onions, garlic, and squash, and the butter and melt over medium heat. Swirl it in the pan to coat it. As soon as the butter stops foaming, but before it begins to color, pour in the egg and squash mixture. Turn off the heat and sprinkle the remaining cheese on top. Transfer the pan to the oven and bake for 30 to 35 minutes, until the eggs are just set and no longer runny in the center. Remove from the oven, slice, and serve immediately. 

Makes 8 servings

Thursday, July 18, 2013

Fresh Fig Jam


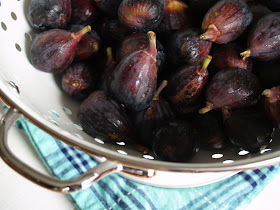
I spotted some beautifully ripe black mission figs the other day and knew I needed to make fig jam. I was considering mixing them with strawberries, but ultimately decided to preserve them on their own. I'm glad I did, as there's nothing quite like a 100% unadulterated fig jam. As a child, I used to love Fig Newtons, so I guess this jam fuels that childhood obsession.  


In the United States, figs are grown in California and the Southwest and are available in mid to late summer. While you can certainly make fig jam using dried figs, there is something special about using them while in season (even better if you have your own personal tree to pick from). Fresh figs are a little less sweet than the dried versions, with soft delicate skins, and light pink centers filled with tiny edible seeds. Their delicate skin makes them particularly temperamental to store and transport, and are extremely perishable. Look for figs that are unblemished and heavy for their size, and not hard and dried out. Try to use them up in a day or two after purchasing and store in the fridge. 


This jam isn't too sweet and you can really taste the unique flavor of fresh figs. I quartered the figs instead of dicing them to make it a bit chunky and rustic. It will make an excellent jam to give as gifts come December. The real challenge will be keeping myself from gobbling it up before the holidays!  


FRESH FIG JAM
Inspired by Ellie Topp & Margaret Howard, The Complete Book of Small-Batch Preserving

Makes 4 cups, or enough to fill 8 (4-ounce) jelly jars or 4 (8-ounce) half pint jars

Ingredients:
2 pounds fresh black mission figs, stemmed and quartered (about 6 cups quartered figs)
2 cups sugar
Zest from 1 lemon
3 tbsp. freshly squeezed lemon juice (about 1 lemon)
1/4 cup water 
A pinch of kosher salt
1/2 teaspoon vanilla extract

Place 1 or 2 small plates in the freezer for testing the jam later on.

Combine the figs, sugar, lemon zest, lemon juice, water, and salt in a large non-reactive pot or Dutch oven. Cover and let stand for 30 minutes to 1 hour, stirring occasionally. 

Uncover the pot and bring to a boil over medium-high heat. Reduce the heat to medium and boil rapidly (occasionally mashing the figs with a potato masher to break up the skins), stirring occasionally and scraping the sides and bottom of the pot to prevent scorching, until the jam forms a gel, about 8 to 10 minutes (begin testing the jam to see that it has set after about 8 minutes: remove the pot from the heat and retrieve a plate from the freezer. Place a dollop of jam on the plate and return it to the freezer for a minute. Run your finger through the jam and if it wrinkles slightly, and does not run back together, it's done. If it's still a bit runny, return the pot to the heat and bring to a boil. Continue checking every couple of minutes in the same manner until a gel has formed). Add the vanilla and stir to combine.  


Ladle the jam into hot, clean jars, leaving a headspace of 1/4-inch. Remove any air bubbles, wipe rims with a clean paper towel or cloth, and apply lids and rings. Process for 10 minutes in a boiling water-bath canner (for 4 oz. jelly jars or 8 oz. half pint jars). Turn off the heat, remove the lid from the canner, and let the jars sit in the canner for 3 to 5 minutes before removing. Allow the jars to rest on a dishtowel undisturbed for 6 to 8 hours or overnight. Check seals, label, and store in a cool dark place for up to 1 year. If any jars did not seal properly, place them in the fridge and use first. For more detailed information, see my step-by-step guide to canning here.

Thursday, July 11, 2013

Lemon & Garlic Pickled Asparagus


A few weeks ago, I spotted some beautiful green and white asparagus and decided they'd make a fine pickle. Lemon and garlic are a natural paring with asparagus, making these pickled delights ideal to eat as a snack right out of the jar, or as a quick addition to weeknight meals. 


Not only are white asparagus delicious to eat, they make a striking presentation when pickled with green asparagus. White asparagus is grown by continually covering the shoots with soil as they grow, keeping them unexposed to sunlight, thus preventing photosynthesis. This is how the full length shoots remain white. 


As asparagus season is fairly short (from about early March to late June, depending on where you live), canning is a wonderful way to enjoy them well past what their season will allow. I happened to come across some tall 24 oz. (1 1/2 pint) Ball mason jars at the hardware store and thought they would be ideal for long asparagus stalks (as it turns out, that's exactly what these size jars are intended for- who knew?). When using regular pint jars, you end up losing half the stalk to fit the asparagus in the jar. The 24 oz. jars are somewhat harder to find, but you can always order them online if you can't locate them at your local hardware or kitchen supply store. 


LEMON & GARLIC PICKLED ASPARAGUS 

Inspired by pickyourown.org

Ingredients:
1 1/2 lb. green asparagus
1 1/2 lb. white asparagus  
2 cups distilled white vinegar (5% acidity)
1 1/4 cups water
3/4 cups freshly squeezed lemon juice
1 tbsp. pickling salt
1 tsp. sugar 
10 garlic cloves, peeled
2 1/2 tsp. coriander seeds  
5 (24 oz. or 1 1/2 pint) mason jars, cleaned and sterilized


Thoroughly wash and trim the bottom of each asparagus spear to fit a 24 oz. (1 1/2 pint) jar, allowing for a 1/2-inch headspace. 

In a medium saucepan, combine the vinegar, water, lemon juice, salt, and sugar. Bring to a boil over medium-high heat, stirring occasionally to dissolve the salt and sugar. Taste the brine, adding more salt or sugar to taste, if needed.

Meanwhile, place 2 garlic cloves and 1/2 tsp. coriander seeds in each of the 5 jars. Tightly pack the asparagus into the jars (I prefer mine tip-side up, but you can pack them either end up). 

Using a ladle, evenly divide the hot brine into each of the 5 jars, leaving a 1/2-inch headspace. Remove any air bubbles, wipe the rims with a clean paper towel, and apply the lids and rings.

Process the jars in a boiling-water bath canner for 10 minutes. Remove the jars and place them on a kitchen towel. Check to see that the jars have sealed properly (if some have not, place these in the refrigerator and eat first). Let the jars rest, undisturbed for at least 12 hours. Label, date, and store the jars in a cool dark place for up to 1 year (allow the pickled asparagus to sit for about 1 month before eating, to allow the flavors to fully develop). After opening, refrigerate and consume the asparagus within 3 weeks. For more detailed information, see my step-by-step guide to canning here.

Yield: 5 (24 oz. or 1 1/2 pint) jars
Notes:
  • Look for asparagus that are very fresh and crisp, with firm tips. 
  • Most grocery stores don't carry pickling salt, so look for it at specialty food stores or online. Pickling salt differs from other table salts in that it is free of additives that darken pickled food or turn the pickling liquid cloudy (such as iodine and anti-caking agents). In a jiffy, you can substitute pickling salt with kosher salt, but since the size of kosher salt is slightly larger than pickling salt, the measurements will differ when measured by volume. So if using kosher salt for this recipe, use 1 heaping tbsp. of kosher salt in place of 1 regular tbsp. of pickling salt.