Saturday, March 3, 2012

Gougeres: French Cheese Puffs


I just finished reading Ruth Reichl's book, Garlic & Sapphires, a fascinating memoir about her experiences as the New York Times restaurant critic. In one chapter, she writes about the gougeres she had at Daniel. These sounded so good, I was inpired to put down my book and make them before dinner one night. Gougeres sound fancy, but the're actually simple little cheese puffs (they just sound prettier in French). They're fluffy and light with a crisp outer shell and make superb hors d'oeuvres served with cocktails at a party or as a delicious snack.


I tried out two different recipes for gougeres, both were coincidentally from Ruth Reichl. The one I liked best comes from The Gourmet Cookbook. On my first attempt at making these, my dough was too wet and my gougeres rose but then quickly collapsed after removing them from the oven, resulting in little cheese pancakes. While still delicious, they weren't quite what I was going for. Part of the problem was that the first recipe I used called for too many eggs (not to mention I was using extra-large eggs, which only contributed to their demise). It's necessary that you remove enough moisture while cooking so that the dough reaches the right consistency. The recipe provided below calls for 4 to 5 large eggs. Use the fifth egg if you find your dough to be too stiff. However, if you removed too much moisture while cooking and the dough still seems stiff after the additional egg, add some water by the teaspoon until the dough is glossy and holds soft peaks.


GOUGERES
Slightly adapted from Ruth Reichl, The Gourmet Cookbook

Ingredients:
1 cup water
1 stick (8 tbsp.) unsalted butter, cut into tablespoons
½ tsp. salt
1 cup all-purpose flour
4 to 5 large eggs
1½ cups finely grated Gruyere (about 4 oz.) 
2 tbsp. finely grated Parmigiano-Reggiano, plus extra for sprinkling
1 heaping tbsp. chives, minced
¼ tsp. ground nutmeg (freshly ground if you have it)
¼ tsp. freshly ground black pepper

Place oven racks in the upper and lower thirds of the oven. Preheat oven to 375 degrees F. Line two sheet pans with parchment and set aside.

Combine the water, butter, and salt in a 4 quart heavy-bottomed saucepan and bring to a boil over high heat. Stir until the butter is completely melted. Reduce heat to 
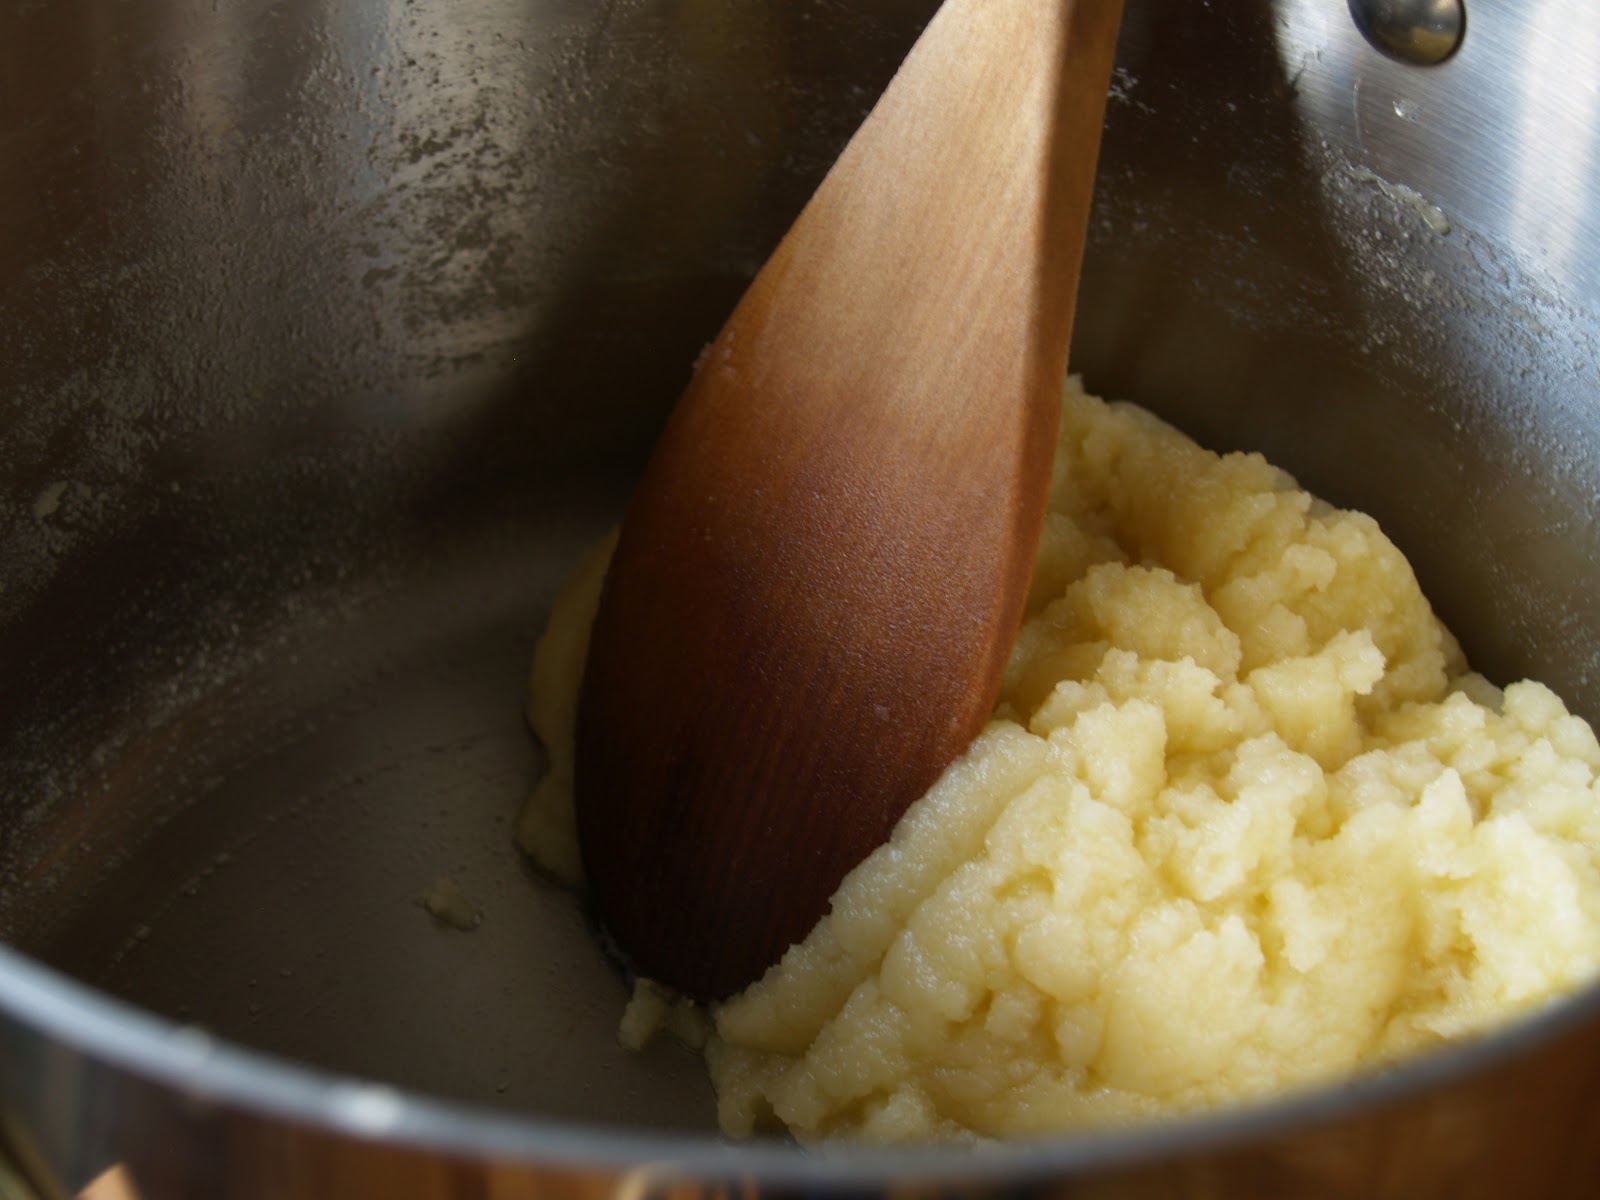
medium and add the flour all at once. Vigorously stir in the flour with a wooden spoon and cook until the mixture pulls away from the sides of the pan, about 30 seconds. Continue to cook and stir the mixture to remove any excess moisture, about 1 1/2 minutes. Remove the pan from heat and set aside to cool for a few minutes. 

Add the eggs one at a time and stir vigorously to incorporate after each addition (don't worry if the batter seems to separate, it will become smooth once beaten long enough). You've reached the desired consistency when the dough becomes glossy and falls gently from the spoon (if the mixture seems too stiff, beat the remaining egg in a small bowl and add a little of it at a time, incorporating each addition fully before adding more. If the dough still seems stiff, add a little water until you feel its reached the right texture). Stir in cheeses, chives, nutmeg, and pepper. Taste to adjust seasonings.

Transfer the dough to a pastry bag (or gallon-sized zip-top bag with the end sniped off) and pipe dough into 1-inch mounds (about a tablespoon), spaced 1-inch apart. Sprinkle each mound of dough with Parmigiano-Reggiano. Bake for 25 to 30 minutes until puffed and nicely golden brown (switch the position of the pans halfway through cooking time). Continue making more gougeres in the same manner with the remaining dough. Serve warm.

Yield: about 50 gougeres

Notes:
  • The gougeres can be made 1 week in advance, baked, cooled, and frozen in well-sealed gallon-sized zip-top bags. Reheat uncovered on a sheet pan at 350 degrees F for about 12 to 15 minutes. You do not need to defrost them before reheating. 

Wednesday, February 29, 2012

Lamb Shepherd's Pie


I've been in such a stewy mood lately. Here's a lovely recipe for that classic peasant food, shepherd's pie. Lamb leg can be a bit pricey, but the rest of the ingredients called for in this recipe are very inexpensive. And believe me, it's worth it for the tender pieces of moist lamb in every bite! 


I asked my butcher for bone-in leg of lamb, but when I got home there was no bone to be found. Argh! The bone imparts so much flavor in a long braise, so I was a bit disappointed (yes, I thought of marching back and asking where my bone was, but I decided I wasn't quite ready to turn into a pushy Upper West Side grandmother). I had intended to let the leg braise overnight in the oven and then once the meat was nearly falling off the bone, shred it. Instead, being short on time and lacking my bone, I decided to dice the meat and braised it for an hour which still gave me incredible results. I also substituted the traditional mashed potato topping for mashed turnips. They are naturally buttery and a bit lighter and fluffier than mashed potatoes. I was in the mood for them so that's what I've used here, but feel free to use potatoes if you please.


Though lamb or mutton is the traditional choice of meat used in shepherd's pie (as shepherds herd sheep, not cows), more often than not you see it with ground beef. Using ground beef is a quick alternative, but I feel that using lamb ironically makes shepherd's pie a bit more elegant. Besides, ground beef could never compare to the incredible flavor you get from browning and braising your meat. It's unbelievably mouthwatering. This shepherd's pie is a rich and hearty dish fit for a winter dinner party (see notes below) or a weekend family dinner.


LAMB SHEPHERD’S PIE
Adapted from an Anne Burrell recipe

Ingredients:

For the lamb:
Olive oil
3 lb. boneless lamb leg (trimmed of excessive fat), cut into ½ inch dice (see notes below) 
Kosher salt
½ cup all-purpose flour
2 medium-sized yellow onions, chopped
2 carrots, peeled and cut into ¼-inch dice
1 parsnip, peeled and cut into ¼-inch dice
3 ribs celery, chopped
2 cloves garlic, minced
¼ cup tomato paste
1 cup red wine
3 to 4 cups chicken stock
2 bay leaves
10 sprigs fresh thyme, tied with butcher's twine
1 sprig fresh rosemary, minced

For the turnip mash:
2 1/2 lbs. turnips (rutabagas work well too), peeled and cut into 1-inch cubes
4 tbsp. unsalted butter
1/4 cup heavy cream
Salt and pepper to taste

Coat the bottom of a large Dutch oven (or a wide deep pan with a lid) with olive oil and set over medium-high heat. Season the lamb generously with salt and toss in the flour until completely coated. Add the lamb to the pot and brown well on all sides (do this in batches to ensure even and dark browning). Remove the lamb from the pot and set aside. Drain off all but two tablespoons of the olive oil in the pan and replenish with a tablespoon or two of fresh oil.

Return the pot to medium heat and add the onions, carrots, parsnips, and celery. Season with salt and, stirring often, cook until the vegetables are soft, about 8 to 10 minutes. Add the garlic and cook 2 to 3 minutes more. Return the lamb to the pot and stir well to combine. Add the tomato paste and cook until it begins to brown, about 2 to 3 minutes.

Add the wine and cook until it reduces by half. Add just enough stock to cover the surface of the lamb, and taste to adjust seasonings, adding more salt if necessary. Add the bay leaves, rosemary and thyme bundle. Scrape up any brown bits stuck to the bottom of the pan. Bring the stock to a boil and then reduce to a simmer. Partially cover the pot and simmer for about 1 hour, or until the lamb is extremely tender. Stir every so often to prevent scorching. 

Meanwhile, make the turnip mash. Blanch the turnips in boiling water or steam them until soft and easily pierced with a fork, about 15 minutes. Transfer the turnips to a food processor fitted with a steel blade and process until completely pureed. Place the puree in a fine mesh strainer set over a small bowl. Using a spatula, work out any excess water and discard. Transfer the turnips to a large mixing bowl and add butter, cream, salt and pepper. Stir well to combine. Taste to adjust seasonings, adding more salt if necessary. Cover with foil and set aside.

Remove the lid from the lamb and continue to simmer for about 15 minutes more to reduce the stock level a bit. The lamb mixture should be thick and stew-like when done. Remove the bay leaves and herb bundle and discard. Taste again to adjust seasonings.

Preheat the broiler. Transfer lamb to a wide, flat ovenproof baking dish. Evenly spread the mashed turnips over the lamb mixture. Place the baking dish under the broiler until the turnips turn a golden brown and develop a delicate crust.

Yield: about 8 servings

Notes:
  • If you plan on making this dish for a dinner party, a fun way to dress it up a bit is by making individual pies in small souffle dishes (as you can see pictured above). Cook and assemble your shepherd's pies the night before and simply heat them through (and brown them under the broiler) just before you're ready to eat.
  • If using bone-in lamb leg, save the bone and add it to the pot as it simmers. 
  • Feel free to add frozen peas to this as well. Incorporate them after your lamb has cooked for the full hour, before continuing on. 

Sunday, February 26, 2012

Homemade Cracker Jacks


Whether young or old, this homemade version of the classic American candy, Cracker Jacks, will knock your socks off. Cracker Jacks, as they became known, were created in 1872 and were later mass-produced and sold at the 1893 Chicago World's Fair. They have been popular ever since. The combination of popcorn, sugar, and nuts is genius. The best part is, it's incredibly easy to prepare. I'll be serving this sweet and salty treat at a small Academy Awards get together tonight. Serving Cracker Jacks is a lot more fun than putting out plain old popcorn. Any time I make these at parties or special occasions, I'm lucky if I get seconds! 


The only downside to making it yourself, is that there's no prize to be found at the bottom of the box (but I think they stopped using the cool trinket toys years ago and have since replaced them with pathetic paper riddles). However, you could always throw your own toy in the mix- just make sure no one chokes on your surprise! Once you make your own, you'll never go back.


HOMEMADE CRACKER JACKS

Courtesy: Alton Brown, Good Eats

Ingredients:
3 oz. plain popped popcorn (about 3 quarts, or 1 microwavable bag)
1 cup salted peanuts
1 stick butter (½ cup)
16 oz. dark brown sugar (about 2 cups)
¼ cup dark corn syrup
½ tsp. pure vanilla extract

Preheat oven to 250 degrees F. Line a sheet pan with parchment paper and grease with butter or non-stick spray. 

Place the popcorn in a medium-sized bowl and shake it a bit to allow the unpopped corn to settle to the bottom. Transfer the popcorn to a large stainless steel bowl and discard the unpopped corn kernels (you'll break your teeth if you don't remove them!). 

In a medium-sized saucepan, melt the butter over medium heat. Add the brown sugar, corn syrup, and vanilla and stir until well combined. Continue to cook the mixture until it reaches 250 degrees F (hardball stage) on a candy thermometer, about 5 to 10 minutes. Remove from heat and stir in the nuts.

Pour the syrup over the popcorn and stir to combine using a large rubber spatula (work quickly, as the sugar syrup hardens rapidly). Evenly spread the mixture onto the prepared sheet pan and bake in the oven for 1 hour. Let cool completely before breaking into pieces. Serve immediately, or store in well-sealed zip-top bags. The cracker jacks will keep well at room temperature for 2 to 3 days. 

Yield: about 4 to 6 servings

Thursday, February 23, 2012

Meyer Lemon Sorbet


When Meyer lemons popped up at the market, I knew right away that I had to use them in sorbet. Sorbets are one of the easiest desserts to prepare and you don't even need an ice cream maker. This sorbet is the perfect end to a hearty winter dinner. It's delicate, flavorful, and extremely refreshing. I've topped my sorbet with some wonderfully sweet candied lemon peels.


Meyer lemons can only be found for a short period during the winter months at specialty food stores or well-stocked grocery stores. They have thin fragrant skins and are golden yellow in color. Meyer lemons are delightfully lemony with a hint of orange and delicate floral undertones.


Meyers are believed to be a cross between a lemon and Mandarin or sweet orange. I did a little research and learned that they were not introduced to the United States until 1908, when a USDA agricultural explorer, by the name of Frank Nicholas Meyer, brought them back from China. Their popularity grew and they soon became a commonly grown tree in California, until they were discovered to carry a virus deadly to other citrus trees. They were banned until many years later, when a new virus-free variety was developed. Meyers had a resurgence in the 1980s when Alice Waters began using them at her famed restaurant, Chez Panisse, in Berkeley, CA. But enough talk about lemons, here's the recipe:


MEYER LEMON SORBET

Adapted from Joy of Cooking, 2006 edition

Ingredients:
1½ cups water
1¼ cups granulated sugar
Zest of 1 Meyer lemon, minced
½ cup freshly squeezed Meyer lemon juice, pulp included

In a small sauce pot, combine the water, sugar, and lemon zest. Bring to a boil over medium heat to dissolve the sugar, stirring occasionally. Remove from heat and stir in the lemon juice. Cover and refrigerate until thoroughly cold, or overnight. Process in an ice cream maker according to the manufacturer's instructions. Transfer to a well sealed container and freeze until ready to use. Garnish with candied lemon peels, if desired.

If you don't have an ice cream maker, pour the sorbet mixture into a metal 9x13 inch baking pan and place in the freezer. Stir the mixture with a fork every half hour until you reach the desired consistency, about 2 to 3 hours. This method will result in slightly larger ice crystals, and will not be as smooth in texture as when using an ice cream maker. However, the results are equally delicious.

Yield: About 2 1/3 cups

Notes:
  • As always, homemade sorbets are best eaten several hours after making. However, if you'll be freezing it overnight, let the sorbet stand at room temperature for 5 to 10 minutes before serving.
  • If you can't find Meyer lemons, this recipe is still excellent with regular lemons as well. You can always order Meyer lemons directly from the farm through Snow's Citrus Court, in California. 


CANDIED MEYER LEMON PEEL
Adapted from Dede Wilson, Bon Appetit, December, 2009

Ingredients:
4 0r 5 large Meyer lemons
4 cups water
4 cups granulated sugar, plus additional for sprinkling

Line a baking sheet with waxed paper, place a drying rack on top and set aside. Fill a 4-quart saucepan with water and bring to a boil. Meanwhile, use the leftover juiced lemons from the above recipe and cut each halved lemon in half again (making 4 quartered lemon peels per lemon). Using a sharp paring knife, slide the knife along the peel, carefully removing as much pith as possible. Cut each quarter lengthwise into ¼-inch wide strips. Once the water is boiling, add the lemon strips, and boil for 15 minutes, stirring occasionally. Drain peels and rinse well. 

Rinse out the saucepan, add the 4 cups water and 4 cups sugar and bring to a boil (this may seem like a lot of liquid, but it will reduce by half during cooking). Once boiling, add the drained lemon peels and reduce heat to medium-low. Simmer until lemon peels are very soft and slightly translucent, about 40 minutes.

Using a fork, carefully transfer the lemon peels a few at a time to the prepared drying rack. Separate strips, seeing that none are touching. Let the peels drain 15 minutes. Generously sprinkle each peel with sugar. Turn strips over and generously sprinkle the second side as well. Let dry uncovered on the rack overnight. Once dry, place peels in a well-sealed plastic container and store in the fridge. The peels keep well for a of couple weeks.

Yield: About 1 cup

Sunday, February 19, 2012

Sausage, Kale, & Potato Stew


The other night I went to the store hungry, but with no idea of what to cook, always a dangerous state to find myself in when entering a store filled with food as it usually results in me reaching for anything and everything I see. But sometimes it's fun to impulsively grab things and throw a meal together without any plans of what to make. I filled my basket with potatoes, pearl onions, and a beautiful bunch of kale. At home I had a can of beans and some leftover hot Italian sausage links. I put them all together and ended up with some hearty ingredients for a winter stew.


I couldn't even remember the last time I had a proper stew. It's a shame because they are extremely economical, healthy, and fill you up when you need it most. Anything that results in a lot of leftovers and uses up things lying around your pantry or hiding in the corners of your fridge is never a bad thing. This includes all those odd bits of cheese lurking in your refrigerator drawers. Rinds of hard cheeses such as parmesan, dry jack, or asiago, are a great way to thicken soups and stews. My grandmother always put these pieces in her incredible minestrone soup. After trimming off the rind or any mold, drop the hard end into the stew and, not only will it thicken nicely, it will impart an incredible flavor as well. Make this stew on a cold night with a glass of red wine and some crusty bread and it's sure to warm you from the inside out!


SAUSAGE, KALE, & POTATO STEW

Ingredients:
3 tbsp. olive oil
5 or 6 sausage links, about 10-12 oz. (I used hot Italian sausages)
12 to 14 pearl onions (fresh or frozen), chopped in half, see notes below (or 1 yellow onion, chopped)
2 cloves garlic, minced
6 cups (48 oz.) chicken or vegetable stock
End of Parmesan cheese (or other hard cheese), rind removed (or 1/2 cup grated)
2 to 3 sprigs fresh rosemary
1½ lb. (about 5) Yukon Gold potatoes, cut into 1-inch cubes
1 bunch kale, ribs removed and leaves torn into pieces
1- 15 oz. can white beans (such as Great Northern or Navy), rinsed and drained
Salt and pepper to taste

Heat the olive oil over medium heat in a large stockpot or Dutch oven. Add the sausages and cook until well browned on both sides, about 10 minutes (depending on the size of your sausages). Remove sausages and set aside to cool. 

Drain off some of the fat in the pot. Add the onions and sauté  until browned on all sides, about 6 minutes. Add the garlic, stir, and cook for another minute. Immediately pour in the stock, add the cheese-end and rosemary. Using a wooden spoon, scrape up all of the brown bits on the bottom of the pot and season the broth to taste with salt and pepper. 

Add potatoes to the pot, bring liquid to a boil, then reduce to a simmer. Simmer potatoes for 10 minutes or until cooked through. 

Add the kale and beans and continue simmering for another 5 to 6 minutes. Meanwhile, cut the sausage links into 1-inch pieces. Once the kale is properly cooked and tender, remove the cheese-end and discard. Return the sausage to the pot along with any drippings. Taste to adjust seasonings and serve hot. 

Notes:
  • If using fresh pearl onions, you'll need to remove their skins. Start by trimming each end of the onions with a pairing knife. Blanch the onions in boiling water for 1 minute. Remove using a spider and transfer to an ice bath to halt their cooking. Their skins should slide off with ease. 
  • If you want a thicker base for your stew, simply mash up some of the potatoes with a wooden spoon. Their starch will help thicken the stew. 

Thursday, February 16, 2012

Blood Orange Marmalade


Aaron and I are heading to California next month to visit my family. We'll be staying with my brother Jeffrey, and sister-in-law, Patricia, both busy parents (of my adorable 16 month old niece, Addy). They're two of our favorite people on the planet and I wanted to do something special for each of them as a belated Christmas gift. I have jams picked out for Jeff, but I remembered that Patricia particularly loves marmalade. I flipped through some of my canning books to get a few ideas and decided to make a Blood Orange Marmalade. Blood oranges are in season right now, and I wanted to showcase (and preserve) them before they're gone. It's a slightly different take on the traditional orange marmalade and one that I hope she'll love.


Blood oranges are so fragrant and vibrantly colored, they're one of those foods I always look forward to. The most common varieties of blood oranges are Moro, Tarocco, and Sanguinello. I used the Moro variety, which are grown in California and Texas. I love to use them in cocktails, toss them in salads (their juice also makes delicious dressings), or simply peel and eat them. Not to mention, I feel like Dexter getting my hands all "bloody" while juicing the oranges. A delicious crime scene indeed.


This recipe was the result of three different attempts. I experimented with several recipes before deciding which marmalade tasted and worked the best. On my third attempt, I came across David Lebovitz's recipe for a classic Seville orange marmalade. I replaced the Seville oranges with blood oranges and added a little port to give an added depth of flavor and a slightly darker color. The final result was wonderful. Together with the port wine, the blood oranges give this marmalade a deep burnt orange color and an intoxicatingly rich flavor. 


BLOOD ORANGE MARMALADE
Adapted from David Lebovitz, Ready for Desert

Ingredients:
6 blood oranges
1 navel orange
9 cups water
1 cup port wine
heavy pinch of salt
8 cups sugar

Place a couple of small plates in the freezer to test the marmalade later on. Wash all the oranges and wipe them dry. Cut each orange in half, crosswise around the equator. Place a fine mesh strainer over a medium-sized bowl and push out any seeds and discard (see notes below). Juice the oranges. Pour the juice and any pulp into a large 8 to 10 quart stock pot.

Remove the stem ends of each orange. Cut each orange half into thirds and then chop each of these slices into about 1 centimeter cubes (or thin slices, if you prefer) and add to the pot. Add the salt and pour in the water and port. Bring the mixture to a boil, then reduce to a simmer and cook until the peels are slightly translucent, about 30 minutes.

Stir the sugar into the mixture and return to a full boil again, then reduce to a gentle boil. Stir occasionally while cooking to prevent scorching on the bottom of the pot. Continue cooking until the mixture has reached 220 degrees (the jelling point) on a candy thermometer. This will take some time, so be patient. You can also test the marmalade by removing the pot from the heat and taking a plate from the freezer. Place a small dollop of the marmalade on the plate. Return to the freezer for a minute or two before running your finger through the marmalade. If it wrinkles slightly and has begun to jell, it's done. If it remains liquid, return the pot to the heat and continue checking every few minutes in the same manner until it's done. 

Once the jelling point has been reached, remove marmalade from heat and ladle into clean 4 or 8 oz. jelly jars and process in a boiling water-bath canner for 10 minutes. Let jars cool in the pot for a couple of minutes before removing. Allow the jars to sit for a few days to allow the marmalade to fully set before using. For more information, see my step-by-step guide to canning here. If you find yourself with any extra marmalade that can't be processed, put it in a clean jar and place in the refrigerator. Use this jar first, within 3 weeks. 

Yield: About 11 to 12 cups

Notes:
  • Many recipes require you to hold onto the orange seeds, place them in a spice bag or well-tied cheesecloth bundle, and add to your marmalade as it cooks. The seeds are loaded with pectin, which helps to jell the marmalade. The Moro variety of blood oranges I used cumulatively only had about 4 seeds, so I've left them out. If, however, you're using another type of orange (such as Seville), by all means add them to your pot and remove a little while after you've added the sugar.
  • I used my trusty candy thermometer to be absolutely sure when the marmalade had gelled. I like using the thermometer because I can actually see the temperature rise and anticipate when the marmalade needs to be removed from the heat. I also like to use the plate method to test for gelling, and often use both methods side by side.
  • If you don't like the slight bitter aftertaste orange marmalade is known for, consider removing some of the pith on each orange peel, or using just the peel itself. However, the pith is full of pectin, which helps to make the marmalade jell. Using just the orange peel may require you to use added pectin.