Sunday, January 29, 2012

"I can't believe it's homemade butter!"


When most of us conjure up images of homemade butter, we see old world grandmothers wearing babushkas in hay covered barns, churning it by hand. Never fear, this couldn't be farther from reality. If you have a food processor, making your own couldn't be simpler. Why burden yourself with homemade butter you ask? Because it's worth the incredible flavor! 


Whenever I make butter, I always use heavy whipping cream from the farmer's market, or a good organic brand from the store. These quality creams smell and taste the way cream should. The result is a butter that's rich and flavorful and better than any store-bought variety you can find. 


HOMEMADE BUTTER

Ingredients:
1 pint (2 cups) organic heavy whipping cream
1 cup ice water, as needed
¼ tsp. sea salt or fleur de sel (or more to taste)

Leave cream at room temperature for 8-12 hours to sour slightly. 

Pour cream into a food processor fitted with a steel blade and process (the cream will go through several stages very quickly- turning into a light whipped cream, then a heavy whipped cream, and finally it will “break” and the fat will separate from the buttermilk. This should only take about a minute).  As soon as the cream breaks, stop the processor.

Turn out the contents of the processor into a small bowl lined with a fine mesh strainer.  The strainer will catch the butter. Discard the buttermilk (this is not the same type of buttermilk you buy in the store).  

Scrape the butter out into a large bowl and using a spatula press out and discard as much liquid as possible.  Repeat until there is little to no liquid left. 

Pour some of the ice water into the bowl of butter.  Work the water into the butter (this will rinse out any remaining buttermilk and in turn, keep the butter from spoiling).  Pour out water and as before, use the spatula to work out any remaining water in the butter. 

Once all the water has been removed, add the sea salt to the butter and stir to incorporate. If you prefer, shape butter into a log and roll between waxed paper and place in the refrigerator. Or place in a butter bell and store at room temperature for easy spreading.  

Yield: about 1 ¼ cups

Notes:

  • Generally, I never cook with my homemade butter. I like to save it for bread, toast, scones, you name it! 
  • Recently, I came across a French butter dish or butter bell. I learned it's been used to keep butter soft and fresh without the use of refrigeration since the late 19th century. You place your butter in a bell-shaped jar and invert it into another jar filled with a bit of water. The water provides an airtight seal, keeping it fresh at room temperature.

Tuesday, January 24, 2012

What Actors Eat When They Eat!


Since the Academy Award nominations were announced today, I thought it would be appropriate to share with you a wonderful cookbook I found a few years ago when I went to California on a road trip with my friend Marisa. On our way to Hearst Castle, we stopped by the charming town of Cambria and explored its many antique stores, finding ourselves happily lost in a maze of all things old. One particular item I found was a cookbook published in 1939 entitled, What Actors Eat When They Eat. It is compiled by Kenneth Harlan and Rex Lease and is filled with personal recipes from all of Hollywood's greatest stars from the golden age of film.


It's plain to see each actor's studio had a firm hand in what was printed, but haven't you ever wondered what silver screen legends like the Barrymore's or Bette Davis ate? This book has it all. (It turns out Lionel Barrymore preferred fettucini alfredo, while Ms. Davis shares her family recipe for "Finnan Haddie a la Davis"). Each recipe is accompanied by the actor's headshot and a brief biography revealing their birth names, height, and sometimes even weight!


Leading man, Clark Gable speaks of his passion for hunting and provides a recipe appropriately entitled "Hunter's Breakfast." This dish calls for twelve doves! Judy Garland offers up her mother's recipe for "Vegetable Salad," and enthusiastically advises, "Now be sure to try it, especially if you think you don't care for vegetable salads. This one is different, honest."  Cary Grant shares a recipe for "Barbecued Chicken," but warns the cook saying, "Now go to it, friends, and don't blame me if it is not to your liking. For after all, the recipe is not mine." At least he's honest.


"Silent film legend Mary Pickford gives a recipe for "Gnocckis a la Romaine." And Miss Claudette Colbert's provides a salad and assures that, "it is very delicious- easy to prepare- it's also healthful- and good for the figure." She should know. Joan Crawford gives her recipe for "Charcoal Broiled Steak" and says, "There isn't a woman in the world who doesn't have at least one dish of which she makes a specialty. She not only enjoys eating it, but preparing it as well."


Humphrey Bogart admits he's not much of a cook, but his favorite dessert is "Coconut Spanish Cream."  Jackie Cooper gives his mother's recipe for "Curried Eggs and Macaroni," and says, "Whenever my mother wants me to have a dish that contains all the vitamins that are necessary for a young chap who is growing by leaps and bounds, this is what she serves me and boy, is it good." And James Stuart tells of how, being a young bachelor in Hollywood he soon grew tired of restaurant cooking and set out to find the best cook in town. Apparently he found her, and shares her recipe for "Pork Chops Supreme." 


As expected, many of these recipes are a bit outdated or contain questionable ingredients. Nonetheless, it's fun to flip through and find your favorite stars and see the way American cooking has evolved over the last seventy years.

Saturday, January 21, 2012

Roasted Spiced Rutabaga Sticks


I came across this recipe last week and loved it! I'm always on the lookout for new rutabaga recipes and this one caught my eye. These rutabaga sticks make a yummy mid-day snack, an alternative to French fries, or an unexpected hors d'oeuvres at your upcoming Super Bowl party. Think sweet potato fries, only with rutabagas. They take no time to prepare, simply toss them is their spice seasoning and roast for 30 to 40 minutes.  


ROASTED SPICED RUTABAGA STICKS
Slightly adapted from Andrea Chesman, The Garden-Fresh Vegetable Cookbook

Ingredients:
2 tbsp. canola oil, plus more for brushing
1 tsp. ground cinnamon
1 tsp. ground cumin
1 tsp. salt, or more to taste
¼ to ½ tsp. ground chipotle chile (or other ground chile)
1 large or 2 medium rutabagas (about 2 lb.), peeled and cut into matchsticks or standard French fry shape 

Preheat oven to 450 degrees F. Line a sheet pan with parchment paper and lightly brush with canola oil and set aside. In a small bowl, combine the cinnamon, cumin, salt, and chile powder and set aside. Add your rutabaga sticks to a large bowl and toss with the 2 tbsp. canola oil. Add your spice mixture and toss again to thoroughly combine. 

Transfer to the prepared pan and arrange in a single layer. Roast for 30 to 40 minutes, until tender and browned, stirring or shaking the pan throughout cooking as necessary. Remove from oven and serve immediately.

Yield: about 2 servings

Notes:
  • These will not be quite as crunchy as French fries, but you could certainly deep-fry them in oil if desired. 
  • Don't cut the rutabagas too thin, as they'll shrink during roasting.
  • If doubling this recipe, divide the rutabaga sticks between two sheet pans and adjust cooking time accordingly


Wednesday, January 18, 2012

Herbed-Baked Eggs


For many months, while our schedules would allow, Aaron's sister, Amy, would come over for brunch (by the time we got going it was pretty much just lunch) and we would feast together like the old chums that we are. Amy would often bring a bottle of sparkling wine and juice and I would prepare brunch. I first made this recipe on one such occasion and we all loved it so much I find myself making it all the time. The eggs are wonderfully savory and covered in beautifully browned and bubbly cheese.


I'm always left with various herbs from the previous night's cooking, so this dish is a great way to use them up. This recipe comes from Ina Garten, and as she states on her show, it's a wonderful alternative to omelettes. Cooking omelettes for a crowd will have you stuck in the kitchen and prevent you from spending time with your friends and family at the table, which is where you should be! These baked eggs can all be made at once, finish at the same time, and won't keep you glued to the stove.


I usually only use two eggs per person in the gratin dishes, but you could certainly increase it to three. I find two to be sufficient, especially if you have other side dishes prepared. Also, if you have guests who don't care for eggs over easy, simply add the herb and cheese mixture to scrambled eggs and cook them on the stovetop while the others are baking in the oven. Either way, they taste delicious.  


HERBED-BAKED EGGS
Adapted from Ina Garten, Barefoot in Paris

Ingredients:
1/4 tsp. garlic, minced
1/4 tsp. fresh thyme, minced
1/4 tsp. fresh rosemary, minced
1 tbsp. fresh Italian parsley, minced
1/4 cup freshly grated parmigiano reggiano
4 extra-large eggs (see notes below)
2 tbsp. heavy cream (see notes below)
1 tbsp. unsalted butter
Sea salt and freshly ground black pepper
2 individual sized gratin dishes (6 inches in diameter)- See notes below

Preheat broiler for at least 5 minutes and place oven rack 6-inches below the heat (if your broiler doesn't allow you to adjust the rack and is closer to the flame, reduce the cooking time by about 2 minutes). 

Combine the garlic, thyme, rosemary, parsley, and Parmesan in a small bowl and set aside. Crack 2 eggs into each of 2 small bowls being careful not to break the yolks. 

Place the 2 gratin dishes on a baking sheet. Put 1 tbsp. of cream and 1/2 tbsp. butter into each dish and place under the broiler for 3 minutes, or until hot and bubbly. Carefully pour 2 eggs into each gratin dish and season liberally with salt and pepper. Evenly sprinkle the eggs with the herb and cheese mixture and place under the broiler for 5 to 6 minutes, or until the whites are almost cooked and the cheese begins to brown (rotate the pan once if they aren't cooking evenly). Remember, the eggs will continue to cook after you take them out of the oven. Allow to rest for a minute and serve hot with toasted bread. 

Notes:
  • You can find personal sized gratin dishes at your local kitchen supply store. They cost about three dollars and I use them to make a variety of mini gratins all the time.  
  • Feel free to use 3 eggs instead of 2, especially if you aren't serving any side dishes with the eggs.
  • You can double the recipe and still fit 4 gratin dishes on one sheet pan. Adjust the cooking time accordingly. 
  • Substitute the heavy cream for light cream or half and half if desired.
  • I've used whatever herbs I have on hand (even scallions) and this dish is still excellent.

Sunday, January 15, 2012

Baked Lasagna


Last month, Aaron's parents were in town to celebrate an early Christmas. We invited them over to our place for dinner, and realized that in all the years we've been together, they'd never tried any of my cooking. After tossing around a few ideas, trying to find a dish everyone would enjoy, we finally landed on a simple hearty dish that's sure to please: lasagna.


Everyone has their own version of lasagna and mine comes from Sylvia Sebastiani's cookbook, Mangiamo, Let's Eat! I've been making this recipe for years, and for me, it has become the definitive way to cook it. I like Sylvia's unexpected choice of Swiss cheese in this dish. I find it's a great combination with the other cheeses. I of course follow suit with her wonderful spaghetti sauce, of which you can find here.


BAKED LASAGNA

Slightly adapted from Sylvia Sebastiani, Mangiamo, Let's Eat!

Ingredients:
1 16 oz. package lasagna noodles
1 lb. good quality fresh ricotta cheese
1/2 lb. buffalo mozzarella cheese, grated
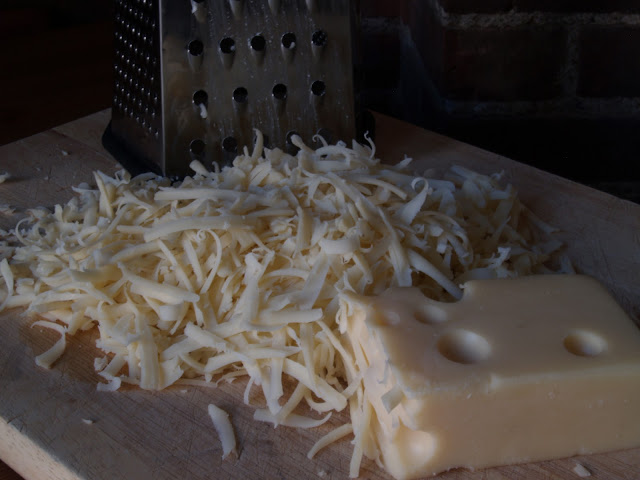
1/2 lb. Swiss cheese, grated
1/2 cup parmigiano reggiano cheese, finely grated
About 2 quarts good quality spaghetti sauce, preferably homemade (see here)
Salt and pepper to taste

Preheat oven to 350 degrees F. Cook lasagna noodles in boiling, salted water (with a splash of olive oil to prevent sticking), according to the label directions. Once done, drain immediately and submerge noodles in a large bowl of ice water to stop cooking. 

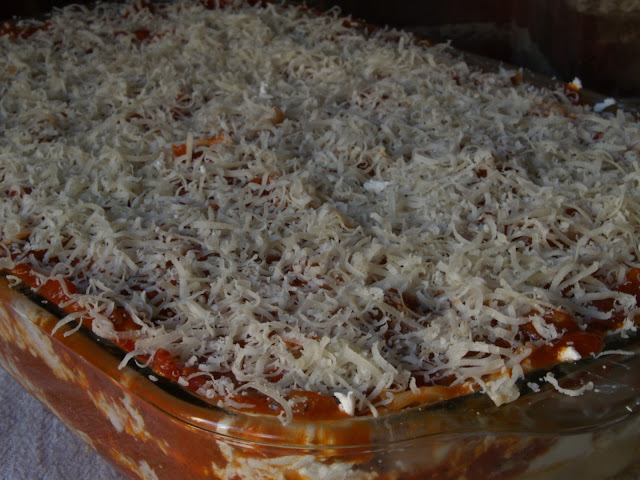
Butter a 9 by 13 inch casserole dish and begin by arranging a layer of lasagna. Evenly spread a thin layer of ricotta over this, followed by a layer of spaghetti sauce, a layer of mozzarella, and finishing with a sprinkling of Swiss cheese (careful not to add too much Swiss, or it can overwhelm the dish). Repeat layers in this order until all ingredients are used, ending with a layer of lasagna covered with sauce and topped with a generous sprinkling of Parmesan. 

Bake for 50 minutes to 1 hour or until sauce is bubbling. Remove from oven and let stand for 15 minutes for ease in cutting. 

Yield: 8 to 10 servings

Friday, January 13, 2012

Buttermilk Scones


This recipe comes from the well-known New York City tea and scone hot spot, Alice's Tea Cup. The first time I tried their "Mad Hatter" (a tower of scones, tea sandwiches, cookies and treats) I thought I'd died and gone to heaven. They have some of the best scones I've ever tasted. I always wished I could snatch up a few of Alice's recipes. On a whim, I searched the catalogues at my local library and low and behold they have their very own cookbook that just came out! I put it on hold and it finally came in last week.


You can be sure I'll be sharing more of these delicious recipes with you over the coming months, but I thought I'd start by posting their classic savory buttermilk scones. I know the restaurant is just a few blocks away and I could pick up some scones anytime I please, but there's nothing like making them in your own home. Besides, you never know where you'll be when you get a sudden craving for these magnificent treats. It's nice to have the recipes on hand to make them no matter where you may be!


These scones also christened our new oven. Our super came to replace our old one just as I was measuring the flour. It was perfect timing, and I tossed my scones into the new oven only a few minutes after it was hooked up. It was a success! I finally have an oven that cooks at the correct temperature (unlike the old one which was 50 to 75 degrees off on any given day) and has numbers on the oven dial. R.I.P. old oven, you will not be missed.


BUTTERMILK SCONES
Courtesy: Haley & Lauren Fox, Alice's Tea Cup Cookbook

Ingredients:
3 cups all-purpose flour
1/2 tsp. baking soda
2½ tsp. baking powder
¾ tsp. kosher salt 
1½ sticks (¾ cup) unsalted butter, melted
¾ cup buttermilk

Preheat oven to 425 degrees F. In a large mixing bowl, combine the flour, baking soda, baking powder, and salt. Make a well in the center of the dry ingredients and pour butter and buttermilk into the well. With clean hands, combine the ingredients just until the dry mixture is wet, but do not knead!

Turn the mixture onto a lightly floured surface and gather the dough together. Gently pat the dough to make a disk about 1½-inches thick. Using a 3-inch biscuit cutter, cut out as many scones as you can and lay them on a parchment lined baking sheet. Gather the remaining dough together lightly to cut out more scones- just don't knead the dough too much. 

Bake the scones for about 12 to 15 minutes, or until lightly browned. Serve warm with butter and honey.

Yield: about 6 scones