Saturday, June 30, 2012

Ice Cream #4: Salted Caramel


This stuff is like crack and it has filled my heart (and stomach) with joy. The recipe comes from cookbook author Rori Trovato and was featured on The Barefoot Contessa. Initially, I made this ice cream because I wanted something to offset the sweetness of a coconut cake I had prepared for my birthday. Salted caramel ice cream was just the ticket, and as it turned out, the two were a perfect balance. 


I think making caramel often intimidates people because of cooking sugar at high temperatures. I feel a lot of people fear they're going to get burned. But cooking with hot oil is just as dangerous as cooking with hot sugar, yet this doesn't seem too scary to most cooks. If you're fearful of making caramel, this is a good first recipe to start with. Though you're not making the actual confection itself, I think it's a simpler way to learn the basics of caramel. Cooking the sugar dry in the pan without any added water is also much faster. You don't have to wait as long for the sugar to reach the right color as you would when traditionally making caramel. 


Techniques aside, I can't praise this recipe enough. The texture of this ice cream is similar to soft-serve ice cream. It's outrageously flavorful, rich, and beautifully creamy. Dare I say it's my most favorite ice cream I've made to date? I dare say it is. 


SALTED CARAMEL ICE CREAM
Recipe courtesy Rori Trovato

Ingredients:

For the ice cream base:
1 cup whole milk
4 large egg yolks
¾ cup sugar
2 cups heavy cream

For the caramel:
1¼ cups sugar (see notes below)
¾ cup heavy cream
2 tsp. good quality sea salt or fleur de sel 
1 tbsp. good quality vanilla extract (such as Nielsen-Massey)

To make the ice cream base:
Heat the milk in a saucepan over medium-low heat, but do not boil. 

Prepare an ice bath by placing a medium-sized bowl inside a larger bowl filled with ice water. Set a strainer over the smaller bowl and set aside.

In a separate mixing-bowl, whisk together the egg yolks and sugar until pale yellow in color and the sugar has mostly dissolved. Gradually pour the warmed milk into the egg mixture, whisking constantly. Pour the mixture back into the same saucepan you used to warm the milk. Cook for 3 to 5 minutes over medium heat, stirring constantly, or until the custard thickens and coats the back of a wooden spoon. 

Strain the custard into the top bowl of the ice bath to stop the cooking process. Stir in the heavy cream until the mixture is cold (this will take a few minutes). Place a sheet of plastic wrap directly on the surface of the custard and another sheet over the bowl. Refrigerate for several hours, preferably overnight. 

To make the caramel:
Heat the sugar in a dry heavy-bottomed saucepan over medium heat, stirring with a fork to heat the sugar evenly. Once the sugar begins to melt, stop stirring and swirl the pan to ensure the sugar melts evenly. Continue cooking until the sugar reaches a dark amber color, but not too dark as it can burn (you'll know its burned if it becomes very dark and begins to smell badly. If this happens, toss the sugar, clean the pan, and start again).

Carefully add the heavy cream (avert your face because the mixture will bubble up violently) and cook, stirring until the cream is fully incorporated. Transfer to a heatproof bowl and stir in the sea salt. Set the caramel mixture over a bowl filled with ice water and whisk until chilled to room temperature (this will take a few minutes). Combine the caramel mixture with the chilled ice cream base and add the vanilla. 

Freeze in an ice cream machine according to the manufacturer's directions. Quickly transfer to quart containers and freeze for several hours to firm up before serving. 

Yield: about 1¼ quarts (5 cups) 

Notes: 
  • I generally use organic or unbleached sugar, but for caramel it's easier to tell when you've reached the right amber color if using regular white refined sugar. 


Thursday, June 28, 2012

Israeli Couscous with Fennel & Spinach


Who doesn't love couscous? For me, Israeli (or pearl) couscous is so satisfying; it's the perfect comfort food. Since Israeli couscous is slightly larger than ordinary couscous, rather than soaking it in boiling water to rehydrate, you simply boil it as you would pasta. I made a big piece of salmon a couple of weeks ago for dinner and was excited to serve it alongside this beautiful dish. When I first delved into making the couscous, I thought I must have bought far too many fennel bulbs; five seems like a lot. But once the fennel cooked down, I understood why I needed so much. The fennel reduces as it caramelizes, becoming sweet and delicate.


This dish is so full of flavor. With the addition of fresh herbs and freshly grated lemon zest, this couscous is light, bright, and zesty. Toasted pine nuts give a nice added crunch. This is a great side dish to serve to a crowd. Not only does it make a ton of couscous, but I was pleasantly surprised that it kept its shape and texture without clumping when reheated, great news for the time sensitive cook. It can be made a day in advance and simply reheated just before serving (and leftovers are even good cold). 


I love dishes that really pack a punch, are flavorful, and loaded with fresh herbs and veggies. This is one such dish. It can be elegant or a comforting and sustaining weeknight meal. 


ISRAELI COUSCOUS WITH FENNEL & SPINACH
Adapted from America's Test Kitchen Menu Cookbook

Ingredients:
3 cups Israeli couscous
Salt & pepper
1/4  cup plus 1 tbsp. extra-virgin olive oil
5 fennel bulbs, stocks discarded, bulbs halved, cored, and thinly sliced (see notes below)
1 yellow onion, halved and thinly sliced
3 cloves garlic, minced
3/4 tsp. grated lemon zest 
3 to 4 tbsp. freshly squeezed lemon juice 
7 oz. baby spinach (about 7 cups)
1/3 cup minced fresh chives
3 tbsp. lightly chopped fresh dill
1/4 cup pine nuts, lightly toasted (see notes below)

Bring 4 quarts of water to a boil in a large pot or Dutch oven. Stir in couscous and 1 tbsp. salt, and cook until the couscous is tender, about 5 minutes. Drain the couscous and transfer to a large bowl. Drizzle with a little olive oil, stir, and cover with tin foil to keep warm. Wipe pot dry. 

In the same pot you just used to cook the couscous, heat 3 tbsp. olive oil over medium-low heat until shimmering. Add the fennel, onion, and 1/2 tsp. salt. Cover and cook, stirring occasionally, until the vegetables have softened and released most of their liquid, about 15 minutes. Uncover, increase heat to medium-high and continue to cook, stirring often to prevent sticking. Cook until the liquid has evaporated and the vegetables are lightly browned, about 20 to 25 minutes. 

Stir in the garlic and lemon zest and cook for about a minute. Remove the pot from heat and stir in the spinach. Cover and let sit until spinach wilts, about 2 minutes. Stir in couscous, lemon juice, chives, dill, and the remaining 1 tbsp. olive oil. Season with salt and pepper to taste. Garnish with a sprinkling of toasted pine nuts. Serve warm or at room temperature. 

Yield: 8 to 10 servings

Note: 
  • The fennel fronds can be minced and used as a garnish, if desired.
  • Lightly toast the pine nuts in a small saute pan over medium low heat, stirring occasionally (watch them closely as they can burn quickly).
  • Couscous can be covered and kept at room temperature for about 2 hours and reheated just before serving. It can also be made a day in advance if needed. 

Monday, June 25, 2012

Spring Root Vegetable Salad with Chevre


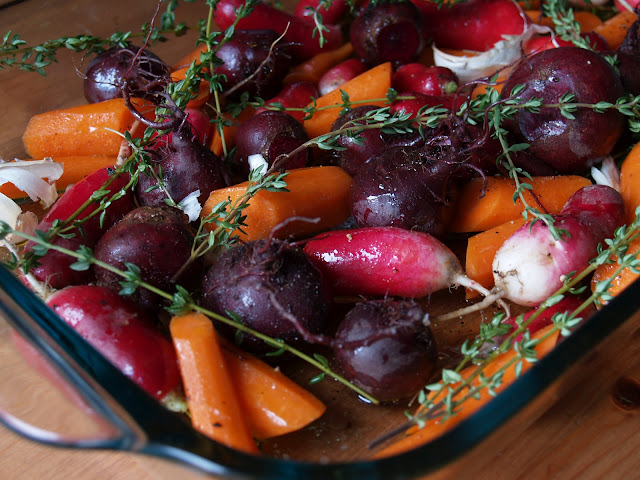
The other night after work I was so tired I didn't even feel like walking across the street to the store to pick up some ingredients for dinner. Yes, across the street. Lazy, I know, but we've all been there. Instead, I crossed my fingers and hoped there were enough odds and ends in the fridge to put together a meal. I was pleasantly surprised to find baby beets, easter radishes, and carrots (I'd completely forgotten that I impulsively bought the beets and radishes at the farmer's market a couple of days earlier). With lettuce, goat cheese, and thyme from breakfast the day before, I had a meal made. How serendipitous!


I love it when things just fall into place, since they rarely seem to, or maybe that's just my luck. Sometimes great dishes are born simply from ingredients you have on hand, and this was one such time. Aaron and I loved it so much, I made it again over the weekend. I think most people never think to roast radishes, at least I hadn't until earlier this year. I was pleased to find when roasted, radishes become sweet and tender, and you don't even have to peel them. I think they make a beautiful presentation for a spring inspired salad (especially the pink and white easter radishes). I love how quick this dish is to prepare. You don't have to bother peeling the baby beets either, since their skins are so delicate. That means no stained hands and no threat of dropping the little buggers and watching them roll across the kitchen floor into the dog's mouth. Sorry poocher.


You can certainly use whatever green(s) you prefer, but to keep with the spring theme, I like the use of mache or watercress. These superior little greens elevate the salad and give it a sense of elegance (when really it's nothing but simple roasted veggies). A quick and easy salad fit enough for company!


SPRING ROOT VEGETABLE SALAD WITH CHEVRE

Ingredients:

For the salad:
1 bunch easter or plain radishes, unpeeled
2 bunches baby beets, scrubbed and washed, unpeeled
5-6 small carrots, peeled and cut on the bias into 1 1/2-inch pieces
2 cloves garlic, unpeeled and smashed
A handful of fresh thyme
1/4 cup olive oil
2 generous splashes sherry vinegar (about 2 tbsp.)
Salt and pepper
5 oz. mache lettuce or watercress
About 3 oz. Chevre or Farmer's cheese

For the dressing:
1/2 cup olive oil
3 to 4 tbsp. sherry vinegar
1 tsp. dijon mustard
1 clove garlic, minced
1 tbsp. minced shallot
Salt and pepper to taste

Preheat oven to 425 degrees F. In a 9x13 oven-proof baking dish, combine the radishes, beets, carrots, and garlic. Drizzle the vegetables with olive oil and 2 splashes of vinegar. Season with salt and pepper and stir the vegetables until evenly coated in oil. Toss in the thyme. Roast the vegetables for 20 to 25 minutes, or until tender and beginning to brown. 

While the vegetables are roasting, make the dressing: in a small jar with a tight fitting lid, combine all of the dressing ingredients. Shake well to combine. Taste to adjust seasonings, adding more vinegar if necessary. 

Let the vegetables rest for a few minutes after roasting before tossing with the mache lettuce. Drizzle on the dressing and toss to combine. Garnish with chevre or farmer's cheese (alternatively, you can portion the lettuce on each plate accordingly and toss on the roasted veggies and garnish with the cheese. Drizzle the dressing on each plate).

Yield: 2 main-course servings, 4 first-course servings

Sunday, June 24, 2012

Asparagus & Potato Tart


I first saw this recipe in Jamie Oliver's cookbook, Jamie at Home, and instantly fell in love with it. I've been waiting for asparagus to come into season to try out this scrumptious tart. 


If you tend to steer clear of tarts because you feel don't have the time or inclination to prepare a shell, you'll be glad to know that this tart doesn't have one. Instead of a traditional tart shell made of French pastry dough, this one uses fillo dough, which can be found in the frozen food section of any grocery store. The fillo creates a delicate buttery, flaky, and crunchy crust. It takes a little patience to layer the filo sheets and brush them with butter, but the good news is, you don't have to be perfect, and it takes half the time of making the dough yourself. In fact, that's one of the great things about this tart. It's rustic and imperfect and a great basic recipe to play around with. You can add all sorts of things to the potato and cheese base. I've adapted the original recipe a bit and added some garlic and caramelized onions. The onions give such a fantastic depth of flavor to this hearty, potato based tart.


This is a great dish to serve to a few brunch guests, or just for two. It reheats nicely, so Aaron and I had this for breakfast and/or lunch over the course of a couple of days. Accompanied by a simple side of greens dressed in oil and balsamic, and you've got a meal made.


ASPARAGUS & POTATO TART
Adapted from Jamie Oliver, Jamie at Home

Ingredients:
1 to 2 tbsp. olive oil
1 large yellow onion, sliced
1 clove garlic, minced
1 lb. Yukon Gold potatoes, peeled and cut into chunks
1 lb. asparagus, woody ends removed
8 oz. fillo pastry dough, thawed
1/2 c. butter, melted
1/2 cup grated Parmigiano Reggiano cheese
1/2 sharp white cheddar cheese
3 large eggs, lightly beaten
8 oz. heavy cream
1/2 tsp. ground nutmeg (freshly grated if you have it)
Sea salt and freshly ground pepper

Preheat the oven to 375 degrees F. Heat the olive oil over medium heat in a large saute pan. When the oil is glistening and hot, add the sliced onions and stir to evenly coat them in the oil. Saute the onions slowly, stirring occasionally to prevent sticking. After a few minutes, add a bit of salt and adjust the heat if they are browning too quickly. If the onions seem to be drying out, add a tablespoon of water or a little more oil and stir, scraping up any brown bits on the bottom of the pan. Continue to cook until the onions are a deep brown color, about 20 to 30 minutes. Add the garlic in the last minute of cooking, and stir to combine. Set onions aside.

While the onions are cooking, place the potatoes in a medium sized pot of boiling salted water and cook for 15 minutes or until cooked through. When the potatoes are done, transfer them to a colander, using a spider or slotted spoon, to drain and cool. Blanch the asparagus in the same water that you used for the potatoes, about 3 minutes. Immediately remove from the water and place in an ice bath to stop them from cooking. 

Begin layering the fillo pastry dough in a greased 9x13 inch oven-proof baking dish. Layer the sheets of fillo pastry in the dish, brushing each layer with melted butter as you go, letting about 1-inch hang over the edge. You want about 8 to 10 layers of fillo pastry. Place a couple of damp paper towels or a clean damp tea towel over the dough to keep from drying out and set aside.

When the potatoes are done, mash them together with the cheeses in a medium sized bowl. In another small bowl, mix together the eggs and cream and stir into the cheesy potato mixture. Add the nutmeg and caramelized onions and stir. Taste to adjust seasonings (this is where you want to add plenty of salt and pepper to taste). Spread the potato base mixture evenly over the fillo pastry shell. Fold in the sides of the fillo pastry and scrunch it together to form a crust around the edge of the potato filling. Evenly lay the asparagus over the filling, gently pressing them down. Brush the edges of the crust with the remaining butter and place in the preheated oven for 20 to 25 minutes, or until golden and crisp. Allow to rest for 10 minutes before cutting.

Yield: About 6 servings

Sunday, June 17, 2012

Chinese Chicken Salad


The dressing for this recipe comes from family friend, Marion Hover. Marion is an excellent cook and I've had the pleasure of eating some wonderful dinners at her home in Sonoma (I can remember one such dinner around Christmastime where the evening ended with us all dancing around the room to Mariah Carey's, All I Want for Christmas. Ok, yeah we had a few drinks in us, but her dinners are always fun). I was lucky enough to have this Chinese Chicken Salad at one such dinner. While I was in college, I emailed her for the recipe and she kindly passed it along. I've been enjoying it ever since.


There is some discrepancy as to the origin of this dish and weather it is authentically "Chinese" at all. Many food historians agree that Chinese chicken salad was most likely invented in California sometime in the 1930s, using Asian inspired ingredients. 


Sugar snap peas showed up at the market the other day and I thought they would make a lovely edition to this salad. Occasionally, I also like to throw in a handful of fresh bean sprouts, but the Asian market on my street was sold out. For a bit of crunch, I like to use fried wonton wrappers. If you prefer to omit the wonton wrappers and are trying to save time, peanuts are a nice alternative (not to mention healthier) and add a nice bit of texture. This salad is a great way to transform  leftover chicken into a meal, which I often do, cutting your cooking time in half. 


CHINESE CHICKEN SALAD
Dressing recipe courtesy Marion Hover

Ingredients:

For the salad:
10 wonton wrappers, cut into ½-inch strips and separated 
½ lb. sugar snap peas
1 large head romaine lettuce (or 2 romaine hearts), chopped or torn into bite size pieces
2 to 3 cups grilled or roasted chicken, cut into bite size pieces
1 or 2 dried red chili peppers, crumbled (or 1 fresh pepper, minced)
Vegetable or canola oil for frying

For the dressing:
1½ tbsp. smooth peanut butter 
2½ tbsp. vegetable or canola oil
½ tbsp. sesame oil
2 tbsp. low-sodium soy sauce
2 tsp. rice wine vinegar
2 tbsp. sugar
Pinch of cayenne pepper
1 tbsp. chopped green onions
1 tbsp. chopped cilantro 

For the salad
In a medium sized saucepan, heat ¾ to 1-inch of oil to 350 degrees F on a fry/candy thermometer. Fry 10 to 12 strips at a time until golden and crisp. Remove using a slotted spoon or spider and transfer to a paper towel lined plate. Sprinkle with sea salt. Continue frying the rest of the strips in the same manner.

In a medium pot of boiling salted water, blanch the sugar snap peas for about 1 minute, until tender and crisp. Immediately transfer the snap peas to an ice bath to stop them from cooking. Once cool, strain, pat dry, and set aside. 

Place the lettuce in a large bowl along with the sugar snap peas and chicken. Pour dressing over salad (to taste) and toss to incorporate. Garnish with crumbled (or minced) red chili peppers and fried wonton strips (if using).

For the dressing:
In a measuring cup or small bowl, whisk the peanut butter, vegetable oil, and sesame oil together until well blended. In a separate small bowl, whisk together the remaining ingredients. Pour the oil and peanut butter mixture into the vinegar mixture in a slow steady steam, whisking constantly. Taste to adjust seasonings. Don't be afraid to play around with this recipe. 

Yield 4 servings

Tuesday, June 12, 2012

Ice Cream #3: Strawberry


Something joyous caught my eye the other day at the farmer's market. At first I could only smell their intense perfume wafting through the air, but when I turned around, I saw them sitting in their sweet little cartons, glistening in the sunlight. Strawberries! I know no better way to celebrate their arrival than by making strawberry ice cream. I've always liked strawberry ice cream, but I fell in love with it after making it in my own kitchen. What could be better than strawberries and cream? The two were made for each other!


I bought a carton of strawberries and surprised Aaron later in the afternoon when he got home from work. After waiting all winter long for the return of these beautiful berries, we sat at the table smelling their intensely sweet aroma and savoring each bite (I just hope the neighbors weren't watching because I'm sure we looked a little crazy). Sharing strawberries is hard enough, but sharing a bowl of homemade ice cream between the two of us becomes next to impossible, even if we have two spoons. It's childish really. But there are worse things to fight over than a bowl of ice cream. The solution: two bowls all to ourselves!


I've been using this recipe for strawberry ice cream for a number of years now. It's one of those things I'll make over and over again all summer long, and never tire of. A spring and summer classic.

STRAWBERRY ICE CREAM
Slightly adapted from Saveur, Issue 12

Ingredients:
1 pint fresh strawberries (about 12 oz.), hulled and thinly sliced
1/3 cup sugar plus ¾ cup 
Juice of half a lemon
1½ cups whole milk
1¼ cups heavy cream
2 eggs
2 egg yolks
¼ tsp. sea salt
¼ tsp. vanilla extract

Combine strawberries, 1/3 cup sugar, and lemon juice in a small mixing bowl. Cover and refrigerate for at least 2 hours.

Bring milk and cream just to a simmer over medium heat. Meanwhile, whisk together eggs, egg yolks, ¾ cup sugar, and salt in a mixing bowl. To temper, lightly whisk ½ cup of the hot cream mixture into the egg mixture, then slowly add all of the egg mixture to the remaining cream mixture, whisking constantly. Cook, stirring constantly with a wooden spoon, until mixture is thick enough to coat the back of a spoon, about 10 to 15 minutes. 

Strain the mixture though a fine mesh strainer into a clean mixing bowl. Stir in vanilla extract and stir the custard over an ice bath until cool. Refrigerate until completely cold (can be made a day in advance).

Slightly mash strawberries, then stir into the custard base and pour into an ice cream maker. Freeze according to the manufacturer’s directions. 

Yield: About 1½ qts.

Tuesday, June 5, 2012

BBQ Baby Back Ribs


Growing up in California, authentic BBQ sauce was never on the menu (even if I was offered a dish with BBQ sauce as a kid, I was too picky to eat it). Dating a Southern boy quickly changed that, and I'm so grateful it did! The first time I made homemade BBQ sauce in my own kitchen, I couldn't believe how flavorful it could be. This past Memorial Day, Aaron and I rolled up our sleeves (with lots of paper towels close at hand) and indulged in these outstandingly messy ribs. I couldn't resist accompanying them with baked beans, collard greens, and freshly baked cornbread. 


Naturally, the first time I attempted making BBQ ribs for Aaron, I was a bit nervous, seeing as he's from Texas. I know many people have their own idea of what BBQ sauce should be depending on where they're from. Generally, they don't take this lightly; I think some people feel as strongly about a particular style of BBQ sauce as they do politics or religion. As I did a bit of recipe searching, I soon found myself completely overwhelmed by the vastly different styles of regional BBQ sauce (there are four recognized types of BBQ sauce in Texas alone, which include: East Texas, Central Texas, South Texas, and West Texas). I had opened a giant can of worms! To make things more confusing, hard and fast "rules" for each type of regional BBQ sauce were often broken in "authentic" recipes I came across, or the lines were continuously blurred. The solution? I came up with my own version for a rub and settled on Pat and Gina Neely's BBQ sauce from their family's original restaurant in Memphis and their cookbook, Down Home with the Neelys, which isn't Texan at all. 


Since many Texas style BBQ dishes are heavier on beef rather than pork, such as beef brisket or beef ribs, I thought Aaron would prefer beef ribs. It turns out, he's more fond of pork ribs, as that's what he predominantly grew up on. I love pork ribs too, so I've appeased us both and used them here (although this sauce would be great with beef ribs as well). The tomato-based Memphis style BBQ sauce provided below is thick, sweet, and slightly tangy. I like my BBQ sauce this way, as I'm not a big fan of the overly vinegary based sauces.  They're a bit too tangy for my taste (I know, now someone has a personal vendetta against me). I've barely adjusted this recipe, and I find it's well balanced and doesn't overpower that heavenly pork flavor. At the end of the day we know what we like (we're the ones eating it after all), and for us, this BBQ sauce is just the ticket. Did I mention, these ribs are fall off the bone, finger lickin' good?


BBQ BABY BACK RIBS

Ingredients:
2 slabs pork baby back ribs (about 4 lbs. total) see notes below

For the Rib Rub:
¼ cup paprika 
1½ tsp. cayenne
2 tbsp. freshly ground black pepper
3 tbsp. garlic powder
1½ tbsp. onion powder
1 tsp. ground cumin
1 tsp. ground coriander
2 tbsp. smoked sea salt
1 tbsp. kosher salt
1½ tsp. dried oregano
1½ tbsp. dried thyme
2 oz. white sugar (about ¼ cup) or 2 oz. dark brown sugar (about ½ cup packed)

For the Barbeque Sauce
Slightly adapted from Patrick & Gina Neely, Down Home with the Neelys

2 cups ketchup
1 cup water
3 oz. brown sugar (about ¼ cup plus 3 tbsp.)
3½ oz. white sugar (about ½ cup)
1½ tsp. freshly ground black pepper
1½ tsp. onion powder
1½ tsp. dry mustard powder
1 oz. smoked paprika (¼ cup plus 1 tbsp.)
1 oz. lemon juice (about 3 tbsp.)
1 oz. Worcestershire sauce (about 2 tbsp.)
4 oz. apple cider vinegar (about ½ cup)
1 oz. light corn syrup (about 2 tbsp.)
Season with smoked salt and cayenne to taste

Rinse the ribs in cold water and dry using paper towels. Place the ribs on a cutting board and using your fingers, remove the silver-skin (the thick white membrane) on the bone side of the ribs and discard (you can also have your butcher do this for you). 

In a medium sized bowl, thoroughly whisk all of the rib rub ingredients together. Generously season both sides of the slabs with rib rub. Place ribs side by side on a drying rack placed over a baking sheet (double lined with aluminum foil on the bottom) “curl” side up, meaty side down. Cover tops of ribs with two sheets of aluminum foil and seal well all around the baking sheet. Refrigerate for at least 24 hours.

Preheat oven to 300 degrees. Remove ribs from refrigerator and allow to rest for 30 minutes to an hour at room temperature. Bake undisturbed for 2½ to 3 hours (switching the position of the pan halfway through cooking), or until ribs are very tender. Meanwhile, prepare your BBQ sauce. 

Combine all of the sauce ingredients (except for the smoked salt and cayenne) in a 4 qt. saucepan. Bring to a boil over high heat, stirring frequently to prevent sticking. Reduce temperature to low and simmer, uncovered, for at least 2 hours. After 2 hours, taste to adjust seasonings, adding a little smoked salt or cayenne if desired (remember there's cayenne in your rub, so easy does it). 

After about 2 hours, remove the ribs from oven and peel off the foil so the ribs are exposed. Carefully flip the ribs, using tongs, so that the "curl" side is down, and the meaty side is facing up. Using a pastry brush, coat the meaty side of the ribs with BBQ sauce. Return to the oven uncovered (meaty side up), until the sauce is thickened and lightly browned, about 20 minutes. Check to see that the meat easily pulls away from the bone. Remove the ribs from the oven and set aside to cool briefly before cutting into 4-bone sections and plating. Serve with more barbecue sauce on the side, if desired. 

Yield: about 6 servings of ribs (a serving equals about 4 or 5 ribs) and about 1 qt. of BBQ sauce

Notes:
  • Freeze any leftover BBQ sauce for later use.
  • If you prefer a slightly less sweet BBQ sauce, reduce both the brown and white sugars by 1 oz.
  • Living in a 4th floor apartment I don't have access to an outdoor grill, but I've had excellent results cooking ribs in the oven. To achieve that coveted smoky flavor, I love using smoked salt in the rib rub, and a bit in the BBQ sauce too. It's a great salt to have on hand, which I like using on everything from fish to beans, or any place where you want some smokiness. You can find smoked sea salt, such as black smoked or applewood smoked at specialty spice stores or online.
  • Baby back ribs are also known as back ribs, loin ribs, or Canadian back ribs. This particular cut is taken from the top of the rib cage between the spine and the spare ribs, below the loin muscle (see diagram below). 
  • There are a few different cuts of pork ribs, which can often be a bit confusing. I find it's easier to understand various cuts of meat by looking at them visually on a diagram, such as the one below: