Tuesday, July 31, 2012

Ice Cream #5: Zabar's Coffee


I've never been one for iced coffee. Call me crazy, I know, but even in mid-summer I still prefer my coffee hot. I do however, love coffee ice cream. Every kid has their favorite ice cream. I remember going to 31 flavors as a child with my nose pressed against the ice cream case faced with, what felt like at the time, a life altering decision. I went through some distinct ice cream phases: sherbet, cookies & cream, (I always liked the idea of ordering the neon-blue bubble gum flavor, but as expected, it looked more fun than it tasted) but at some point, I finally landed on coffee, and it remains my favorite today. Even when I'm at some fancy ice cream parlor filled with exotic flavors, I find myself fighting the temptation to return to coffee time and time again.


Many coffee ice cream recipes call for instant coffee or brewing strong coffee or espresso and adding it to the ice cream base. In my experience, instant coffee ends up tasting like exactly what it is. It also leaves an odd film on your tongue, which is never appetizing. Adding freshly brewed coffee to the ice cream can dilute it slightly and create an icy consistency in the final product. After much consideration, I thought, why not just "brew" the coffee in the cream base from the start? This way you get to pick your favorite roast and eliminate any of those textural issues. I came across David Lebovitz's coffee ice cream (which does just that) and the rest is history. 


Aaron and I are die-hard Zabar's-blend coffee drinkers (for those of you who live outside New York, Zabar's is an Upper West Side institution. It's a local gourmet food store that's been serving New Yorkers for over 70 years). It's safe to say, our mornings wouldn't be complete without a cup of Zabar's coffee. They roast their beans in-house and sell hundreds of pounds of it a day. We now have our families hooked on the stuff and they continually ask us to bring them some at every family gathering. Of course, you can use whichever bean you prefer, but naturally, I used Zabar's-blend for my ice cream. It would be sacrilege if I didn't.


COFFEE ICE CREAM
Barely adapted from David Lebovitz, The Perfect Scoop

Ingredients:
1½ cups whole milk
¾ cup sugar
1½ cups whole coffee beans 
¼ tsp. sea salt
1½ cups heavy cream
5 large egg yolks
¼ tsp. vanilla extract
¼ tsp. finely ground coffee (pressed through a fine mesh sieve)

Combine the milk, sugar, coffee beans, salt, and ½ cup of the heavy cream in a medium saucepan and heat until very warm, but not boiling. Cover and remove from heat. Let steep for at least 1 hour. 

Pour the remaining 1 cup of heavy cream into a medium size metal bowl. Place the bowl of cream inside a larger bowl filled with a few handfuls of ice. Position a fine mesh strainer on top of both of the bowls and set aside. 

Gently reheat the milk and coffee mixture over medium heat, stirring occasionally (again, do not boil). In a medium size mixing bowl, whisk the egg yolks together. Slowly pour the heated milk and coffee mixture into the yolks, whisking vigorously (you don't want to scramble the eggs). Using a rubber spatula, scrape the warmed egg and cream mixture back into the saucepan.

Cook the mixture over medium heat, stirring constantly. As you stir, scrape the bottom of the pan to avoid scorching. Cook until the mixture is thick enough to coat the back of the spatula, and you're able to run your finger through it without it running, about 10 minutes.  

Once thickened, pour the custard through the prepared strainer and stir it into the cream. Use the spatula to press on the coffee beans in the strainer to extract as much coffee flavor as possible. Discard the beans. Stir in the vanilla extract and finely ground coffee. Continue stirring until cool. 

Place a sheet of plastic wrap directly on the surface of the custard and refrigerate for several hours, preferably overnight. Process in an ice cream maker according to the manufacturer's instructions. 

Yield: About 1 quart

Friday, July 27, 2012

Tomato and Bread Salad with Corn (Panzanella)


This is my favorite summer salad. I've been making it for a number of years and it's a dish I look forward to every season. Whenever my friend Ashley would come over for dinner on her way home from work, she always requested I make this salad. And if I ever wanted her to come over, all I had to do was tell her I was going to make it and a few hours later, the buzzer would ring (much to our dog Lady's delight). I love it when a dish reminds you of a friend or relative, conjuring up memories of good food and laughter. Even though she's moved away from New York, I still think of her every time I make it. Maybe this post will tempt her for a visit sometime this summer... 


I've been making this panzanella for so long, I'd forgotten where it originally came from. I dug through my old magazines and books and finally discovered the original recipe came from Lidia Bastianich's cookbook, Lidia's Italian Table. I love how rustic this salad is and how it makes use of whatever you have on hand. Day-old bread from the previous night's dinner is always a good excuse to make this salad (I find I make that excuse often). I love throwing in olives or kidney beans or any summer vegetables I happen to have lying around the kitchen. The toasted pieces of bread are like big crunchy croutons, which absorb the garlicy vinaigrette.


This salad is all about the tomatoes, so I like to seek out those especially yummy ones from the farmer's market. The ones pictured here are Jersey beefsteak tomatoes I picked up over the weekend. I often look for Heirloom varieties of all shapes, colors, and sizes. It makes for fun eating! I love how the corn kernels look like little bits of confetti thrown in the mix. Their sweetness balances nicely with the acidity in the vinaigrette. A perfect celebration of summer.


TOMATO & BREAD SALAD WITH CORN (PANZANELLA):

Adapted from Lidia Bastianich, Lidia's Italian Table, and Saveur, Issue #130

Ingredients:
3 to 4 medium tomatoes (about 1½ lbs.), cut into large wedges
2 ears of corn, husked, grilled, and cut off the cob (see notes below)
Half a French loaf or country style bread (about 6 oz.) torn into pieces and toasted (see notes below)
2 large handfuls of arugula (about 2 cups)
15 to 20 fresh basil leaves
Half a medium shallot or red onion, thinly sliced
½ cup extra virgin olive oil
3 tbsp. red wine vinegar
2 cloves garlic, minced
Sea salt and freshly ground black pepper, to taste

In a large salad bowl, combine the tomatoes, corn, bread, arugula, basil, and onions. Toss to combine.

In a small bowl, whisk together the olive oil, vinegar, and garlic until well blended. Pour over the salad and season generously with salt and pepper to taste. Toss again and let the salad sit for 5 to 10 minutes before serving, allowing the bread to absorb some of the dressing.

Yield: 6 servings

Notes: 
  • Brush the corncobs with a little olive oil and season with salt and pepper. Grill on each side until you get some nice color.
  • Toast the torn pieces of bread directly on the grill along side the corn. 
  • Feel free to add all sorts of things to this salad. I like throwing in beans, olives, or even feta cheese or slices of Parmesan when on hand.

Saturday, July 21, 2012

Apricot Raspberry Jam


While I've always loved apricot jam, this was my first attempt at making it in my own kitchen. Many recipes call for dried apricots, which are rehydrated prior to making the jam.  With dried apricots, you can make this jam no matter the season, but I went ahead and used fresh apricots and was very happy with the results. I came across a big box of them at the market and figured I'd make a small batch of jam before they're gone. 

When I was looking up recipes for apricot raspberry jams, I felt like the ratio of raspberries to apricots was far too much. In my opinion, a little bit of raspberries goes a long way, and I didn't want to overpower the delicate apricot flavor. I've added just a cup in this recipe, which gives a pronounced flavor without overwhelming the entire jam.


The best part is, you don't even have to peel the apricots, like you would peaches. Their skins are extremely thin and delicate and dissolve during cooking. If you prefer a seedless jam, simply run the cup of raspberries through a blender or food processor and strain the puree through a fine mesh strainer to remove the seeds. Stir the puree with the chopped apricots and proceed with the recipe. I don't really mind the seeds, as I feel they give a rustic, homey feel to a jam, but to each his own. Either way, a lovely jam to wake up to in the morning alongside a cup of joe, or as a glaze for a fruit tart. 


APRICOT RASPBERRY JAM
Adapted from Ellie Top & Margaret Howard, The Complete Book of Small-Batch Preserving

Ingredients:
3 cups roughly chopped ripe apricots, unpeeled and pitted (About 1¼ lbs. apricots)
1 cup raspberries
3 cups granulated sugar
¼ cup freshly squeezed lemon juice

Place a small plate in the freezer to test the jam later on.

In a large bowl, stir together the apricots, raspberries, sugar, and lemon juice. Cover with plastic wrap and refrigerate for 12 hours or overnight.

Transfer the apricot mixture to a medium stainless steel pot or Dutch oven. Bring to a boil over high heat, stirring often. Reduce the heat to medium and gently boil, uncovered, for 20 to 25 minutes, or until the jam begins to gel (approximately 220 degrees F), stirring frequently. To see that the jam has jelled properly, remove the pot from the heat and retrieve the plate from the freezer. Place a dollop of jam on the plate and return it to the freezer for a couple of minutes. Run your finger through the jam and if it wrinkles slightly, it's done (if it's still runny, return the pot to the heat and continue checking every few minutes in the same manner). 

Ladle the jam into hot, clean jars, leaving a headspace of ¼ inch. Wipe rims and apply lids and rings. Process for 10 minutes in a boiling water-bath canner (for 4 oz. jelly jars or 8 oz. half pint jars). Turn off heat and let jars sit in canner for 3 to 5 minutes before removing. Allow jars to rest on a dishtowel undisturbed for 6 to 8 hours or overnight. Check seals, label, and store in a cool dark place for up to a year. If any jars did not seal properly, place them in the fridge and use first. For more information, see my step-by-step guide to canning here.

Yield: 3½ cups


Notes:
  • If you prefer plain apricot jam, simply leave out the raspberries and continue with the recipe as written.

Tuesday, July 17, 2012

Zucchini Salad with Basil & Mint


Green, green, green! This zucchini salad makes a quick and easy summer salad. I came across the original recipe in Beatrice Peltre's beautiful cookbook, La Tartine Gourmande. What I love about this dish is that you don't even have to cook the zucchini, simply shred it on a mandoline and it's ready in minutes. The mint and basil give it a refreshing bite and the white balsamic (or white wine vinegar) give it a nice sharp zing. 


This salad is light and refreshing, a nice choice on those unbearably hot and humid summer days when just the thought of turning on the oven makes you sweat. It goes well with any meal of the day: omelettes, sandwiches, and as your veg at dinner. This salad lasts for a number of days in the fridge. I actually think it tastes better the following day, after the zucchini has absorbed some of the dressing. 


ZUCCHINI SALAD WITH BASIL & MINT

Adapted from Beatrice Peltre, La Tartine Gourmande

Ingredients:

For the vinaigrette:
1 large clove garlic, minced
Sea salt & freshly ground pepper 
3 tbsp. white balsamic or white wine vinegar
1/3 cup extra virgin olive oil 

For the salad:
3 zucchini (about 1½ lbs.), julienned on a mandoline (see notes below)
½ cup julienned basil leaves
¼ cup julienned mint leaves

In a small bowl, add the garlic, salt, pepper, and vinegar. Pour in the olive oil and whisk to blend. 

Place the zucchini in a medium sized bowl, pour on the dressing and toss. Add the herbs just before serving and toss once more. Keeps well refrigerated for up to 3 to 4 days.

Yield: 6 servings

Notes:
  • If you don't own a mandoline you can julienne the zucchini by hand (which will take a little more time) or shred the zucchini on a box grater.
  • Since the basil browns shortly after cutting, add it at the last minute just before serving.

Friday, July 13, 2012

Beef & Black Olive Tapenade Burgers with Stilton


These burgers are my secret weapon! To me, they are the quintessential summer burgers. The black olive tapenade creates meat that is extremely moist and flavorful, yet doesn't taste overwhelmingly "olivey." In fact, if I didn't tell anyone there were olives in it, they probably wouldn't even know (Aaron's not the biggest fan of olives, and he LOVES these). So why add them you ask? Since olives are naturally meaty, they're a perfect combination with red meat. In my opinion, they make burgers taste more like burgers (in the same way coffee makes chocolate taste more like chocolate). The ingredients in the tapenade simply season the meat and keep it nice n' juicy.


I first incorporated tapenade into my burgers a few years ago while working at a gourmet olive oil and food store. Occasionally, we would be given jars of tapenade that were nearing their expiration date. I used tapenade on toast and fish, but soon stared experimenting with it in other ways. Of course making the tapenade yourself will provide a deeper, richer flavor, but a good quality store bought variety works just as well.


There are so many recipes for burgers out there that require a bunch of seasonings. I like to keep it simple and just add one. Blue cheese pairs wonderfully with this burger (I used Colston Bassett's Stilton). If you want to go down the Greek route, try using crumbled feta, or any cheese your heart desires! 


BEEF & BLACK OLIVE TAPENADE BURGERS WITH STILTON

Ingredients:
1½ lbs. ground chuck (80% lean)- or a combination of chuck and sirloin (see notes below)
Kosher salt and freshly ground black pepper
7 tbsp. homemade black olive tapenade (see recipe below) or good quality store-bought
4 brioche rolls
Extra virgin olive oil
6 oz. Stilton or other blue cheese, crumbled
Baby arugula, for garnish 

Place the beef in a large mixing bowl and season with salt and pepper. Using the tines of a fork, break up the meat and mix in the black olive tapenade until it is evenly incorporated (be careful not to mash the meat). Using your hands, gently shape the meat into 4 patties. Set aside.

Slice the brioche rolls in half and lightly brush each side with olive oil. Place cut-side down on a hot grill and cook until you have beautiful grill marks and the buns are crisp and golden. Set aside.

Place the patties on the grill and cook for 3 minutes on the first side. Flip the patties and add the blue cheese. Cover the grill and cook for 3 minutes more for medium-rare (if using an indoor stovetop grill, simply place circular cake pans over the patties to melt the cheese. Once the cheese has melted, remove pans from the grill using oven mitts). Garnish each burger with arugula and serve immediately.

Yield: 4 burgers

Notes:
  • Seek out some really great ground beef for your burgers, or have your butcher grind it for you fresh. In the New York area, check out Grazin' Angus.
  • For long-term storage, wrap the patties in plastic wrap and again in foil, label, and freeze for up to 3 to 4 months.


BLACK OLIVE TAPENADE
Adapted from Saveur, Issue #40

Ingredients:
½ cup pitted, roughly chopped Kalamata olives (see notes below)
1 anchovy filet
1 clove garlic, peeled
1 tsp. capers
3 to 4 sprigs Italian parsley
Juice from half a lemon
¼ cup extra virgin olive oil
Freshly ground black pepper, to taste

Place all the ingredients in the bowl of a food processor or blender and pulse until the ingredients are finely chopped. Taste to adjust seasonings. If you have the time, cover and refrigerate overnight before using, to allow the flavors to meld. Refrigerate for up to 4 days. 

Yield: ½ cup

Notes:
  • The easiest way to pit an olive is to firmly press the side of a chef's knife against the olive, which loosens the pit from the flesh. You should then be able to use your fingers to remove the pit.
  • If you're adverse to using anchovies, you can certainly leave it out. It does, however, add a nice tang to the tapenade. 

Tuesday, July 10, 2012

Strawberry Jam Two Ways

It's that time of year again folks. And by that I mean a whole other season of canning! Sometimes our friend's will ask Aaron why I'm MIA and he simply replies, "he's canning and jamming." Eye rolls ensue! It has now become a running joke. There are so many jams and things to be pickled in the summer months, how can I help it? Aaron is conveniently away when I do the majority of canning (I don't like to hear complaints of the house being too hot, so I plan my jamming sessions when he's not around). Funny how I hear nothing but praise come fall and winter...


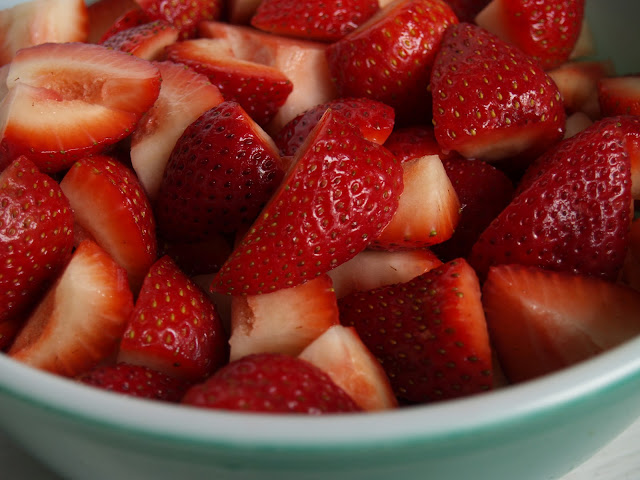
Strawberry jam is a great way to use up the plethora of strawberries the summer months provide. Last year I made a strawberry rhubarb and traditional strawberry jam. This year I've branched out a bit and made two new strawberry jams: strawberry balsamic and strawberry vanilla. Both are a slight twist on traditional strawberry jam, each giving me trouble as to which one I like more. Luckily we have both! 


I was delighted to find that strawberry balsamic jam is sweet and surprisingly sophisticated. The balsamic provides a depth of flavor that you just don't find in ordinary jam. It also gives the jam a deep dark hue. 


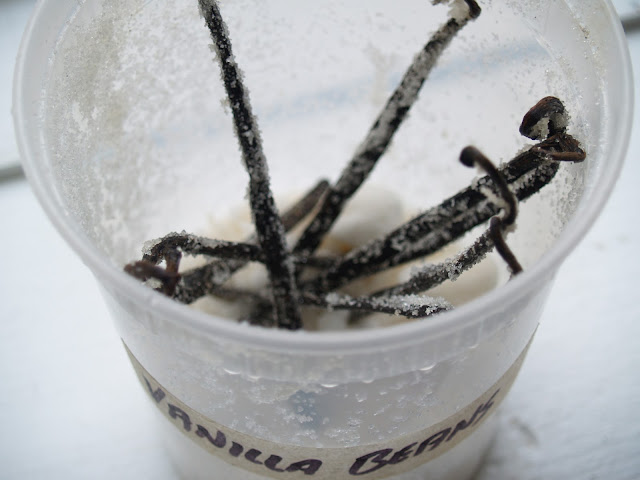
In my opinion, anything with vanilla just tastes better. So is the case with strawberry vanilla jam. The strawberries are allowed to macerate with the vanilla seeds and beans for a number of days before cooking. The result is sweet and flavorful, with that little extra spice provided by the vanilla. This particular jam is a small batch recipe. Since we have limited space in our NYC apartment, small batches of preserves allows us to have a greater variety of jams, in smaller quantities. I know by the end of summer our closet will be filled will jars of all shapes and sizes, so I'm trying to be realistic and plan accordingly. A small batch of strawberry jam also reduces the cooking time considerably, saving time and resulting in a fresher, less "cooked" tasting jam. 


STRAWBERRY BALSAMIC JAM

Recipe courtesy Eugenia Bone, Well Preserved 

Ingredients:
8 cups sliced washed & hulled strawberries (about 3 lbs. strawberries), lightly mashed 
5 cups sugar
½ tsp. butter (optional)
5 tbsp. balsamic vinegar

Start by placing a small plate in the freezer to test the jam later on.

Add the strawberries to a large Dutch oven or heavy bottomed pot and bring to a boil. Once boiling, add the sugar and stir until dissolved (scrape the bottom of the pot to keep the sugar from burning). Continue boiling the strawberries and sugar and add the butter (the butter helps to keep foaming to a minimum). Scrap off any foam and discard. Reduce the heat to medium low and gently boil the jam for about 40 minutes, or until a thermometer reads 220 degrees F, indicating that the jam has jelled properly. You can also test that the jam has jelled properly by removing the pot from the heat and retrieving the plate from the freezer. Place a dollop of jam on the plate. Return it to the freezer for a minute or two. Remove the plate from the freezer again and run your finger through the jam. If it wrinkles slightly and has begun to jell, it's done (if it has not jelled properly, return the pot to the heat and continue checking every few minutes in the same manner). Remove the pot from heat and stir in the balsamic vinegar.

Fill clean, sterilized jars with jam, leaving ¼ to ½-inch headspace. Wipe rims and apply lids and rings. Process in a boiling water bath canner for 10 minutes (for 4 oz. jelly jars or 8 oz. half pint jars) or 15 minutes (for 16 oz. pint jars). Turn off heat and let jars sit in canner for 3 to 5 minutes before removing. Allow jars to rest on a dishtowel undisturbed for 6 to 8 hours or overnight. Check seals and store in a cool dark place for up to a year. If any jars did not seal properly, place them in the fridge and use first. For more information, see my step-by-step guide to canning here.

Yield: 4 to 5 cups


SMALL BATCH STRAWBERRY VANILLA JAM
Adapted from Marisa McClellan, from her blog, Food in Jars 

Ingredients:
4 cups washed & hulled and roughly chopped strawberries (about 1½ lbs.) 
2 cups sugar, divided
2 vanilla beans, split lengthwise and scraped
½ tsp. butter (optional)
2 tsp. freshly squeezed lemon juice

In a large bowl, combine the strawberries with 1 cup of sugar and the vanilla beans and seeds. Allow the berries to macerate for at least 2 to 3 hours or up to 72 hours.

When ready to make the jam, place a small plate in the freezer to test the jam later on. 

Remove the bean pods from the strawberries and discard. Pour the macerated strawberries into a heavy-duty 6-quart saucepan and add the remaining 1 cup of sugar. Bring to a boil over medium-high heat. Once boiling, add the butter (the butter helps keep foaming to a minimum). Scrape of any foam and discard. Reduce heat and simmer until the jam reaches 220 degrees F, about 20 minutes, stirring often. During the last five minutes of cooking add the lemon juice and stir. Remove jam from heat. You can test that the jam has jelled properly by removing the pot from the heat and retrieving the plate from the freezer. Place a dollop of jam on the plate. Return it to the freezer for a minute or two. Remove the plate from the freezer again and run your finger through the jam. If it wrinkles slightly and has begun to jell, it's done (if it has not jelled properly, return the pot to the heat and continue checking every few minutes in the same manner).

Fill clean, sterilized jars with jam, leaving ¼ to ½-inch headspace. Wipe rims and apply lids and rings. Process in a boiling water bath canner for 10 minutes (for 4 oz. jelly jars or 8 oz. half pint jars). Turn off heat and let jars sit in canner for 3 to 5 minutes before removing. Allow jars to rest on a dishtowel undisturbed for 6 to 8 hours or overnight. Check seals and store in a cool dark place for up to a year. If any jars did not seal properly, place them in the fridge and use first. For more information, see my step-by-step guide to canning here.

Yield: 2 to 3 cups

Wednesday, July 4, 2012

Rocket Party Favors


These fun and festive homemade paper rockets make great use of cardboard toilet paper rolls. I've already expressed my love for the 4th of July and New England in my previous post. This year, I made some cinnamon red hots to stuff inside these patriotic rockets. You could fill them will all sorts of goodies, but I thought firery hot candies were a nice choice. 


I made these as a host and hostess gift, but there's no reason why they wouldn't make awesome party favors or decorations for your upcoming 4th of July gathering. Adults will love them as much as the kids! Happy Independence Day! 


Here's how to make 'em:
  1. Begin by assembling everything you need: 
    • Toilet paper rolls
    • Blue card stock 
    • Thin craft paper or wrapping paper
    • Glitter pompoms
    • String
    • Glue stick
    • Hot glue gun
    • Scissors 
    • A pencil for tracing
  2. Cut a piece of craft paper or wrapping paper to fit around the toilet paper roll. Using a glue stick, attach it to the toilet paper roll. 
  3. Use a small bowl (about 5 1/2-inches in diameter) to trace a half-circle on the blue card stock. Cut out the half-circle and bend it in a circle to create a cone. Using a glue stick, glue the edges of the paper together to form the cone. 
  4. Using a hot glue gun, attach the cone to one end of the wrapped toilet paper roll.
  5. Using the same blue craft paper you used to make the cone, trace one end of the toilet paper roll and cut out the small circle.
  6. Pierce a hole in the small blue circle with a pencil or pin. 
  7. Cut about 5 inches of string, thread it through the hole and tie a knot on one end.
  8. Using a hot glue gun, attach the pompom to the other end of the string.
  9. Fill the rocket with candy and using a couple of dots of hot glue, lightly glue the blue circle to the bottom of the rocket. 
  10. Use the string to pull off the bottom of the rocket when ready to open and enjoy!