Monday, August 20, 2012

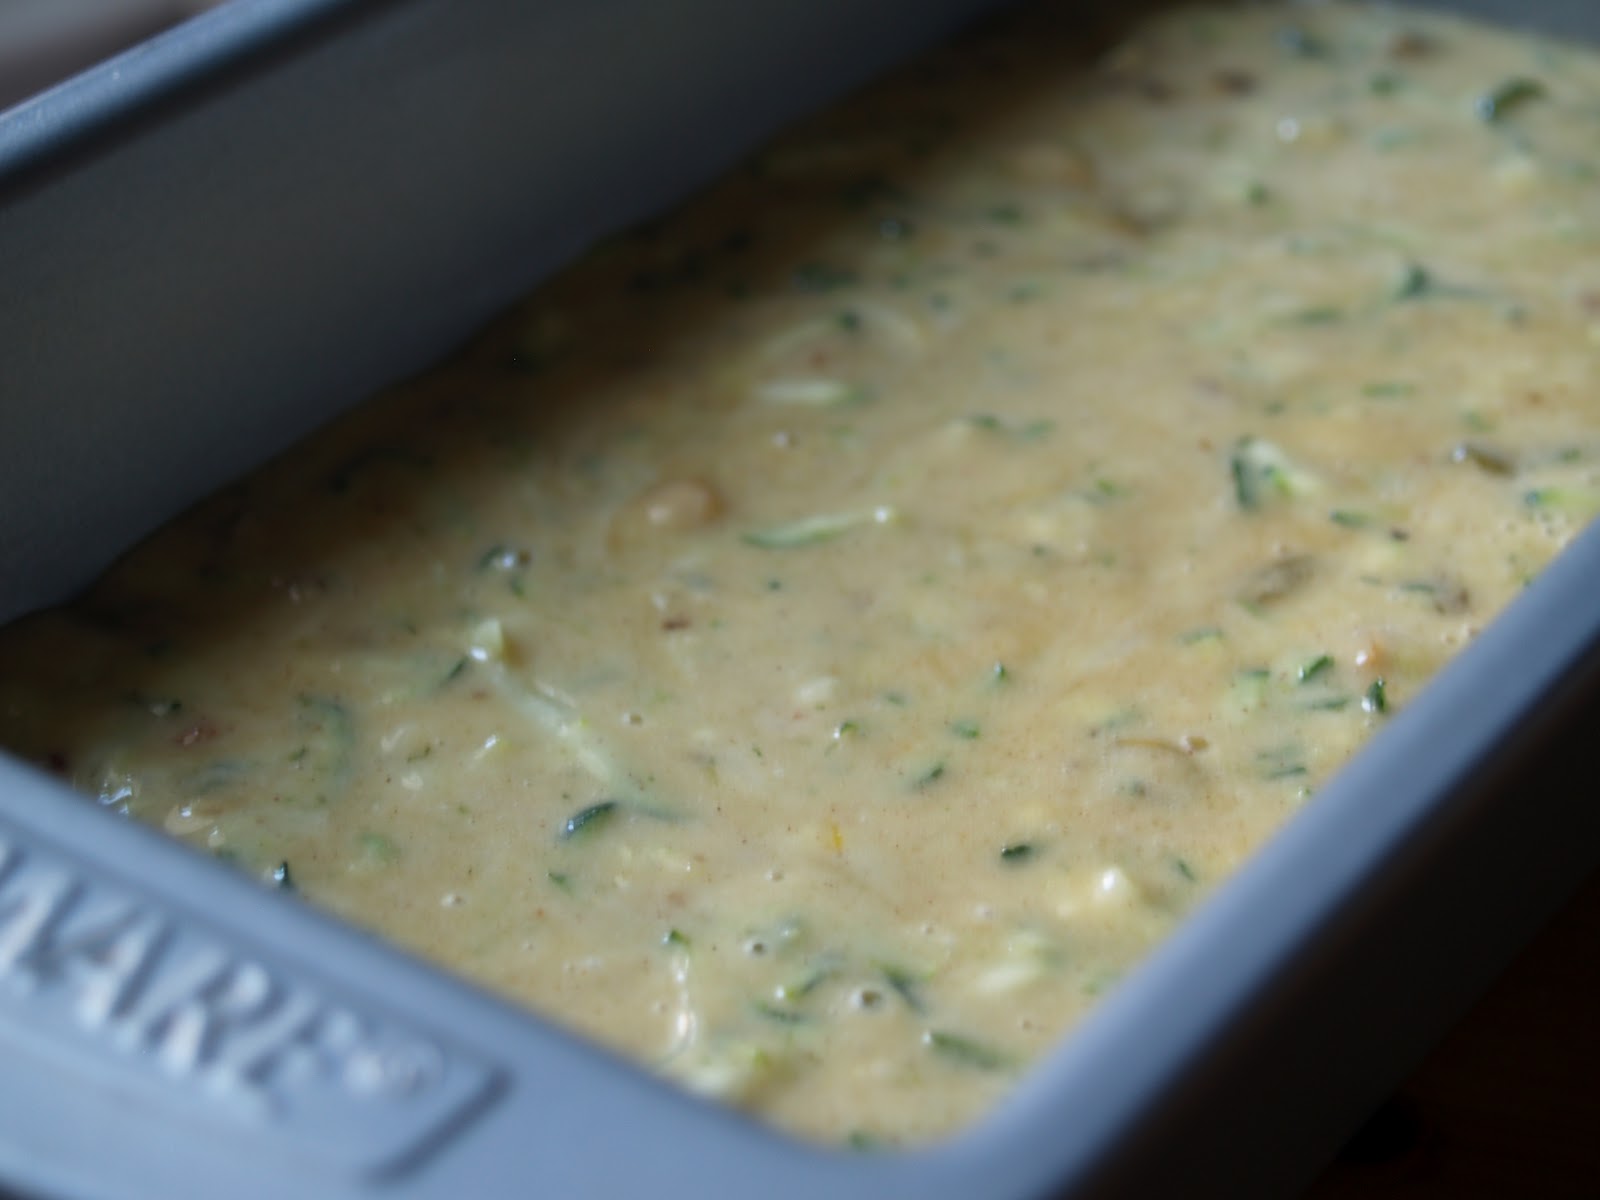
Zucchini Bread


This is one of me and Aaron's favorite morning breads. It's is a great way to use up all the zucchini the summer months provide. It's extremely moist, not too sweet, and wonderful along side a cup of joe. A great snack or breakfast on the go. 


Zucchini bread still reminds me of the delicious version my friend Marisa's mom, Denice, used to make. When Marisa and I left on a California road trip many moons ago (the same trip where I found this), Denice sent us off with a loaf of zucchini bread. While parked at a campsite in Cambria, and with little else to eat, we enjoyed our bread. Unfortunately, we awoke to find black birds attacking the zucchini bread and spreading it (along with the foil it was wrapped in) across the campsite. We foolishly left it out all night! We were met with some disapproving looks from our fellow campers. However, we were more broken up at the thought of perfectly delicious zucchini bread gone to waste.   


This classic recipe, from Joy of Cooking, can be used with either zucchini or carrots. Feel free to double the recipe and freeze one loaf for longer storage. 


ZUCCHINI BREAD
Adapted from Joy of Cooking, Rombauer, Becker, Becker

Ingredients:
1¼ cups all-purpose flour (plus 1 tsp. for the raisins and nuts)
1 tsp. baking soda
1 tsp. baking powder
¼ tsp. cinnamon
1/8 tsp. nutmeg
¾ cup sugar
2 large eggs, beaten
½ cup vegetable oil or olive oil (or a combination of both)
1 tsp. vanilla extract
½ tsp. salt
2 cups grated zucchini, squeezed of excess moisture (place in a colander and press down on the zucchini)
½ cup golden or red raisins (optional)
½ cup chopped walnuts or pecans (optional)
Preheat the oven to 350 degrees F. Grease a 9 x 5-inch loaf pan and set aside. 
In a medium sized mixing bowl, whisk together the flour, baking soda, baking powder, cinnamon, and nutmeg. 
In a large mixing bowl, whisk together the sugar, eggs, oil, vanilla, and salt, until well blended. Stir in the dry ingredients until combined. In a small bowl, toss the raisins and nuts with 1 tsp. of flour. Stir into the batter with a few swift strokes.
Using a rubber spatula, scrape the batter into the prepared loaf pan. Bake until a toothpick inserted in the center comes out clean, about 40 to 45 minutes. Place on a cooling rack for 10 minutes before un-molding. Let cool completely on the rack before slicing. 
Yield: 1 loaf

Notes:
  • If substituting the zucchini for carrots, increase the flour to 1 1/2 cups and use 1 1/2 cups shredded carrots.

Wednesday, August 15, 2012

Julia Child's 100th Birthday & Madeleines


Today would have been Julia Child's 100th birthday, and in honor of this merry occasion I've decided to use her recipe for madeleines. The pan for this popular little cake is a terrible unit-tasker, which I generally try to stay away from as my kitchen is cluttered enough; I've left madeleines to the French bakeries and cafes for that very reason. Nevertheless, I've always wanted to bake them in my own home so, with  Julia Child in mind, I let my rule slide and bought the pan against my better judgement. Of course, I won't make them all the time, but they'll be a wonderful treat on special occasions (or at least this is what I told myself while making the purchase). 


I had a difficult time finding a madeleine pan with a hole in it for hanging on the wall (apparently most manufacturer's don't have tiny NYC kitchens in mind). In my kitchen, if there's no room for it in a cupboard (which there's not) it has to hang from the ceiling or on the wall. Eventually I found one online made by Fox Run, which I love. 


Julia Child is so ingrained in American culture, that the mere mention of her name conjures up happy memories of her cooking on her many television shows. As a child, I used to love watching her on PBS in Julia's Kitchen with Master Chefs and Julia & Jacque's Cooking at Home. Like most, I was immediately drawn to her wonderful sense of humor. When I was older and watched re-runs of The French Chef (and took avid notes like a big-time nerd), I realized part of the reason she was so enjoyable to watch, was the fact that she wasn't afraid to make mistakes and broadcast them on her show. This allowed the home viewer to be less intimidated and see that even a trained chef makes mistakes and that it's okay. She made cooking good food approachable and fun for the everyday cook.


Coincidentally, I'm in the middle of reading, As Always, Julia: The Letter's of Julia Child & Avis DeVoto, edited by Joan Reardon. Their correspondence reveals, among other things, the struggle to get Mastering the Art of French Cooking published. As Always, Julia discusses the state of American cooking in the mid 1950s, when the most common dish on the table was a casserole made from canned soup. Basic cooking ingredients such as shallots or fresh herbs were difficult or nearly impossible to find in American markets. It's easy to take for granted how lucky we are to have the incredible variety and quality of foods found in grocery stores and farmer's markets today. 


Julia Child was a natural born teacher, which has always been clear in her cookbooks and television shows. Her attention to detail, specificity, and continual drive to "get it right" made her one of the most beloved cooks and cookbook authors of all time. Mastering gave greater confidence to the home cook and set the bar for the way cookbooks are written. On television, Julia possessed that rare quality which allowed her audience to really feel as if they knew her personally. She will always be remembered as a pioneer for cooking shows and food T.V. today.


This is a wonderful recipe for classic madeleines. They created perfect humps on the their back side, were beautifully browned around the edges, and slipped easily out of the pan. Such a fun and delicious treat that can be made in a snap. I can't think of any better way to celebrate the life of this intelligent, funny, and incredibly inspiring woman, than by using one of her recipes. Happy Birthday Julia Child and Bon Appetit!


MADELEINES
Recipe from Julia Child, The Way to Cook

Ingredients:
2 large eggs, lightly beaten
2/3 cup sugar
1 cup all-purpose flour (scooped and leveled), plus 1 tablespoon for preparing the molds
5 ounces (1¼ sticks) unsalted butter, cut into 6 pieces
A pinch of salt
Grated lemon zest (from half a lemon)
Drops of freshly squeezed lemon juice
Drops of pure vanilla extract
Confectioners sugar, for sprinkling 

Preheat the oven to 375 degrees F. To make the batter, measure ¼ cup of the beaten eggs and place them in a medium bowl. Using a wooden spoon, beat in the 1 cup of the flour along with the sugar, until well blended (this mixture will be quite thick, never fear). Set aside to rest for 10 minutes.

Meanwhile, place the butter in a 2-quart saucepan and bring to a boil over medium-high heat. Allow the butter to brown just slightly, then immediately remove it from the heat (it should smell nutty, not burned). Measure out 1½ tablespoons of the browned butter and place it in a small bowl along with the remaining 1 tablespoon flour. Stir to blend and set aside. Pour the remaining butter into another small bowl and stir over an ice bath until cool, but still liquid. 

Stir the cooled butter and remaining egg into the batter mixture. Stir in the salt and lemon zest. Add the lemon juice and vanilla extract to taste. 

To prepare the pans for baking, brush the shell molds with the flour and browned butter mixture (making sure you get into all the nooks and crannies). Scoop the batter by generous tablespoons into the shells. Bake for 14 to 15 minutes until the cakes are lightly browned around the edges, humped in the middle, and slightly shrunk from their molds. Unmold onto a drying rack shell-side down. When cool, turn the madeleines shell-side up and dust with confectioners sugar. Store in an airtight container in the refrigerator or cover individually in plastic wrap and freeze for longer storage. 

Yield: about 16 madeleines 

Notes:
  • If you don't own a madeleine pan, or feel the need to buy one, try baking them in scallop shells instead. You could also bake the batter in muffin tins and call them Commercy Cupcakes. 

Friday, August 10, 2012

Guide to Buying Quality Extra Virgin Olive Oil

The world of making and purchasing extra virgin olive oil is a slippery one. Searching for olive oil at the grocery store is an overwhelming task. The glittering green bottles stamped with their cryptic, contradictory labels are difficult to understand, so most people grab the first bottle they lay their hands on, without bothering to question the label. Having worked in an olive oil specialty shop for over two years (trust me it wasn't as glamorous as it sounds, and no, it wasn't run by the mafia), I learned a handful of key things to look for and taste in truly, high-quality extra-virgin olive oils. Bear with me, this post is a beast, but I've tried to do my best to consolidate all the information.


If you haven't guessed already, I'm a big fan of olive oil. Not just for its taste, but for its health benefits as well. In an era when people (especially Americans) easily succumb to the latest dietary trends (no matter how absurd) and often defend said trends to the death regardless of their scientific validity, no one can deny that people have been eating olive oil for thousands of years. Olive oil contains a number of antioxidants and polyphenols, which are believed to defend against cardiovascular disease, Alzheimer's, and cancer. About 70 percent of olive oil is composed of mono-unsaturated fatty acids, which helps to improve blood cholesterol levels. In addition, olive oil is wonderful for your skin, hair, and overall digestive system. To learn more on the health benefits of olive oil see here.

To begin, it's important to know that many oils labeled "extra virgin" are in fact not, such as the many generic oils you'll find at supermarkets. In my opinion, they should be labeled "extra bastardized olive oil." Truly extra virgin olive oil is the highest quality grade olive oil, the standards of which are set by the IOC (International Olive Council), EU, and other governing bodies. Extra virgin oil must legally meet a series of chemical requirements (with an acidity of 0.8% or lower) and pass a taste panel, proving that the oil is indeed fruity and free of any taste flaws. Unfortunately, while analysis methods and standards continue to evolve and get better, testing extra virgin olive oil has been easy to fool in the past, leaving the consumer at a loss. It's hard to say exactly the number of the oils produced in the world that are falsely labeled "extra virgin," but the numbers are vast. You can read an in-depth account of how slick and corruptive the oil producing world can be in Tom Mueller's enlightening  book, Extra Virginity. As Mueller explains, many generic olive oils on the market are blends of olives from several countries which are refined and deodorized (in an effort to remove bad or off flavors) to achieve one bland, uniform flavor. These oils are devoid of any taste, color, character, or health benefits, and equivalent to what the Italians call "lampante oil" (lamp-burning oil unfit for human consumption). 


When buying extra virgin olive oils, you want to look for ones that say "Product of (wherever it's from)" not "Imported From ___" or "Packed In ___" etc. Also look for a harvest date or a "use by" date (see more on this below). This will give you a good idea of how fresh the oil is. Depending on the region and variety of olives being grown, harvesting spans from September/October until January/February. I also like to look for bottles that state where the estates or groves the olives are grown, or a specific mill, along with what variety of olives are used. Some labels will go above and beyond and state the oil's acidity level and number of bottles produced. These are the major indicators in buying premium extra virgin oil. Bottom line, look for specificity. 

You will see bottles commonly labeled "First-Cold Pressed", "Cold Pressed", or "Cold Extracted". Today, these terms are pretty much obsolete, but producers continue to use them on their labels because they know that's what consumer's are looking for. These terms aren't necessarily bad, they're just leftover from a time when olive oil was made using hydraulic and screw presses, where after the first pressing, the olive paste was combined with hot water to extract as much oil as possible and re-pressed, creating a second pressed oil of poor quality. Today, all extra virgin olive oil is first cold pressed almost by definition, as olives aren't pressed at all, but centrifuged.  

Not only are there an incredible amount of olive oils to choose from, there are many different types, each suited for different uses. If you think of olive oil as you would wine, it's a bit easier to understand. Oils will have the unique characteristics of the olives used and the climate in which they were grown, which varies dramatically from region to region. In addition, no olive oil harvest will ever be exactly alike, much like wine vintages. Unlike wine, however, olive oil does not get better with age. In fact, it should be bought and consumed rather quickly and not sit on the pantry shelf for a number of years.  


There are  a spectrum of oils to choose from, some more delicate than others. These range from oils that are herbaceous, grassy, and intensely peppery, to oils that are delicate and mild with floral undertones. The bold grassy oils are wonderful for bread, pasta, and certain vegetables, while the fruity, floral oils are perfect for fish and more delicate vegetables and salads. The biggest asset to choosing an oil is your taste buds. That being said, if you've only experienced generic grocery store quality oil, don't be turned off by the extremely flavorful and unique tasting extra virgin olive oils out there. Bold or identifiable flavors are often a good indication of high-quality oils.

In terms of cooking, quality extra virgin olive oil is fine for sauteing and other cooking needs. However, a big green, grassy tasting oil with lots of sediment probably isn't ideal for this. I generally use a more moderate tasting oil (and more economical) for sauteing. Using olive oil for deep frying or high temperature cooking over 400 degrees F is not particularly a good idea, not to mention expensive. There are many other types of oils on the market that have much higher smoke-points than olive oil and are ideal for high temperature cooking. Once the oil reaches its smoke-point, it begins to smoke and can impart unpleasant tastes in your food. On average, olive oil has a smoke-point anywhere between 350 and 410 degrees F. The lower the oil's acidity (the better the quality) the higher the olive oil's smoke-point will be.


While selling oil, I had many customers request olive oils exclusively from Italy. They wouldn't even taste an oil from another country even if I was certain it was exactly what they were looking for taste-wise. Italy is actually the number one importer of olive oil. Many Italian producers buy oil from other countries and turn around and sell it as "100% pure Italian oil." Aside from Italy, some of my favorite oils have come from France, Spain, Portugal, Greece, Morocco, and a number of other countries throughout the Mediterranean. In the U.S., California produces some incredible olive oils which are gaining popularity every year (many people are surprised to learn that olives have been grown in California since the 17th century, when Spanish missionaries began planting trees). All in all, it's important to remember that as consumers, we should buy based on what tastes the best, and not on some preconceived notion of where we think an oil should come from. This is why it's important (if at all possible) to taste oils before you buy them. Olive oil "bars" are becoming more and more popular. If there is no such place in your area, and tasting them is not an option, I've shared Tom Mueller's helpful list of reputable places to get your oil (see here). 


Not that you should buy an oil based on its price, but on the whole, expect to pay more for quality oils. Anything costing about 10 dollars and under is a good indication that the oil is of inferior quality. When I was selling olive oil, many customers would be outraged by the notion of forking out 20 to 30 dollars for a bottle of oil. This always baffled me since they had often just come from buying a 30 dollar bottle of wine for their dinner that evening. Wine is consumed over one meal, while oil will last for many weeks. When I alluded to this fact I was often met with a disapproving look, one that suggested I had a few screws loose. It's important to remember that producing quality extra virgin olive oil is expensive. For example, something as simple as how the olives were picked (by hand or by machine) will effect the price of the final product. Many small estate producers still pick their olives by hand (so there is lesser chance of bruising the fruit) which is more labor intensive and thus more expensive. 

All in all, I hope this post wasn't completely overwhelming. Hopefully, with this knowledge you should be able to walk into a store and find a quality extra virgin olive oil with confidence. Good Luck!

In Summary:

Key things to know when buying extra virgin olive oil:
  1. Be sure the label says "extra virgin."
  2. Look for labels that say "Product of (wherever it's from)" not "Imported From ___" or "Packed In ___" or "Bottled In ___" etc. Just because a label says the oil is "imported" from somewhere, doesn't mean that it was actually made there.
  3. It's always a good sign when there's a "best by" or "harvest date" or both. Try to buy oils from this year's harvest. "Best by" dates are typically two years after the oil was bottled. So when looking at the label, it's better when the "best by" date is two years away, as this is a good indication that the oil is fresh.
  4. Look for bottles that provide a specific mill on the label.
  5. Look for the variety of olives used in the oil, such as arbequina, leccino, mission etc.
  6. Today, the terms "First Cold Pressed" or "Cold Pressed" are largely obsolete, as olives are no longer "pressed," but centrifuged.    
  7. Look for bottles with dark colored glass or other containers that help protect the oil from sunlight.
  8. There is not necessarily a difference in quality between filtered and unfiltered olive oil. Unfiltered oils usually have a shorter shelf life as the sediment can spoil faster than the actual oil, creating off flavors. So if buying unfiltered oils, just make sure they are extremely fresh. Filtered oils generally have longer shelf lives, so refer to the best by date or harvest date and use your best judgement.  
  9. Olive oils come in many shades and colors, so don't judge an oil based on looks alone. 
  10. Bottles labeled as "Light" olive oil are simply marketing terms. These oils still contain the same number of calories per gram as regular olive oils. The only difference is that the olives used to make "light" olive oil are usually of inferior quality and have been deodorized to remove their bad taste, making them devoid of nearly all health benefits. 
  11. Remember, your taste buds are your biggest assest. 
  12. For a list of credible places to buy quality extra virgin olive oil in the U.S. and Canada, see here.
Storing olive oil:
  • Do not refrigerate your oil, place it in a cool dark place away from your stove or direct sunlight. A cupboard or pantry works best. 
  • Don't hoard your oil or buy more than you can consume in a reasonable amount of time (I know it's easy to do once you've discovered a few that you love). Opened bottles should be consumed in 1 to 2 months.

Monday, August 6, 2012

Watermelon Popsicles


I feel like a shmuck- I got such a late start on watermelon this year! With so many other summer fruits available, I neglected to buy a big watermelon and hack into it. Part of my problem is I feel the summer months are quickly slipping away. August you say!? Where have I been? In any case, last week I finally got my booty to the store and bought some melons. Watermelon is a juicy and refreshing snack on those unbearably hot summer days. I love eating it all on its own, but it ain't too shabby in popsicle form!


Last year I made a watermelon granita basically using the same ingredients as I did for my popsicles. Watermelon is naturally sweet and primarily made up of water, so you really don't need to add much to it when it comes to frozen desserts. Just a little lime juice and zest added to the base is all it needs. There is very little sugar, and feel free to decrease or increase the amount of sugar to taste. These popsicles are SO easy to make. A perfect light summertime dessert or refreshing mid-day treat.


WATERMELON POPSICLES

4 lb. cubed watermelon, seeds and rind removed (see notes below)
1 1/2 tbsp. lime juice
Zest of 1 lime
6 tbsp. sugar

Place all of the ingredients in a blender and puree until liquified (do in batches if all the watermelon doesn't fit). Pour the mixture through a sieve placed over a large (4 cup) measuring cup or medium sized bowl. You should end up with about about 4 cups watermelon puree. Pour the strained mixture into popsicle molds, insert sticks and freeze. 

Let the popsicles rest for a minute or two at room temperature before removing from molds. Transfer popsicles to a plastic zip-top bag and freeze for longer storage.

Yield: 10 to 12 popsicles, depending on size of mold

Notes:
  • 1 baby watermelon equals about 4 lb.
  • If you have any leftover puree, use it to make watermelon flavored cocktails, or for a delicious watermelon lemonade.

Friday, August 3, 2012

Scallop Ceviche


I don't think I'm alone in trying to keep away from the oven these days. Ceviche is a perfect dish to make in the summer, as it requires no stove! This popular Central and South American dish is incredibly versatile and can be used as a lovely hors d'oeuvres paired with endive or as a main course dinner. I like to roll it up in tortillas and make mini ceviche tacos. 


I've been wanting to make a scallop ceviche inspired by a Jacques Pepin recipe I came across years ago in his book, The Apprentice: My Life in the Kitchen. It's bright, colorful and fresh. I love the use of scallops versus the more common use of fish. I feel often times people are intimidated by ceviche because it's made of raw seafood. But as long as you're using very fresh scallops from a trusted source, you've nothing to fear. The citric acid from the lime juice breaks down the protein structure in the scallops, preserving their fresh raw flavor, but giving them a firmer "cooked" texture. 


At first glance, this recipe looks like it calls for a lot of ingredients, but essentially it's just a "salad" with homemade dressing. It requires nothing more than chopping and assembling ingredients. A perfect no-cook, refreshing and incredibly healthy dish for summer.


SCALLOP CEVICHE

Adapted from Jacques Pepin, The Apprentice: My Life in the Kitchen

Ingredients:
1 lb. sea scallops, well washed and cut into 1/4-inch slices (see notes below)
1 cup diced cucumber (1/2-inch pieces), from 1 peeled and seeded cucumber
15 to 20 cherry tomatoes, halved 
1 Hass avocado, pitted and cut into 1/2-inch pieces
1 medium red onion, coarsely chopped
1 large clove garlic, minced
½ cup (loosely packed) coarsely chopped fresh cilantro leaves
¼ cup (loosely packed) coarsely chopped fresh mint leaves
1 or 2 Serrano or jalapeno peppers, seeded and minced
1 tsp. grated lime zest
¼ cup lime juice
¼ cup olive oil
1½ tsp. kosher salt
Freshly ground black pepper, to taste
2 tbsp. rice or white vinegar 
3 or 4 dashes hot sauce  
2 to 3 endive for serving (for hors d'oeuvres)

Pat the scallops dry using paper towels. Combine all of the ingredients in a large non-reactive bowl (ceramic, plastic, or stainless steel) except for the endive, if using. Stir to combine. Cover with plastic wrap and refrigerate for 30 minutes to 1 hour or until the scallops have turned completely white and are no longer opaque. Stir once more, drain off some of the liquid and serve. 

If using as hors d'oeuvres, remove the leaves from the endive and place a spoonful of ceviche on each leaf. Arrange on a platter and serve.

Yield: 6 main course servings, or about 20 to 25 hors d'oeuvres  

Notes:
  • Remove the "foot" from each scallop before cutting. The foot is the little square piece of muscle that holds the scallop to its shell (it's slightly different in color than the scallop itself). You can simply peel it off using your fingers. It's tough and should be removed prior to eating.
  • Feel free to make the ceviche a day in advance and refrigerate until ready to serve. Keeps well refrigerated for a couple of days.

Tuesday, July 31, 2012

Ice Cream #5: Zabar's Coffee


I've never been one for iced coffee. Call me crazy, I know, but even in mid-summer I still prefer my coffee hot. I do however, love coffee ice cream. Every kid has their favorite ice cream. I remember going to 31 flavors as a child with my nose pressed against the ice cream case faced with, what felt like at the time, a life altering decision. I went through some distinct ice cream phases: sherbet, cookies & cream, (I always liked the idea of ordering the neon-blue bubble gum flavor, but as expected, it looked more fun than it tasted) but at some point, I finally landed on coffee, and it remains my favorite today. Even when I'm at some fancy ice cream parlor filled with exotic flavors, I find myself fighting the temptation to return to coffee time and time again.


Many coffee ice cream recipes call for instant coffee or brewing strong coffee or espresso and adding it to the ice cream base. In my experience, instant coffee ends up tasting like exactly what it is. It also leaves an odd film on your tongue, which is never appetizing. Adding freshly brewed coffee to the ice cream can dilute it slightly and create an icy consistency in the final product. After much consideration, I thought, why not just "brew" the coffee in the cream base from the start? This way you get to pick your favorite roast and eliminate any of those textural issues. I came across David Lebovitz's coffee ice cream (which does just that) and the rest is history. 


Aaron and I are die-hard Zabar's-blend coffee drinkers (for those of you who live outside New York, Zabar's is an Upper West Side institution. It's a local gourmet food store that's been serving New Yorkers for over 70 years). It's safe to say, our mornings wouldn't be complete without a cup of Zabar's coffee. They roast their beans in-house and sell hundreds of pounds of it a day. We now have our families hooked on the stuff and they continually ask us to bring them some at every family gathering. Of course, you can use whichever bean you prefer, but naturally, I used Zabar's-blend for my ice cream. It would be sacrilege if I didn't.


COFFEE ICE CREAM
Barely adapted from David Lebovitz, The Perfect Scoop

Ingredients:
1½ cups whole milk
¾ cup sugar
1½ cups whole coffee beans 
¼ tsp. sea salt
1½ cups heavy cream
5 large egg yolks
¼ tsp. vanilla extract
¼ tsp. finely ground coffee (pressed through a fine mesh sieve)

Combine the milk, sugar, coffee beans, salt, and ½ cup of the heavy cream in a medium saucepan and heat until very warm, but not boiling. Cover and remove from heat. Let steep for at least 1 hour. 

Pour the remaining 1 cup of heavy cream into a medium size metal bowl. Place the bowl of cream inside a larger bowl filled with a few handfuls of ice. Position a fine mesh strainer on top of both of the bowls and set aside. 

Gently reheat the milk and coffee mixture over medium heat, stirring occasionally (again, do not boil). In a medium size mixing bowl, whisk the egg yolks together. Slowly pour the heated milk and coffee mixture into the yolks, whisking vigorously (you don't want to scramble the eggs). Using a rubber spatula, scrape the warmed egg and cream mixture back into the saucepan.

Cook the mixture over medium heat, stirring constantly. As you stir, scrape the bottom of the pan to avoid scorching. Cook until the mixture is thick enough to coat the back of the spatula, and you're able to run your finger through it without it running, about 10 minutes.  

Once thickened, pour the custard through the prepared strainer and stir it into the cream. Use the spatula to press on the coffee beans in the strainer to extract as much coffee flavor as possible. Discard the beans. Stir in the vanilla extract and finely ground coffee. Continue stirring until cool. 

Place a sheet of plastic wrap directly on the surface of the custard and refrigerate for several hours, preferably overnight. Process in an ice cream maker according to the manufacturer's instructions. 

Yield: About 1 quart

Friday, July 27, 2012

Tomato and Bread Salad with Corn (Panzanella)


This is my favorite summer salad. I've been making it for a number of years and it's a dish I look forward to every season. Whenever my friend Ashley would come over for dinner on her way home from work, she always requested I make this salad. And if I ever wanted her to come over, all I had to do was tell her I was going to make it and a few hours later, the buzzer would ring (much to our dog Lady's delight). I love it when a dish reminds you of a friend or relative, conjuring up memories of good food and laughter. Even though she's moved away from New York, I still think of her every time I make it. Maybe this post will tempt her for a visit sometime this summer... 


I've been making this panzanella for so long, I'd forgotten where it originally came from. I dug through my old magazines and books and finally discovered the original recipe came from Lidia Bastianich's cookbook, Lidia's Italian Table. I love how rustic this salad is and how it makes use of whatever you have on hand. Day-old bread from the previous night's dinner is always a good excuse to make this salad (I find I make that excuse often). I love throwing in olives or kidney beans or any summer vegetables I happen to have lying around the kitchen. The toasted pieces of bread are like big crunchy croutons, which absorb the garlicy vinaigrette.


This salad is all about the tomatoes, so I like to seek out those especially yummy ones from the farmer's market. The ones pictured here are Jersey beefsteak tomatoes I picked up over the weekend. I often look for Heirloom varieties of all shapes, colors, and sizes. It makes for fun eating! I love how the corn kernels look like little bits of confetti thrown in the mix. Their sweetness balances nicely with the acidity in the vinaigrette. A perfect celebration of summer.


TOMATO & BREAD SALAD WITH CORN (PANZANELLA):

Adapted from Lidia Bastianich, Lidia's Italian Table, and Saveur, Issue #130

Ingredients:
3 to 4 medium tomatoes (about 1½ lbs.), cut into large wedges
2 ears of corn, husked, grilled, and cut off the cob (see notes below)
Half a French loaf or country style bread (about 6 oz.) torn into pieces and toasted (see notes below)
2 large handfuls of arugula (about 2 cups)
15 to 20 fresh basil leaves
Half a medium shallot or red onion, thinly sliced
½ cup extra virgin olive oil
3 tbsp. red wine vinegar
2 cloves garlic, minced
Sea salt and freshly ground black pepper, to taste

In a large salad bowl, combine the tomatoes, corn, bread, arugula, basil, and onions. Toss to combine.

In a small bowl, whisk together the olive oil, vinegar, and garlic until well blended. Pour over the salad and season generously with salt and pepper to taste. Toss again and let the salad sit for 5 to 10 minutes before serving, allowing the bread to absorb some of the dressing.

Yield: 6 servings

Notes: 
  • Brush the corncobs with a little olive oil and season with salt and pepper. Grill on each side until you get some nice color.
  • Toast the torn pieces of bread directly on the grill along side the corn. 
  • Feel free to add all sorts of things to this salad. I like throwing in beans, olives, or even feta cheese or slices of Parmesan when on hand.