Sunday, May 6, 2012

Garlic Roasted Artichokes with Lemon Aioli


Growing up in California, I've had my fair share of artichokes. If you take a moment to think about them, they're such a strange vegetable. Every time I eat one, I can't help but wonder how anyone discovered they're edible. Nevertheless, I'm glad they did! In the U.S., artichokes are primarily grown in California and peak in the spring and again in the fall. Look for artichokes that have tightly closed leaves and are evenly green with little or no brown discoloration. They should also feel slightly heavy for their size.  I don't eat them too often on the east coast, as they can cost a pretty penny. Or maybe I'm just used to the roadside stands in Castroville, off the coast of Monterey Bay, that sell 10 for a dollar, or something outrageously wonderful as that. 


As a child, my parents always used to boil them, which is certainly a quick and delicious way to prepare them. This year however, I came across several recipes for roasting them, and came up with my own. Roasting artichokes is a more rustic approach that makes them incredibly flavorful and beautifully browned. In Sicily, they are often cooked directly in open pits of hot embers. In my apartment, roasting is the next best thing. The garlic and oil infuse the artichoke with so much flavor, while the red peppers add a good bit of heat. 


These artichokes are of course amazing to eat all on their own, but if you like a condiment for dipping (aside from mayonnaise) I find this lemon aioli is a fine companion. Frankly, it's kind of like crack. I couldn't stop dipping my artichokes! The aioli takes a few minutes of constant whisking, but by god is it worth it (think of it as a rewarding arm workout). It can also be made in a blender, which is great news for the time-sensitive (or lazy) cook. 


GARLIC ROASTED ARTICHOKES

Ingredients:
5 to 6 cloves garlic, minced 
½ tsp. red pepper flakes
2 tsp. dried oregano
¾ cup olive oil
4 globe artichokes
Balsamic vinegar, for drizzling
Sea salt and freshly ground black pepper
Lemon

Preheat oven to 425 degrees F. In a small bowl or measuring cup, combine the garlic, red pepper flakes, oregano, and olive oil. Mix well and set aside.

To prepare the artichokes, cut off their stems and rub the bottoms of each with lemon juice to prevent browning. Using a serrated knife, cut about 1½ inches off the top of each artichoke and discard. Using scissors or kitchen shears, cut off the top half of the remaining leaves (the prickly part). Rub the artichokes with lemon juice. 

Tear off 4 sheets of aluminum foil per artichoke (large enough to wrap around the entire artichoke). Place an artichoke in the center of each piece and spoon the garlic and herb mixture over each. Work the mixture in between the leaves using your fingers or a small spoon. Pour the oil evenly over the 4 artichokes. Drizzle each with balsamic vinegar and season with sea salt and freshly ground pepper. Wrap the foil around the artichokes (I like to double wrap mine to prevent leaking). Place the wrapped artichokes in an ovenproof baking dish and roast for 1¼ hours. 

Yield: 4 roasted artichokes 

Notes:
  • The artichokes are roasted with their choke intact. Once you've peeled away most of the outer leaves, you'll see small purple leaves in the center of the artichoke. Pull these out and using a spoon, scrape out the rest of the choke and discard, being careful not to dig into the heart. Then you can continue eating your artichoke heart with ease!

LEMON AIOLI 
Adapted from Saveur magazine

Ingredients:
1 clove garlic, smashed
¼ tsp. kosher salt
2 egg yolks
2 tsp. Dijon mustard
½ tsp. lemon zest, minced
2½ tsp. lemon juice
2/3 to 1 cup olive oil
Salt and freshly ground black pepper

Using a mortar and pestle, mash the salt and garlic together to form a paste. Place in a medium sized bowl and add the egg yolks, mustard, lemon zest, and juice. Whisk until smooth. While whisking constantly, add the olive oil a few drops at a time (I like to transfer the oil to a squeeze bottle for ease in pouring). Allow the oil to become fully incorporated before adding more, a little at a time. As the aioli begins to thicken, add the oil in a very slow and steady stream, still whisking constantly (if the mixture begins to separate, stop adding the oil and drizzle with a few drops of lukewarm water. While whisking, continue adding water a little at a time until the mixture comes back together. Then continue adding the oil). The end result should be thick, smooth, and creamy. Season with salt and pepper to taste. 

Blender method:
Place the all of the ingredients, except for the oil, in a blender and puree until smooth. With the blender running on low speed, slowly add some of the olive oil a little at a time. As the mixture begins to thicken, gradually pour the oil into the blender in a slow and steady stream, until a smooth and creamy consistency is reached (if the mixture begins to separate, stop adding the oil and drizzle with a few drops of lukewarm water. While the blender is running on low speed, continue adding water a little at a time until the mixture comes back together. Then continue adding the oil).

Thursday, May 3, 2012

Cookies & Cream Ice Cream


Aaron specially requested this ice cream as one of his edible birthday presents this year. This is one of his favorite ice creams that I make and little does he know how easy it is to make! This particular recipe is a Philadelphia style ice cream, which unlike French style ice creams, does not contain eggs. That means it's incredibly easy and less work to make. You don't have to separate eggs, temper, or cook the base to create a custard (good news for the lazy cook). Though it's not as rich as some egg-based ice creams, it's still sinfully delicious, and surprisingly light and refreshing. 


Unfortunately, I have no idea where I found the original recipe. By now, it has been adapted and over the years morphed into something all my own. All I know is that after the first time I made this ice cream, I immediately wrote down my version of the recipe so I wouldn't forget it. That's always a good sign. 


This tastes the way cookies and cream ice cream is supposed to taste. There are no fillers or additives commonly found in store-bought ice creams. It's a simple recipe made with simple ingredients. Since there are no eggs, the flavor of the cream stands out beautifully. Sometimes I just crave that unadulterated creaminess and this hits the spot. I wouldn't be surprised if I get another request for this in just a few days. 


This ice cream marks the beginning of my year-long ice cream challenge (Aaron's idea, no big surprise). My challenge is to make two ice creams (including sorbets and gelatos etc.) a month, 24 in a year. I realize many people don't have an ice cream maker, but this is a personal challenge I've set for myself just for fun. I figured some of you would like to follow along, ice cream maker or not. We love having frozen desserts in the house and this is a great way to ensure a constant supply!


COOKIES & CREAM ICE CREAM

Ingredients:
1½ cups whole milk
1 cup sugar
¼ tsp. sea salt
2½ cups heavy cream
1½ tsp. vanilla extract
3 cups chocolate cream-filled cookies (2 cups chopped & 1 cup broken into large pieces)

In a 2-quart saucepan, add the milk, sugar, and salt. Heat over medium heat, whisking every so often, until the milk begins to simmer and the sugar has completely dissolved (approximately 175 degrees F). Remove from heat and let cool for a few minutes. 

Once cooled slightly, add the cream and vanilla extract and whisk to combine. Transfer the cream mixture to a medium-sized mixing bowl and cover with plastic wrap. Refrigerate for 4 hours or overnight. 

Transfer the cream mixture to an ice cream maker and process according to the manufacturer's instructions. Transfer the ice cream to a large metal bowl. Using a rubber spatula fold all of the cookie pieces into the ice cream. Scoop the ice cream into plastic containers and freeze for several hours or over night.

Makes about 1¾ quarts 

Notes:
  • If you're adverse to eating the Nabisco brand Oreo's, look around and you can find many different varieties that taste equal to or better than Oreo's themselves. I like to use Whole Food's 365 brand or Late July brand cookies. Also, refrigerating the cookies makes them easier to chop.

Sunday, April 29, 2012

Old-Fashioned Banana Spice Cake


Each year on his birthday, I let Aaron select a cake and ice cream of his choosing. I pile up my cookbooks, magazines, and various clippings and let him have his pick. I think it's a slightly overwhelming task and each year I can see he gets a bit nervous, hoping he makes the right decision (all the while knowing he can't really go that wrong). I love this process, because he inevitably chooses something that I wouldn't choose myself, or an unexpected recipe I've forgotten about or never used. 


This year he chose an Old-Fashioned Banana Spice Cake from Birthday Cakes, a collection of recipes by Kathryn Kleinman and Carolyn Miller. He loves bananas and saw in the ingredient list that the cake calls for mace. I often find him rummaging through the spice rack seeking out the coveted scent of mace. I believe this is what sold him (even though it only calls for a pinch). I love how home-spun the cake looks, spilling over with heavenly custard, stuffed with bananas, and topped with freshly whipped cream. 


This particular recipe comes from chef, restaurateur, and cookbook author, Bradley Ogden. Growing up, this was one of his favorite birthday cakes. I wouldn't say this cake screams birthday, but that's why I think it's a good choice. It's a departure from the sweet and overly frosted cakes (which, don't get me wrong, I deeply love) that are synonymous with birthdays. It's a nice change, not to mention absolutely delicious! We had a few friends over for cake and bubbly, and it was devoured in less than 30 minutes. Judging by the outcome, I would have to say Aaron made an excellent choice this year.


OLD-FASHIONED BANANA SPICE CAKE
Adapted from Bradley Ogden, Birthday Cakes

Ingredients:

For the cake:
½ cup (1 stick) unsalted butter, at room temperature
1½ cups granulated sugar
2 large eggs, room temperature
1 cup mashed ripe bananas (2 to 3 bananas)
1 tsp. vanilla extract
2 cups cake flour
1 tsp. baking soda
½ tsp. salt
½ tsp. ground cinnamon
1/8 tsp. ground allspice
Pinch of ground mace (or ground nutmeg)
½ cup buttermilk well shaken, at room temperature 

For the filling:
1½ cups whole milk
½ cup granulated sugar
4 large egg yolks
6 tbsp. all-purpose flour, sifted 
Pinch of salt
2 tbsp. unsalted butter
1½ tsp. vanilla extract
1 or 2 tbsp. heavy cream or milk (optional)
5 to 6 bananas, peeled and sliced
Simple syrup (see notes below)

For the topping:
1 cup cold heavy cream 
3 tbsp. confectioner's sugar, sifted
¼ tsp. vanilla extract

Preheat the oven to 350 degrees F. Evenly butter the sides and bottoms of two 8-inch round cake pans. Cut two pieces of parchment to fit the bottoms of both pans. Stick the parchment to the buttered pans and butter the parchment. Toss some flour in the pans to evenly coat, knocking out any excess flour. Set aside.

Using an electric mixer on medium speed, cream the butter and sugar together in a large bowl for about 10 minutes or until light and fluffy. Beat in the eggs, mashed banana, and vanilla extract. Sift the flour, baking soda, salt, and spices together onto a large sheet of waxed paper. While stirring, funnel the flour mixture into the banana mixture alternatively with the buttermilk.

Spoon the cake batter into the prepared pans (if you have a kitchen scale, weigh the batter and distribute it evenly between the two pans), and smooth the tops with a spoon or rubber spatula. Bake for 25 to 30 minutes, or until a cake tester or wooden toothpick inserted into the center comes out clean. Transfer the pans to wire racks and let cool for about 10 minutes. Unmold the cakes onto the racks and let cool completely before frosting.

While the cakes bake, make the custard filling: In a 2-quart saucepan, heat the milk over low heat until you see small bubbles beginning to form around the edges of the pan (keep and eye on it and be careful not to boil). Remove from heat and let it rest for a few minutes. Meanwhile, using an electric mixer, beat the sugar and egg yolks together in a small bowl, until the sugar is incorporated and the mixture is pale yellow in color, about 2 minutes. Slowly beat in the flour and salt. Increase the mixer speed to medium and very slowly pour in the hot milk.

Return the mixture to the saucepan and cook over low heat, whisking constantly, about 3 to 4 minutes. As soon as the custard begins to thicken, remove the pan from the heat and whisk it vigorously for a few seconds. Whisk in the butter and vanilla. Transfer the custard to a small bowl and let cool for a few minutes. Place a sheet of plastic wrap directly on the surface of the custard and refrigerate until completely cool, about 1 to 2 hours or overnight. 

To assemble the cake, split each cake in half using a long serrated knife. If the custard seems to thick to spread, thin it with a little cream or milk. Lightly brush the first cake layer with simple syrup. Spread one-third of the custard and evenly arrange one-third of the banana slices on top of the custard. Repeat with the next two layers. Carefully top with the fourth layer. Place in the refrigerator for about 30 minutes to allow the custard to firm up. Meanwhile, place a small deep mixing-bowl and the whisk attachment to an electric mixer in the freezer to chill.

Just prior to serving (or about an hour before serving if you'd like to make it ahead), make the topping. Remove the bowl and whisk attachment from the freezer. Add the cream to the bowl and using an electric mixer, whip the cream until soft peaks form. Beat in the sugar and vanilla. Using a rubber or cake spatula, spread the whipped cream frosting over the top of the cake, creating a design if desired. 

Yield: One 8-inch, 4-layer cake (serves 10 to 12)

Notes:
  • To make the simple syrup, combine 1 cup of granulated sugar with 1 cup of water in a small saucepan. Heat until the sugar is completely dissolved. Let cool before placing in a clean jar or bottle and refrigerating. Brushing the cakes with simple syrup will keep them nice and moist and prevent them from drying out. It's especially important to do this in cakes that are not frosted and exposed on the sides, such as this one.
  • Feel free to bake the cakes and make the custard the day before serving. Once cooled, place the cakes in gallon-sized zip-top bags or wrap with several sheets of plastic wrap. Cut and assemble the cakes the following day. 

Wednesday, April 25, 2012

Wooden Happy Birthday Banner


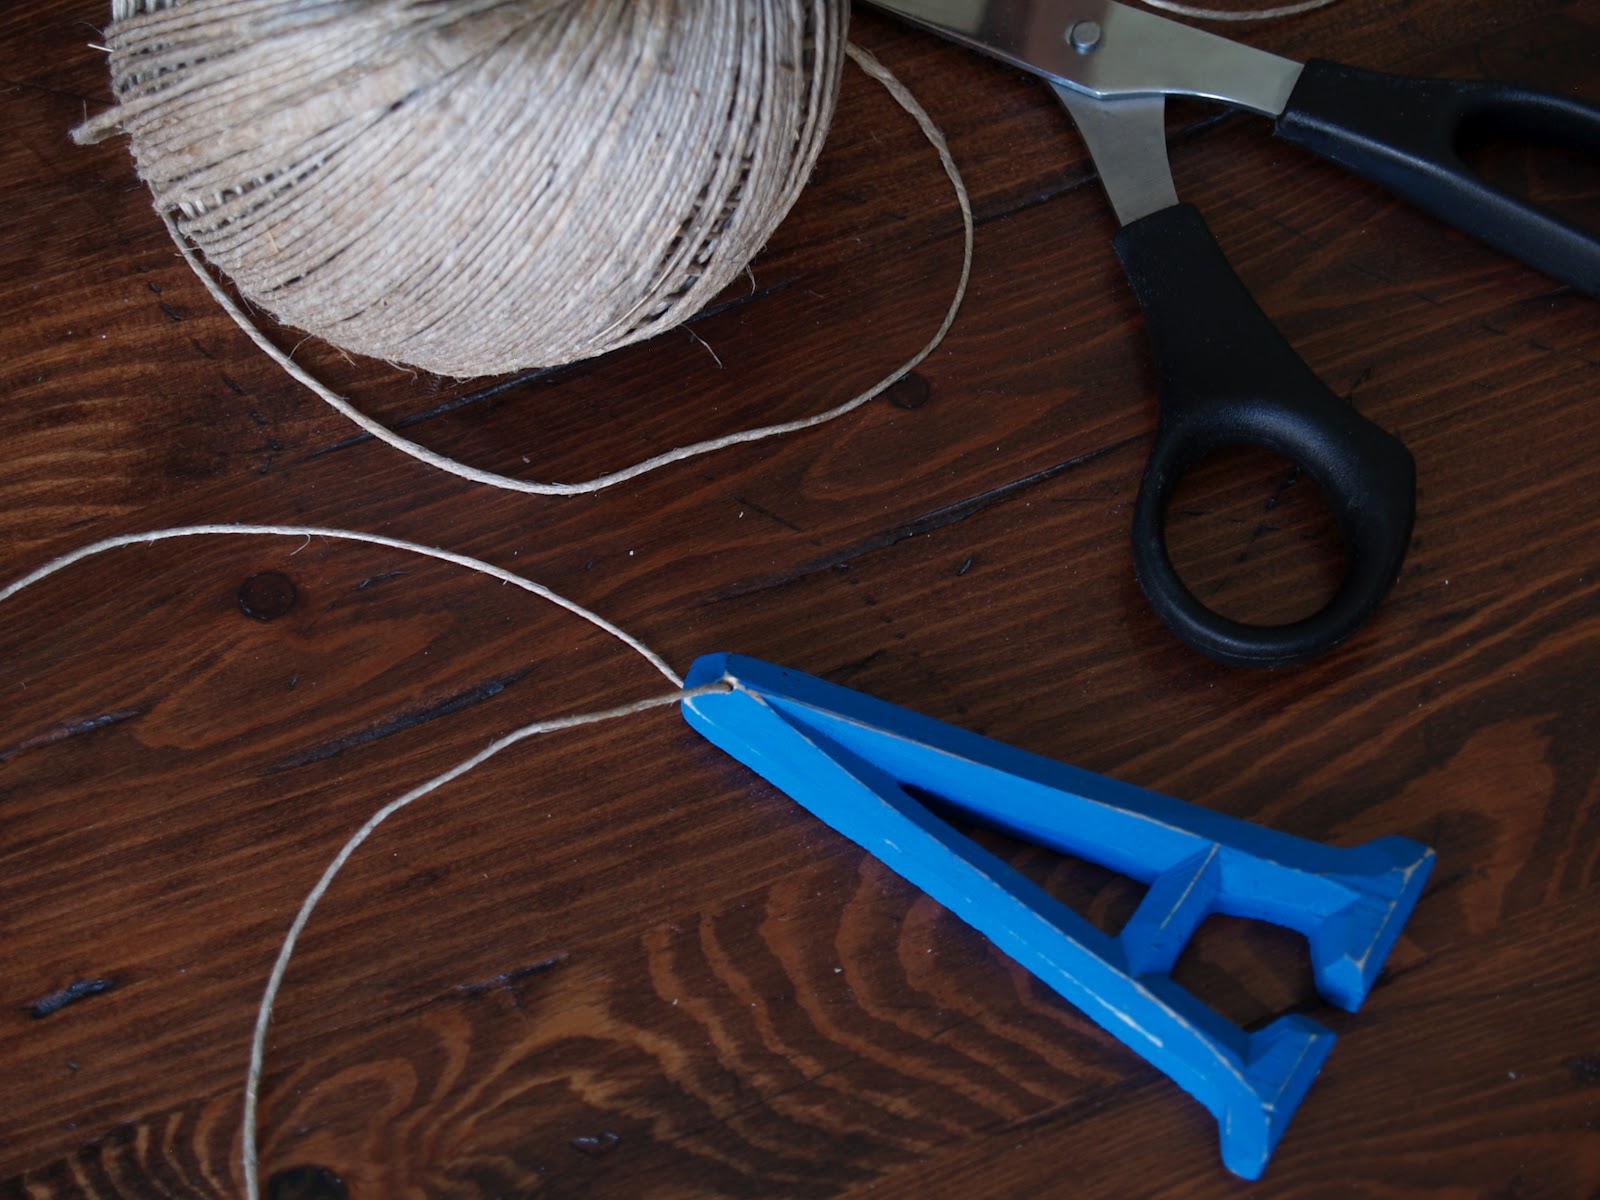
Every year for Aaron's birthday, I used to make a paper happy birthday banner. It was time consuming and only lasted a few hours before it was curling in on itself and falling apart. A few years ago I decided to remedy this problem by making a birthday banner out of wooden letters. Using paint I'd accumulated over the years and a ball of twine from the closet, I was able to construct a cheerful, celebratory sign that will last for many birthday's to come.


I love the use of simple bright colors when it comes to birthday decorations. Maybe because it reminds me of childhood, but the color combination has always put me in a jolly mood. The bright letters are contrasted by the rustic, neutral twine. Lightly sanding the edges of the banner gives it a homey, broken-in feel. I love this birthday banner because it reminds me of good times and eating delicious cake!


Here's how to make it:
  1. Buy the wooden letters at your local craft store. You can usually find them in a variety of sizes and styles. 
  2. Using a hand drill attached with a 1/3-inch drill bit, drill holes into the tops of each letter.
  3. Paint the letters in your favorite colors.
  4. Lightly sand the edges of each letter.
  5. Measure a length of ribbon or twine to attach the letters to.
  6. Thread thin twine or ribbon through the holes in the letters and tie them to the long piece of twine. 

Sunday, April 22, 2012

Arugula Pesto


Happy Earth Day! I can't think of a better way to celebrate than eating some delicious arugula pesto. Arugula pesto is a fun take on traditional basil pesto. A great alternative when basil is not in season and a perfect substitution for any dish where you'd normally use pesto. Arugula is easily one of my favorite greens. It creates a wonderfully bright green pesto with a peppery finish, making it a great addition to many spring dishes. I've used basically the same recipe as my basil pesto, just tweaked it a bit. A couple of batches of this will hopefully tide me over until my basil plant is in full bloom in a couple months.


I always feel somewhat silly writing down a recipe for pesto, as I find it's more of a guide than a set in stone master recipe. Pesto is completely dependent on the quality of your ingredients. Buy the freshest basil or arugula, use a good quality olive oil, and most importantly, real Parmigiano Reggiano. It's way more expensive than most of the stuff found in supermarkets, but it will reward you plenty! 


ARUGULA PESTO


Ingredients:
4 cloves garlic, peeled
¾ cup Parmigiano Reggiano cheese, finely grated
¼ cup pine nuts, lightly toasted
2½ cups fresh arugula
½ cup olive oil
¾ to 1 tsp. sea salt
1/8 to 1/4 tsp. pepper 

Add the garlic, parmesan, and pine nuts to a blender or food processor and blend to a smooth paste. Add the arugula, olive oil, salt and pepper, and purée until you’ve reached a smooth and creamy consistency. Taste to adjust seasonings and refrigerate until ready to use. 

For long-term storage, transfer pesto to ice cube trays. Freeze overnight and transfer to zip-top bags (this allows for smaller serving sizes, so you're not stuck with a solid block of pesto, helping it to defrost more quickly). 

Yield: about 10 oz. or 1¼ cups

Notes:
  • If you’re doubling or tripling this recipe, do it in batches, or as much as your blender or food processor will allow.
  • I like my pesto on the saltier side, so feel free to reduce the amount of salt, also taking into consideration how salty your parmesan is.
  • In a pinch, you can always substitute walnuts for pine nuts.