Thursday, November 24, 2011

Cranberry & Wine Relish


Since college, a group of friends and I have gotten together to celebrate Thanksgiving. Many of us either have to work the holiday weekend or have families on the other side of the country, making it sensible for us all to have Thanksgiving together. Anyone who's in town is welcome to attend and the guests vary from year to year. No matter who is in attendance, we always manage to have a lot of fun. Cocktails and no cranky Aunt Lou Lou tend to make the occasion a bit more merry!


This recipe has evolved over time at our annual Thanksgiving celebrations and is the real deal. Cranberry sauce often gets pushed aside, but there's no reason why it shouldn't be a standout dish at the table. To me, this recipe just tastes like the holidays. Homemade cranberry sauce, or relish, is leagues better than that canned stuff (something that I'm sure would leave the Pilgrim's baffled). That being said, I still have one friend who occasionally smuggles in his beloved canned cranberry despite my homemade offerings, more for nostalgia's sake than anything else. But in my opinion, this recipe beats the can every time. Happy Thanksgiving to you and yours!


CRANBERRY & WINE RELISH:

Ingredients:
1½ lb. fresh cranberries (about 6 cups)
1/3 cup red wine
1/3 cup water
Juice of 1 orange (about 1/3 cup)
1 1/2 cups granulated sugar
2 tsp. orange zest, finely grated
1 tsp. cinnamon
½ tsp. allspice
¼ tsp. nutmeg 
½ cup walnuts, roughly chopped and toasted
½ cup pecans, roughly chopped and toasted
½ cup golden raisins
½ cup red raisins
Aged balsamic, for garnish (optional)

Wash and pick over the cranberries; remove stems and discard any shriveled berries. Combine wine, water, orange juice, and sugar in a large saucepan and bring to a boil. Reduce heat to a simmer and cook until the sugar is dissolved and the syrup has slightly thickened, about 5 minutes. 

Add the cranberries, return to a boil, and then immediately reduce heat to a simmer. Simmer the berries in the syrup uncovered, stirring very gently until the relish has thickened and the berries are slightly translucent and begin to burst, about 5 to 7 minutes (some will burst completely and some will remain slightly whole). Skim off any foam. Remove from heat and stir in the orange zest and spices. Gently stir in nuts and raisins. Refrigerate until ready to use. Lightly drizzle with aged balsamic just before serving. Serve hot or cold.

Yield: about 1½ quarts

Note:
For a tarter relish, reduce the sugar by ½ cup.

    Monday, November 21, 2011

    Thanksgiving Dinner Rolls


    This recipe comes from Tom Colicchio, the former executive chef at Gramercy Tavern in NYC, and was also featured on Saveur.com and The Heritage Cook. These dinner rolls are perfect for the Thanksgiving table. There's nothing like the scent of freshly made bread wafting throughout the home. Frankly, I was salivating. The good news is that they can be made days or weeks in advance and frozen until ready to use. This will free up much of your time, especially if you're cooking for a whole gaggle of folks this Thanksgiving. These yeasty delights have a crisp flaky top and a light and fluffy center. Need I say more?


    First rise

    Deflating dough

    Second rise

    Third rise


    DINNER ROLLS:
    Adapted from Tom Colicchio

    1 1/2 cups whole milk, heated to 110 degrees F
    2 tsp. barley malt syrup
    2 packets active dry yeast (2 1/4 tsp. each)
    4 cups all purpose flour
    1 1/2 tsp. kosher salt
    4 tbsp. unsalted butter, melted and slightly cooled (should not exceed 110 degrees F)
    2 tbsp. unsalted butter, melted for brushing
    Sea salt or fleur de sel, for sprinkling

    In a small sauce pot, heat the milk to 110 to 115 degrees F, over low heat. Use an instant read thermometer to be absolutely sure you've reached the right temperature (be sure not to overheat the milk, as this will kill the yeast and the rolls won't rise). Remove from heat and transfer to a small bowl; stir in malt syrup. Stir in yeast and let sit until foamy, about 10 minutes.

    In a medium sized bowl, whisk together flour and salt. Add the milk mixture along with the 4 tbsp. of melted butter and stir together with a wooden spoon until a dough forms. Transfer to a lightly floured surface and knead until dough is satiny and no longer sticky, about 5 to 6 minutes. Roll dough into a ball and place inside a buttered bowl, turning once, so all the dough is lightly covered in butter. Cover with a clean kitchen towel in a warm place until doubled in volume. The first rise will take about 60 to 75 minutes.

    When the dough has risen, uncover and press it down in the center to deflate, don't punch it. Form the dough into a smooth ball, cover and let sit until doubled in volume again. The second rise will take another 60 to 75 minutes.

    Butter a 12-inch cast iron skillet. Portion the dough into 28 to 30 equal pieces, about 1 1/2-inch diameter balls, about the size of a ping pong ball (a bench scraper works great to cut the dough). Transfer the rolls to the prepared skillet. This will be a nice tight squeeze and all the rolls should be touching each other. As before, cover the rolls with a kitchen towel and let rise until doubled in size. The third rise will take about 1 1/2 to 2 hours.

    Preheat the oven to 375 degrees F thirty minutes prior to baking the rolls. Once the rolls have risen, brush with melted butter and sprinkle with sea salt or fleur de sel. Bake until the tops are lightly browned, about 20 to 30 minutes. If they are browning too quickly, tent loosely with foil. If they are not browning fast enough, increase the oven temperature to 400 degrees F. Remove from oven and let rest in the pan for 5 to 10 minutes before removing. The rolls should come out in one large piece (like a pull-apart loaf). Place on a cooling rack and serve warm or at room temperature.

    Place the rolls in a well-sealed plastic container if using the following day. Otherwise, after cooling completely, wrap the entire "loaf" with plastic wrap and again with tin foil. Freeze for later use. To reheat, place the uncovered loaf directly on a baking sheet in a preheated 300 degree F oven. Bake about 5 to 10 minutes or until warmed through. Once warm, break apart the rolls and serve immediately.

    Yield: 28-30 rolls

    Notes:
    • Since my kitchen was a bit cool, I let the dough rise in the oven. Turn the oven onto 250 degrees F for about a minute and then shut off- you don't want it to get too hot. Place the covered dough in the slightly warmed oven. Repeat with each rising session. If you're already baking something in the oven, simply place the bowl near it to stay warm. 

    Friday, November 18, 2011

    Peanut Brittle Ice Cream


    For as long as I can remember, my parents and grandmother have been sending me See's Candy peanut brittle. I have to admit, it's some of the best store-bought brittle I've ever had. No matter what holiday or birthday, I've always received a big box of it via mail, even in college. As there are no See's Candy stores on the east coast, these were always welcome care packages. Before long, the boxes started accumulating in our fridge, especially around the holidays when there's already plenty of candy and sweets to go around. We were getting more of it than we could possibly eat at one time. What to do with all that peanut brittle? 


    On Aaron's birthday, its become a tradition for me to make him a cake of his choosing, along with an ice cream to go with it. This year, he told me he wanted some sort of peanut buttery concoction (he and his sister are peanut butter addicts). He was having a dilemma, since he loves my homemade vanilla ice cream, but wanted a peanut butter type too! One day, much to my dismay, the boxes of brittle came crashing down in the kitchen. Aaron said it was time to say goodbye to our beloved brittle collection... in the form of ice cream! Of course, why hadn't I thought of it before! We soon discovered peanut brittle ice cream is like peanut brittle on crack. I absolutely loved it, but I knew it was really good when my "weight conscious" girl friends were asking for more. If I'm not mistaken, I think Aaron remembers the day with particular fondness, or at least his bowl of ice cream. A happy birthday indeed! 


    Now that we have discovered the perfect vessel for our plethora of See's brittle, I'm begging my parents to send more (hint, hint)! The brown butter base for this ice cream is tasty on its own, but the brittle takes it to a whole new level. Of course, you can make this ice cream anytime of the year, but I made it just the other night for dinner guests and I think it works nicely with a fall inspired meal.   


    PEANUT BRITTLE ICE CREAM:

    Adapted from Janet Fletcher, Bon Appétit, January 2008 

    Ingredients:
    6 Tbsp. (3/4 stick) unsalted butter
    2 cups heavy whipping cream
    1 cup whole milk
    6 large egg yolks
    1/3 cup sugar
    1/3 cup dark brown sugar
    ¼ tsp. sea salt
    ¼ tsp. vanilla extract
    3 cups homemade or good quality store-bought peanut brittle, chopped (plus extra for garnish)

    Melt butter in small skillet over medium-low heat. Cook until butter turns dark amber, stirring occasionally, about 5 to 6 minutes being careful not to burn. Pour through fine strainer into small bowl and set aside.

    Bring cream and milk to simmer in large saucepan. Whisk egg yolks, both sugars, and salt in large bowl until thick and well blended. Add brown butter; whisk to blend.

    Gradually whisk hot cream mixture into yolk mixture to temper; return to same saucepan. Stir mixture over medium-low heat until an instant-read thermometer registers 178°F, about 5 minutes. Strain custard into large bowl. Set bowl over larger bowl of ice water. Stir until custard is cold. Stir in vanilla.  Lay a sheet of plastic wrap directly on the custard, and another over the bowl.  Refrigerate overnight.

    Process custard in an ice cream maker according to the manufacturer's instructions. Transfer ice cream to a large bowl and stir in peanut brittle. Transfer ice cream to quart containers and freeze. Garnish with a sprinkling of chopped peanut brittle before serving.

    Yield: about 1½  quarts

    Monday, November 14, 2011

    Butternut Squash Ravioli


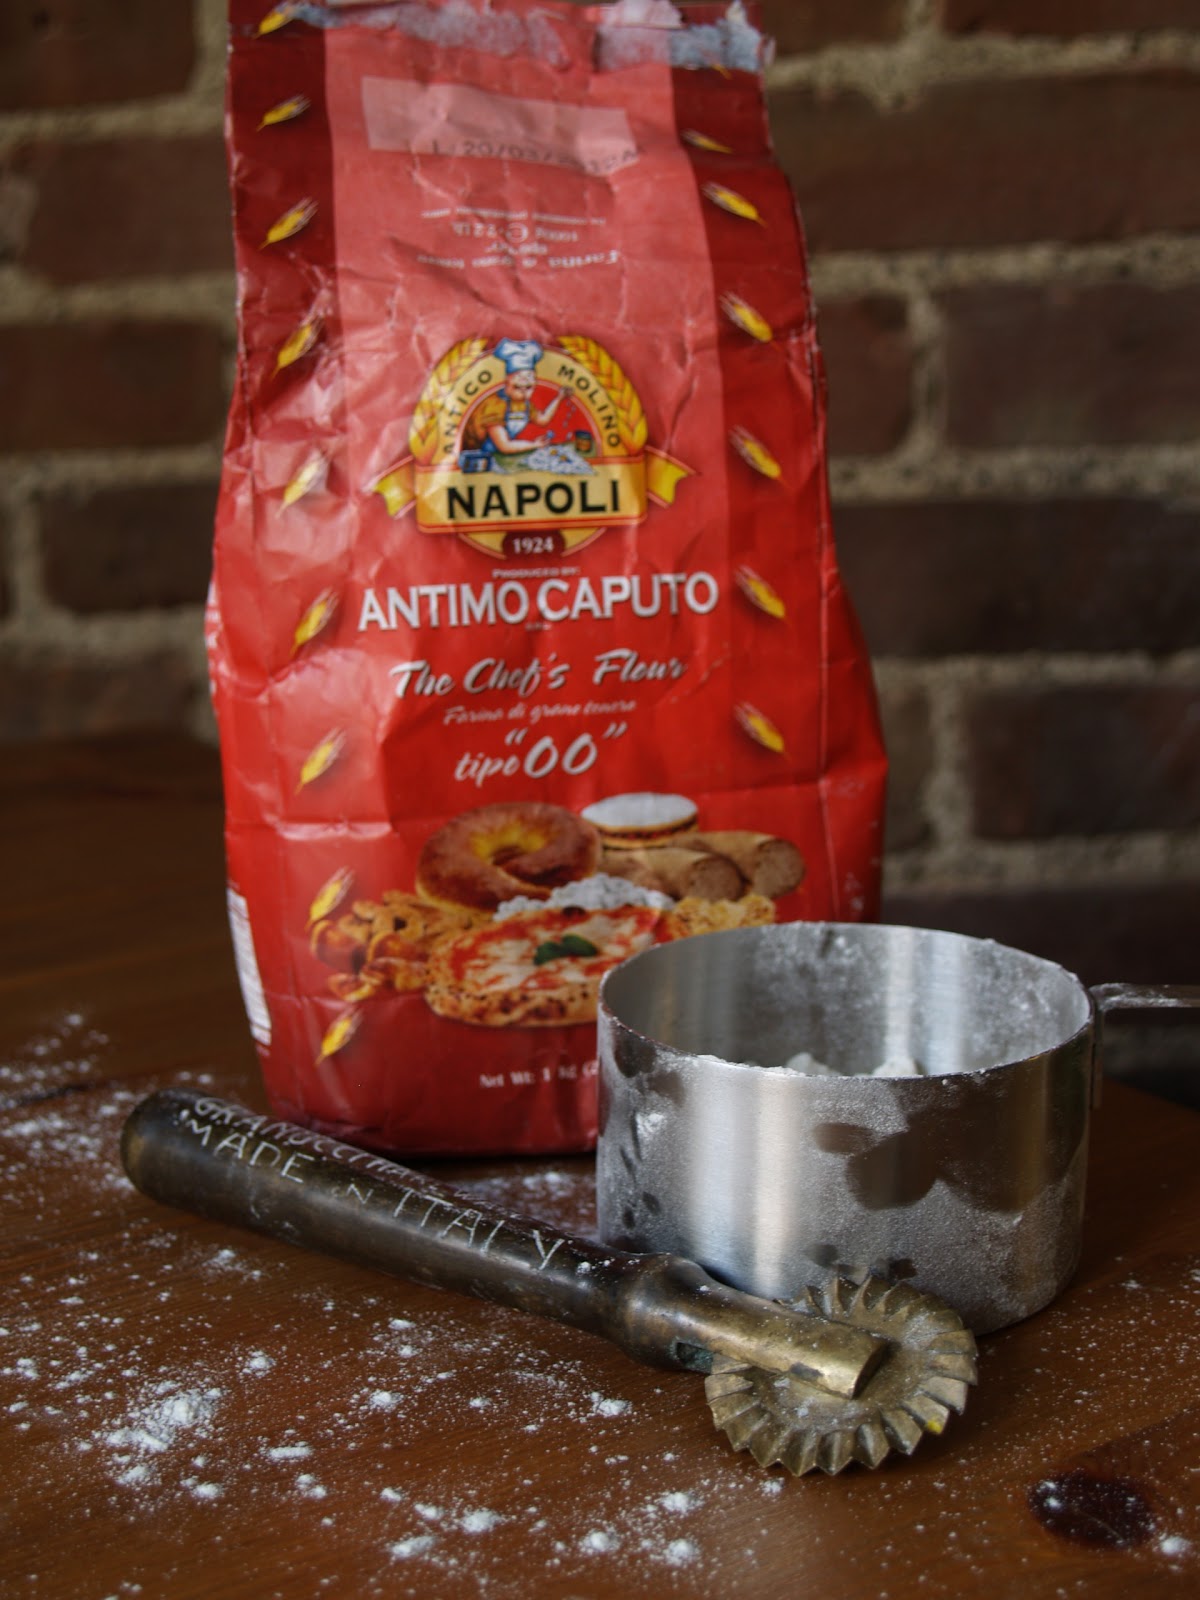
    Butternut squash ravioli is easily one of my favorite dishes to prepare and eat. A few years ago my parents gave me my great grandmother's ravioli cutter from Italy, now a cherished possession in my kitchen. When I was little, and unaware of the ravioli cutter's purpose, I used to use it as a pizza cutter. No wonder it never worked!


    As a child, I remember picking up delicious meat-filled raviolis from The Depot, an old Italian restaurant in Napa, CA. We used to drive to the back, straight to the kitchen entrance, and pay the cook for his freshly made raviolis. As good as those were, there's nothing better or fresher than making your own.


    Butternut squash is one of my favorite fall and winter vegetables. The filling for these raviolis is, as you might expect, like butter. It's smooth and creamy and what I consider the essence of comfort food. Many recipes call for mascarpone cheese in a squash filling, but I just use a good quality parmigiano reggiano, partly because it's always what I have on hand. My filling is extremely simple, made up of squash, parmesan, nutmeg, salt and pepper. Don't be deceived by its simplicity; the flavor is out of this world.  


    BUTTERNUT SQUASH RAVIOLI:


    Ingredients:
    For the squash filling:
    2 cups butternut squash purée
    ½ cup finely grated parmigiano reggiano
    heavy pinch nutmeg (freshly ground if you have it)
    ¾ tsp. sea salt
    ¼ tsp. freshly ground black pepper

    For the brown butter sauce: 
    12 tbsp. unsalted butter
    1 tsp. sea salt
    16 fresh sage leaves
    Freshly grated Parmigiano reggiano, for garnish
    Chopped toasted pecans (you could also use walnuts or hazelnuts), for garnish

    Start by making the filling. Preheat oven to 400 degrees F. Cut squash in half, seed and place cut-side down on a foil lined sheet pan. Cook for 35-45 minutes (depending on size), until skins have blistered and squash is soft to touch. Cool and peel off outer skins. Puree squash in a food processor until perfectly smooth. Add 2 cups of squash puree to a medium-sized bowl, along with the Parmesan, nutmeg, salt and pepper. Mix well to incorporate. Refrigerate filling until ready to use (can be made a day or two in advance).

    See my recipe for making homemade pasta here. Once all of your pasta is rolled out to 1/8 inch thick, and slightly transparent, it's time to fill it! Using a small spoon, place about ½ tsp. (for smaller raviolis) or 1 tsp. (for larger raviolis) of squash filling on one half of one sheet of pasta. Space the mounds of filling about 1½ inches apart (for smaller raviolis) or 2 inches apart (for larger raviolis). Dip your finger or a silicone brush into a small bowl of water and use it to brush water around the mounds of filling. Fold the other half of dough over the top of the side your mounds are on (like closing a book) and press around each mound firmly, being sure no air is trapped.

    Use a ravioli cutter, pizza cutter or small paring knife to cut the dough into individual raviolis, seeing that each one is well sealed (if you're not using a ravioli cutter, seal the edges gently with a fork). Place the ravioli, not touching one another, on parchment-lined sheet pans, dusted with flour (turn them occasionally to keep from drying out). Cover with plastic wrap and continue to fill the rest of your dough.  

    When it comes time for you to cook your pasta, bring a large pot of water to a rolling boil. Add a generous amount of sea salt (it should taste like the sea). Add a splash of olive oil to keep the raviolis from sticking. Cook the pasta for 3 to 5 minutes, until al dente and they begin to float to the surface.

    Meanwhile, make the brown butter sauce. In a small saucepan, melt the butter and salt over medium-low heat. Add the sage leaves and cook, stirring often, until the butter begins to brown, and the sage is crisp, about 5 minutes. Using a slotted spoon, transfer the sage leaves to a paper towel lined plate. Drizzle the browned butter sauce over the pasta, toss on a few sage leaves, chopped toasted pecans, and Parmesan and serve immediately.

    Yield: 4 servings

    Friday, November 11, 2011

    Homemade Pasta


    Many people get intimidated by making fresh pasta because they feel like they need a bunch of fancy gadget's. This couldn't be farther from the truth. When I first learned to make pasta, I rolled it out by hand using a rolling pin and cut it into ribbons using a small knife. This past Christmas, my parents gave me a pasta maker, which is a time saver and helps to make the dough more consistent and perfectly even, which I love. But a pasta maker is by no means necessary to make great pasta. In fact, if it's your first attempt at making pasta dough, you might find it useful to roll it out by hand. This will give you a chance to really work with the dough and know when you've reached the right consistency. I feel like I learn faster when I get intimate with food, getting my hands dirty and using a little elbow grease!


    Often times, I like to try different pasta recipes or play around with proportions whenever I make fresh pasta dough. I'll try 4 eggs instead of 3, add an extra egg yolk, add a little toasted wheat germ, play around with different flours etc. But my go-to recipe has always been from Joy of Cooking, and that's the one I've provided below. It's the first recipe I used when I started making pasta, and one that I find gives the most consistent results. Of course, anytime you make pasta, you'll be adding a little more flour or water, depending on the consistency of your dough. No batch of pasta is exactly alike.


    FRESH PASTA DOUGH:
    Courtesy: Joy of Cooking, by Irma Rombauer, Marion Becker, and Ethan Becker

    Ingredients:
    2 cups unbleached all-purpose flour or Italian “tipo 00” flour (see notes)
    3 large eggs
    ½ tsp. sea salt
    1 tsp. olive oil

    On a clean counter, use your flour to create a well. Add to the well the rest of the ingredients. Beat the eggs lightly with a fork, drawing in some flour as you go, until the eggs are mixed and slightly thickened. Using the fingertips of one hand, gradually incorporate the flour into the eggs and blend everything into a smooth, not too stiff dough. If the dough feels dry and crumbly, add a little water or milk just until the dough combines. If it's too sticky, add a bit more flour, a little at a time. Use a dough scraper to lift and turn the dough if it sticks. It should be firm but not sticky.

    Knead the dough until satiny and very elastic, about 10 minutes (you can really work the dough here, so if you knead gently, it may take longer than 10 minutes). Divide the dough into 4 pieces, and wrap loosely in plastic wrap or cover with an inverted bowl. Let the dough rest at room temperature for 1 hour before rolling out.

    Roll the dough out by hand, or use a pasta machine following the manufacturer's instructions. In either method, you want the dough to be about 1/8 inch thick or less. If you're rolling your dough out by hand, use a heavy rolling pin and apply even pressure. Work on one piece of dough at a time until you reach the desired thickness. It's important to remember that unlike other pastry dough’s that require a cool working environment, pasta dough will dry out or get stiff. So after you've rolled it out, dust it with a touch of flour, cover it with plastic wrap, and set aside. You want to keep it elastic and smooth. Cut it into the desired shape using a pasta maker or a small knife. 

    Note:
    • In Italy, flour is categorized as 1, 0, or 00 and refers to how finely ground the flour is and how much bran and germ they contain. The percentages of gluten and protein also vary. This summer, I started using tipo 00 flour (which is the most finely ground) in place of all-purpose in my pasta, as per the suggestion of my friend Carolyn and other pasta recipes I've come across. I have to say, I like the texture the tipo 00 flour provides. The dough is extremely supple, soft, and smooth. However, it's certainly not necessary and I've been making pasta with unbleached all-purpose flour for years with wonderful results. Since tipo zero can be hard to find, I save it for special occasions. 


      Monday, November 7, 2011

      Chicken Tikka Masala


      Chicken Tikka Masala was the first thing I ever ate at an Indian restaurant, so it's no surprise it was the first Indian dish I made at home. I'm no authority on Indian cookery, so my ignorance leaves me to be guided solely by my taste buds. I've found one of the great things about Indian food is that it allows me to experiment and play around in the kitchen.


      There has always been some mystery surrounding the origin of chicken tikka masala. Most people think it's an authentic Indian dish, but after doing some research, I discovered that it may have been created in Scotland or England as recently as the 1950s or 60s. However, some still argue it originated in the Punjab region of South Asia. While there is much discrepancy as to the source of this classic dish, we can all agree that it tastes good!  


      I love this recipe. The sauce is rich, creamy, and even better the next day when the flavors have had a chance to meld. It's a fun dish to cook for company; you can prepare it the night before and simply reheat it when your guests arrive. I guarantee they'll be impressed, especially when they take their first bite! 


      CHICKEN TIKKA MASALA:
      Slightly adapted from Saveur Magazine, Issue 123

      Ingredients:
      1 tbsp. ground turmeric
      4 tsp. garam masala
      6 cloves garlic, crushed
      One 2½ inch piece ginger, peeled and chopped, plus extra julienned strips for garnish
      1 jalapeno, stemmed, seeded, and chopped (you can leave the seeds and veins in for added heat)
      One 28oz. can whole peeled tomatoes, un-drained (or fresh tomatoes)
      2½ lbs. boneless, skinless chicken breasts, cut into 1½  inch cubes
      ¼ cup plain Greek yogurt
      Kosher salt, to taste
      6 tbsp. unsalted butter
      1 tsp. coriander seeds
      1 tsp. cumin seeds
      1 tbsp. paprika
      2 medium-sized yellow onions, finely chopped
      1 cup heavy cream or coconut cream
      Cilantro leaves, for garnish

      In a blender or food processor, puree turmeric, 2 tsp. garam masala, garlic, ginger, jalapeno, and ¼ cup water.  Put paste into a small bowl and set aside.

      In the same blender, puree tomatoes and place in another bowl and set aside.

      In a medium sized bowl, combine 2 tbsp. paste mixture with chicken, yogurt, and salt.  Cover chicken with plastic wrap and let marinate for 30 minutes at room temperature. Meanwhile, turn oven on to broil.  Once the chicken has marinated, transfer to a foil-lined sheet pan and broil until cooked, 6-8 minutes, stirring once to keep from sticking. Once cooked, cover with foil and set aside.

      Heat butter in a 6 qt. saucepan over medium-high heat.  Add coriander and cumin and toast for 4-6 minutes.  Add paprika and onions and cook until soft, about 6-8 minutes.  Add remaining paste and brown for 5-6 minutes.  Add tomatoes, cook for 2 minutes more.  Stir in cream and bring to a boil.  Reduce heat and simmer until thickened, 6-8 minutes.  Stir in remaining garam masala and chicken.  Season generously with salt to taste.  Garnish with julienned strips of ginger and cilantro and serve with basmati rice.  

      Yield: 4 servings

      Notes:
      • Traditionally, the chicken would be cooked in a tandoor oven, but in my NYC apartment, the broiler becomes the next best thing. 

        Thursday, November 3, 2011

        Pumpkin & Pomegranate Wild Rice


        Growing up, I only ate pumpkin in my mom's pies at Thanksgiving but never enjoyed it in any savory context. Pumpkin is such a fall time treat, I find it's a waste to reserve exclusively for pies, so I try to use it throughout the season in a variety of ways, both savory and sweet. It's interchangeable with more common winter squashes, such as butternut or acorn.  However, don't make the mistake of roasting a carving pumpkin. Look for ones labeled "sugar pumpkins" or "pie pumpkins" which are smaller and suitable for roasting. They are buttery and smooth, unlike their carving counterparts, and can usually be found at farmer's markets and grocery stores during the fall and winter months. Look for pumpkins that seem heavy for their size and free of large blemishes or soft spots. Finding ones with longer stems is a good indication of freshness.


        I made up this recipe because I love the combination of roasted pumpkin (or any squash for that matter) and pomegranate seeds. I'm always trying to think up new ways to use the strikingly vibrant and extremely flavorful seeds. They bring lightness to the wonderfully rich rice and, simply put, make eating fun! Pomegranate seeds keep well in the refrigerator (for nearly 2 months) so I like to have them on hand to throw in salads, granola, soups etc. They ripen in mid to late autumn and are available throughout the winter months. Look for pomegranates that seem heavy for their size, brightly colored, and relatively blemish free.


        PUMPKIN & POMEGRANATE WILD RICE:

        Ingredients:

        For rice:
        2 cups wild rice (I used Lundberg's wild rice blend)
        4 cups chicken or vegetable stock
        4 tbsp. butter
        1 tsp. salt
        1/3 cup pomegranate seeds 

        In a covered, medium sized pot, bring the rice, stock, butter and salt to a boil and stir once. Reduce heat, keep covered and simmer for 50 minutes or until all of the stock has been absorbed. Turn off the heat and let the rice rest covered for 10 minutes. Remove lid and fluff with a fork.

        Note: There are many varieties of wild rice to choose from and each can vary in cooking time. Refer to the directions on your particular brand of rice for the suggested cooking method and time. Regardless of the type, replace the water called for in the directions for stock and add the butter and salt.

        For pumpkin & shallots:
        1 sugar or pie pumpkin (about 4 lbs.), seeded, peeled, and cut into 1-inch cubes
        3 medium sized shallots, peeled and cut into 1/2-inch slices
        4 tbsp. olive oil
        Salt & pepper to taste

        While the rice is cooking, preheat the oven to 400 degrees F. Place the pumpkin and shallots on a parchment or foil lined sheet pan. Drizzle with the olive oil and season generously with salt and pepper. Toss well, seeing that everything is coated in oil (clean hands work best). Cook for 45 minutes (depending on the size of your pumpkin), or until the pumpkin is slightly browned around the edges and easily pierced with a fork.

        In a large bowl, toss the pumpkin, shallots, rice and pomegranate seeds. Taste to adjust seasonings, adding salt and pepper if needed. Serve warm.

        Notes:
        • To roast the pumpkin, remove the stem and bottom and cut the pumpkin it in half (from top to bottom) using a clever or large chef's knife. Scoop out the seeds (save them for roasting and snacking later!) and flesh using an ice cream scoop or large spoon. Cut the pumpkin into 1-inch slices, lay each slice on its side, and using your chef's knife, cut off the skin. Cut each slice into 1-inch cubes and proceed with roasting.
        • The easiest way I know how to de-seed a pomegranate is by cutting off the top and bottom (as you would an onion) and then score the outer skin. Peel off the skin in a large bowl of water and remove the seeds using your fingers. The skin and fleshy bits will float to the top and the seeds will sink to the bottom. Skim off the water and discard the skin and peel. Strain seeds through a fine mesh strainer or colander and turn out onto a paper towel lined plate to dry. Once dry, place in a well sealed plastic container, and store in the refrigerator. 
        • If you're looking to save time, you can always make the rice the night before, and have it ready to reheat when the pumpkin and onions are done roasting.