Thursday, February 16, 2012

Blood Orange Marmalade


Aaron and I are heading to California next month to visit my family. We'll be staying with my brother Jeffrey, and sister-in-law, Patricia, both busy parents (of my adorable 16 month old niece, Addy). They're two of our favorite people on the planet and I wanted to do something special for each of them as a belated Christmas gift. I have jams picked out for Jeff, but I remembered that Patricia particularly loves marmalade. I flipped through some of my canning books to get a few ideas and decided to make a Blood Orange Marmalade. Blood oranges are in season right now, and I wanted to showcase (and preserve) them before they're gone. It's a slightly different take on the traditional orange marmalade and one that I hope she'll love.


Blood oranges are so fragrant and vibrantly colored, they're one of those foods I always look forward to. The most common varieties of blood oranges are Moro, Tarocco, and Sanguinello. I used the Moro variety, which are grown in California and Texas. I love to use them in cocktails, toss them in salads (their juice also makes delicious dressings), or simply peel and eat them. Not to mention, I feel like Dexter getting my hands all "bloody" while juicing the oranges. A delicious crime scene indeed.


This recipe was the result of three different attempts. I experimented with several recipes before deciding which marmalade tasted and worked the best. On my third attempt, I came across David Lebovitz's recipe for a classic Seville orange marmalade. I replaced the Seville oranges with blood oranges and added a little port to give an added depth of flavor and a slightly darker color. The final result was wonderful. Together with the port wine, the blood oranges give this marmalade a deep burnt orange color and an intoxicatingly rich flavor. 


BLOOD ORANGE MARMALADE
Adapted from David Lebovitz, Ready for Desert

Ingredients:
6 blood oranges
1 navel orange
9 cups water
1 cup port wine
heavy pinch of salt
8 cups sugar

Place a couple of small plates in the freezer to test the marmalade later on. Wash all the oranges and wipe them dry. Cut each orange in half, crosswise around the equator. Place a fine mesh strainer over a medium-sized bowl and push out any seeds and discard (see notes below). Juice the oranges. Pour the juice and any pulp into a large 8 to 10 quart stock pot.

Remove the stem ends of each orange. Cut each orange half into thirds and then chop each of these slices into about 1 centimeter cubes (or thin slices, if you prefer) and add to the pot. Add the salt and pour in the water and port. Bring the mixture to a boil, then reduce to a simmer and cook until the peels are slightly translucent, about 30 minutes.

Stir the sugar into the mixture and return to a full boil again, then reduce to a gentle boil. Stir occasionally while cooking to prevent scorching on the bottom of the pot. Continue cooking until the mixture has reached 220 degrees (the jelling point) on a candy thermometer. This will take some time, so be patient. You can also test the marmalade by removing the pot from the heat and taking a plate from the freezer. Place a small dollop of the marmalade on the plate. Return to the freezer for a minute or two before running your finger through the marmalade. If it wrinkles slightly and has begun to jell, it's done. If it remains liquid, return the pot to the heat and continue checking every few minutes in the same manner until it's done. 

Once the jelling point has been reached, remove marmalade from heat and ladle into clean 4 or 8 oz. jelly jars and process in a boiling water-bath canner for 10 minutes. Let jars cool in the pot for a couple of minutes before removing. Allow the jars to sit for a few days to allow the marmalade to fully set before using. For more information, see my step-by-step guide to canning here. If you find yourself with any extra marmalade that can't be processed, put it in a clean jar and place in the refrigerator. Use this jar first, within 3 weeks. 

Yield: About 11 to 12 cups

Notes:
  • Many recipes require you to hold onto the orange seeds, place them in a spice bag or well-tied cheesecloth bundle, and add to your marmalade as it cooks. The seeds are loaded with pectin, which helps to jell the marmalade. The Moro variety of blood oranges I used cumulatively only had about 4 seeds, so I've left them out. If, however, you're using another type of orange (such as Seville), by all means add them to your pot and remove a little while after you've added the sugar.
  • I used my trusty candy thermometer to be absolutely sure when the marmalade had gelled. I like using the thermometer because I can actually see the temperature rise and anticipate when the marmalade needs to be removed from the heat. I also like to use the plate method to test for gelling, and often use both methods side by side.
  • If you don't like the slight bitter aftertaste orange marmalade is known for, consider removing some of the pith on each orange peel, or using just the peel itself. However, the pith is full of pectin, which helps to make the marmalade jell. Using just the orange peel may require you to use added pectin.


Monday, February 13, 2012

Hurricane Chili


I made this three bean chili on the eve of Hurricane Irene this past summer. New Yorkers were in a frenzy boarding up and taping windows and sand bagging store fronts. The grocery stores were busier than any day I'd ever seen leading up to Thanksgiving or Christmas, with lines wrapping around the store! We were shameless in showing our complete ignorance of what to expect and how to prepare for such a storm. In the end, it was nothing more than heavy rain, wind, and some minor flooding (but it was a great excuse for work to be cancelled and to stay in your pajamas all day watching movies).


Our friend Caitlin came to stay with me and Aaron during the storm, as she lived in a potential flood zone. So the three of us hunkered down and enjoyed a couple of days of guilt-free laziness. Just before the storm was expected to hit, I made this simple hearty three bean chili, henceforth coined "Hurricane chili." With the wind howling and the rain pouring down, together we enjoyed this classic comfort food with slices of freshly baked bread to mop it up.


HURRICANE CHILI
Adapted from Tom Birchard & Natalie Danford, The Veselka Cookbook

Ingredients:
3 tbsp. olive oil
2 lbs. 80% lean ground beef
2 medium red or yellow onions, chopped
2 cloves garlic, minced
1- 15oz. can black beans, including liquid
1- 15oz. can white beans, including liquid
1- 15oz. can red kidney beans, rinsed and drained
1- 28oz. can crushed tomatoes (preferably San Marzano brand)
2 tbsp. ground coriander
3 tbsp. ground cumin
1 tbsp. dried oregano
1 to 2 tsp. med-hot chili powder (or to taste)
1 tbsp. smoked salt (or regular salt to taste- see notes below)
1 tbsp. freshly ground black pepper

In a large stockpot or Dutch oven, add the olive oil and sauté the beef over medium-high heat until fully cooked, stirring occasionally. Add the onions and garlic and cook until onions are translucent. Drain off and discard any excess fat.

Add the beans, their canning liquid, and the drained kidney beans to the pot. Rinse cans out with a bit of water and add the liquid to the pot. Stir in the tomatoes, coriander, cumin, oregano, chili powder, and salt.  Bring to a boil, reduce to low, and gently simmer, covered with the lid slightly ajar, until the chili is very thick, about 1 hour. Stir occasionally to prevent sticking. Taste to adjust seasonings, adding more salt if necessary. Garnish with grated cheddar cheese, chopped red onions, and sour cream if desired. Serve hot.

Yield: About 3 quarts

Notes:
  • I like to use smoked salt in this recipe because, as expected, it imparts a subtle smokiness to the chili. You can find it at your local spice shop or online. 
  • Feel free to substitute the ground beef for ground turkey.
  • This chili freezes quite well. Defrosted leftovers make an excellent weeknight meal in a flash.

Friday, February 10, 2012

Homemade Valentines


I'm not a huge fan of Valentine's Day and thankfully Aaron's not big on the Hallmark holiday either. I pity all those fellows running around trying to pick up flowers or being pressured into making dinner reservations at overbooked (and overpriced) restaurants. I'd much prefer a lovely home cooked meal than being crammed ("asshole to bellybutton," as my father would say) into some restaurant with a million other couples fawning all over one another. Not to mention, being assaulted by red and white carnations arranged with babies breath, or large dangling hearts hitting me in the head. Call me Uncle Scrooge, but I like to keep it simple.


So I guess you'd be surprised to find that I actually enjoy exchanging homemade Valentine cards. Even as a kid I preferred making my own and left the store-bought ones for the suckers (o.k., the Teenage Mutant Ninja Turtles ones were pretty cool). Over the last couple of years, I've collected a handful of old skeleton keys of all shapes and sizes. I got the idea earlier this month to use them for a few homemade valentines. I knew I'd find a use for them one day. They're a bit cheesy, I know, but then so is the holiday.


Tuesday, February 7, 2012

Roux 101


Ok folks, I'm very excited about this post because I've taught myself so much about making roux and am delighted to share all of my findings with you! Yes, it's time for another one of those "nerd alert" moments, but bare with me. Since I've received Paul Prodhomme's classic, Paul Prudhomme's Louisiana Kitchen, I am eager to try more of his recipes, and I thought I'd take some time to practice my roux making skills. As I've said before, I've had some experience making lighter roux, but none with the darker ones, which are most common in Cajun cooking (for those who don't know, a roux is a thickening agent made up of equal parts fat and flour, and when cooked together impart a unique nutty flavor to whatever you include it in). 


There are four main types of roux: 1) White roux 2) Blonde roux 3) Medium-dark roux 4) Black roux (although there are varying degrees of colors in each of these categories). The white and blonde roux are used in sauces, gravies, and soups and are ideal for darker meats such as beef and game. These lighter roux are often used in classic French cooking (white roux are used to make bachamel sauce and the blonde roux are used to make veloute sauce and soups). Many cooks use the darker roux in sauces and gravies for lighter meats such as pork, rabbit, veal, and seafood dishes (however, some cooks do just the opposite and use light roux with lighter meats and dark roux with darker meats. In the end it comes down to personal preference). Dark or black roux are traditionally used in making gumbo. The darker the roux, the less it will thicken (the high heat breaks down the starch in the flour), but the flavor becomes more intense. 

I've learned through my research over the past week that every cook uses different methods and techniques to get to their desired result. Butter is often the fat of choice in French cooking, while oil is commonly used in Cajun cooking. In addition to oil, clarified butter and animal fats can also be used (such as chicken, duck, and pork fat). Measurements are another common variation in preparing roux. Some prefer to use equal parts by volume of fat and flour, while others prefer to measure them by weight. It's no wonder roux have such a stigma surrounding them!


The more I researched, the more I found every authority on Cajun roux varied in opinion so much so, that I decided to put it all aside and find what methods and techniques worked best for me. In my trials and errors making roux, I've come up with a few methods that gave me excellent results. To start, I tried measuring the fat and flour by volume and by weight, and found that measuring by weight was the most consistent. 


In making lighter roux, I found that by adding the oil and flour to a cold pan and then cooking it over medium heat allowed me more control. Once the mixture came to a simmer I reduced the heat slightly. It took about 3 to 5 minutes to reach the white roux and about 7 to 10 minutes to reach the blonde roux. I learned that if I added the flour to smoking hot oil, I quickly lost control of the lighter roux and it became too dark- even after removing it from the heat. 

To make the darker roux, I found the best method was heating the oil until it was smoking (about 5 minutes) over high heat and then whisking in the flour in thirds. This method allows you to "skip" over the lighter roux, or at least move through them very quickly, so you don't have to whisk the flour for a half an hour or more. Once the flour was incorporated and simmering, I reduced the heat to medium/medium-low heat (and occasionally removed the pan from heat if I found it was browning too quickly), which allowed me to stay in complete control of the roux. I reached the dark red-brown roux in about 15 to 20 minutes. I'm not sure how long it took me to reach the black roux, as I lost track of time while whisking and staring into its deep dark abyss. So, awhile, I guess. I also tried another method for making the darker roux, starting as I did with the lighter roux, adding the oil and flour all at once to a cold pan and cooking it very slowly over medium heat. This method also worked well, but takes significantly longer- about 30 to 40 minutes or more. 

I've also read about another method, in which you brown the flour on a sheet pan in the oven and then add the fat to it later. This method seems to be used most often in large professional kitchens as a way to save time. As for me, I'm going to stick to the pan methods, as I rather like making a roux the old-fashioned way. You can see my various roux below:

White roux

Blonde roux

Dark red-brown roux

Black roux

The wonderful thing about a roux is that it can be made in advance, cooled and then stored in a well-sealed container until ready to use. You can simply pour off any excess oil and reheat the roux prior to using. Always remember: never add a hot roux to hot liquid as it can splatter and cause burns. So let it cool (or let it come to room temperature if making in advance) before incorporating it with a hot liquid. The same goes for combining a cold roux with cold liquid, as this will make it lumpy.

Here are some helpful pointers I've compiled about making roux from Paul's book and various other resources:
  • Be careful when making your roux, as the oil is extremely hot. Use a long-handled metal whisk. Never leave your roux unattended!
  • Use a cast iron skillet (large enough so the oil does not fill it by more than 1/4 its capacity) to make your roux, if possible, one with flared sides as this makes stirring easier and helps prevent burning.
  • Whisk quickly and constantly while making your roux to avoid possible scorching.
  • If you feel the roux is darkening too fast, reduce heat and/or remove it from the heat and continue to whisk constantly until you have control of it.  
  • If for some reason lumps appear in your roux, simply strain it through a fine-mesh sieve before continuing.
  • If black specks appear in the roux as it cooks, it has burned. Transfer it to a heat-proof container to cool before discarding. Clean your pan and start again. 

Thursday, February 2, 2012

New Orleans & Shrimp Etouffee


This past November, Aaron had an improv show in New Orleans, so I tagged along as the team's groupie. We've both been dying to go to the Big Easy for years, so this was our chance! Also, my childhood friend Molly and her fiance Flynn both live there and graciously put us up. 


We both fell in love with the city: its architecture, cuisine, people and music. It was everything we'd hoped for and more. Our primary navigating tool was food. It became quite a challenge to hit all the places we wanted to eat in the span of a day. We would find ourselves eating lunch still stuffed from breakfast, then contemplating dessert after a full dinner. I felt like our trip was a crash course training exercise to stretch our stomachs as much as possible and prepare us for a professional eating competition! Some of our gluttonous standout dishes were: fried alligator and hushpuppies at Cochon, turtle soup at The Commander's Palace, bread pudding at Mother's, and benyas at Cafe du Monde, just to name a few.


While staying at Molly and Flynn's, I noticed a cookbook on their bookshelf entitled, Chef Paul Prudhomme's Louisiana Kitchen. The book cover instantly filled me with joy. I know you're not supposed to judge a book by its cover, but look at it!  Even if I didn't know anything about Paul Prudhomme, I could safely say this guy was the real deal. I found myself flipping through it during our stay. When I got back to New York, I researched the top ten Louisiana cookbooks and his came up every time. Published in 1984, its been a classic ever since. After "subtle" hints from me all of December, Aaron found it in his heart to surprise me on Christmas morning with Paul's delightful book. Lets just say it's a gift to both of us, as each of us will equally benefit from its pages. 


This is my first attempt at cooking Cajun and Creole cuisine. I often found the two to be confusing, but I like Paul Prudhomme's thorough definition, explaining that, "Cajun and Creole cuisines share many similarities. Both are Louisiana born, with French roots. But Cajun is very old, French country cooking- a simple, hearty fare. Cajun food began in Southern France, moved on to Nova Scotia and then came to Louisiana. The Acadians adapted their dishes to use ingredients that grew wild in the area- bay leaves from the laurel tree, file powder from the sassafras tree and an abundance of different peppers such as cayenne, Tabasco peppers, banana peppers and bird's eye peppers that grow wild in Southern Louisiana- learning their uses from the native Indians. The evolution of Creole cooking, just like Cajun, has depended heavily on whatever foods have been available. But Creole food, unlike Cajun, began in New Orleans and is a mixture of traditions of French, Spanish, Italian, American Indian, African and other ethnic groups. Creole cooking is more sophisticated and complex than Cajun cooking- it's city cooking." I know that's a hefty excerpt, but I find it to be a wonderful explanation and distinction between the two styles of cooking. 


With all that being said, there's no better way to learn about this food than by cooking it and eating it! I sort of just opened the book and my eyes fell upon Paul's recipe for Shrimp Etouffee, so that's where I began. 


I have little experience cooking dark roux's so I was curious to see how mine would turn out. The original recipe calls for a dark red-brown roux, so I referenced Chef Prudhomme's wonderful roux resource page to help me get there. While my roux turned out to be a beautiful red-brown as depicted in his book, it quickly became too hot and I lost control of it. The roux began to inch its way towards a very dark brown roux as I stirred in my vegetables and spices, thus resulting in a darker sauce instead of the creamy red-brown color etouffee is known for. I should have listened to the voice in my head and tossed the roux and started over, but I was hungry and impatient. Since my roux became too dark, my etouffee was a bit thin (the longer you cook a roux, the less it will thicken- since the high heat breaks down the starch in the flour). Nevertheless, a good first attempt at this dish and making a darker roux.

Since my first go at this dish, I've tried making roux different ways, so I'll share what I've learned from my trials and errors in an upcoming post. My second attempt at this dish is the one you see pictured before you. I took what I learned from my experimentation and successfully applied it the second time around. While eating, fond memories of New Orleans came flooding back, so I must have done something right.  


SHRIMP ETOUFFEE
Adapted from Paul Prudhomme, Paul Prudhomme's Louisiana Kitchen

Ingredients:

For the seafood stock:
2 quarts cold water
1 medium onion, quartered
2 large cloves garlic, unpeeled and smashed
1 rib celery 
1 medium sized carrot, unpeeled and cut in half or quartered
Shrimp heads, shells, and tails (in addition, you could also add a couple of rinsed fish carcasses- heads and gills removed and/or oyster liquor).

Peel and de-vein the 2 lb. of shrimp (or crawfish) called for in the etouffee recipe and reserve heads, shells, and tails for stock. Discard veins. Cover all of the stock ingredients with the 2 quarts of water in a 4 quart sauce pot. Bring to a boil over high heat, then gently simmer uncovered for 1 hour. Replenish the stock with water as necessary, to insure that you'll end up with about 1 1/2 quarts. Strain stock through a fine mesh strainer and discard the shells and vegetables. Set aside until ready to use or refrigerate overnight. Freeze any leftover stock for another use.  

Yield: About 1 1/2 quarts

For the rice:
2 cups uncooked rice (preferable converted, such as Uncle Ben's)
2 1/2 cups seafood stock
2 tbsp. yellow onion, minced
2 tbsp. celery, minced
2 tbsp. green bell pepper, minced
1 1/2 tbsp. unsalted butter, melted
1/2 tsp. salt, or more to taste
1/8 tsp. garlic powder
A pinch each of white pepper, cayenne pepper, and black pepper

Preheat oven to 350 degrees F. In a 5x9x2 1/2- inch loaf pan, combine all the ingredients; mix well. Seal pan snugly with aluminum foil. Bake for 1 hour, 10 minutes. Serve immediately or keep covered and it will stay warm for up to 2 hours. 

Yield: about 6 cups

Note:
  • This is a basic rice recipe. You could certainly spice it up a bit, but its mellow flavor goes nicely with the flavorful sauce.
  • If making in advance, use a double boiler to reheat the rice, or warm it in a skillet with unsalted butter.
  • Also, if making in advance, omit the bell peppers- they tend to sour quickly. 
For the etouffee:

Seasoning mix:
2 tsp. salt
1/2 to 1 tsp. cayenne pepper (use only 1/2 tsp. or less if you're sensitive to heat)
1 tsp. white pepper
1 tsp. black pepper
1 tsp. dried basil leaves
1 tsp. dried thyme leaves

1/4 cup onions, chopped
1/4 cup celery, chopped
1/4 cup green bell peppers, chopped
3.5 oz. (by weight) vegetable oil (about 1/2 cup)
3.5 oz. (by weight) all-purpose flour (about 3/4 cup)
3 cups seafood stock
1/2 lb. (2 sticks) unsalted butter
2 lb. medium shrimp (or crawfish)
3/4 cup green onions, chopped
4 cups cooked rice (see above recipe)

Combine the seasoning mix ingredients in a small bowl, mix well and set aside. In another bowl combine the chopped onions, celery, bell peppers (a.k.a. the "Cajun Trinity"). 

Begin making your roux (for more information on making roux, see here): in a large cast iron skillet (or other heavy skillet), heat the oil over high heat until it begins to smoke, about 4 to 5 minutes. Using a long-handled metal whisk, gradually mix in the flour (adding in thirds), stirring until completely smooth. Reduce heat and continue cooking, whisking constantly, until roux just becomes a medium red-brown color, about 5 to 10 minutes- remember the roux will continue cooking a bit even after you've removed it from the heat (be careful not to let it burn or splash on your skin). Remove from heat and immediately stir in the vegetables followed by 1 tbsp. of the seasoning mix with a wooden spoon. Continue stirring until the mixture has cooled, about 5 minutes. 

In a 2-quart saucepan, bring 2 cups of the stock to a boil over high heat, then reduce to a simmer. Gradually add the cooled roux and whisk until thoroughly combined. Heat the mixture over low heat and cook until flour taste is gone, about 2 minutes, whisking almost constantly. The mixture will become quite thick. Remove from heat and set aside.

In a 4-quart saucepan melt 1 stick of the butter over medium heat. Stir in the shrimp and green onions and saute about 1 minute, stirring almost constantly. Add the remaining stick of butter, the stock mixture, add the stock starting with a 1/2 cup and gradually adding more if necessary, until you've reached the desired consistency. Constantly shake the pan in a back and forth motion or stir the mixture until well combined. Stir in the remaining seasoning mix and remove from heat (if sauce begins to separate, add about 2 tbsp. more of stock or water and shake pan until it combines). Drain off any excess oil and serve immediately. 

To serve, using a small bowl or teacup as a mold, place the rice in the center of each plate. Surround the rice with the etouffee. 

Yield: about 4 servings

Note:
  • Making the seafood stock and rice a day in advance makes this dish less labor intensive and saves you a lot of time on the day you plan to serve it.

Sunday, January 29, 2012

"I can't believe it's homemade butter!"


When most of us conjure up images of homemade butter, we see old world grandmothers wearing babushkas in hay covered barns, churning it by hand. Never fear, this couldn't be farther from reality. If you have a food processor, making your own couldn't be simpler. Why burden yourself with homemade butter you ask? Because it's worth the incredible flavor! 


Whenever I make butter, I always use heavy whipping cream from the farmer's market, or a good organic brand from the store. These quality creams smell and taste the way cream should. The result is a butter that's rich and flavorful and better than any store-bought variety you can find. 


HOMEMADE BUTTER

Ingredients:
1 pint (2 cups) organic heavy whipping cream
1 cup ice water, as needed
¼ tsp. sea salt or fleur de sel (or more to taste)

Leave cream at room temperature for 8-12 hours to sour slightly. 

Pour cream into a food processor fitted with a steel blade and process (the cream will go through several stages very quickly- turning into a light whipped cream, then a heavy whipped cream, and finally it will “break” and the fat will separate from the buttermilk. This should only take about a minute).  As soon as the cream breaks, stop the processor.

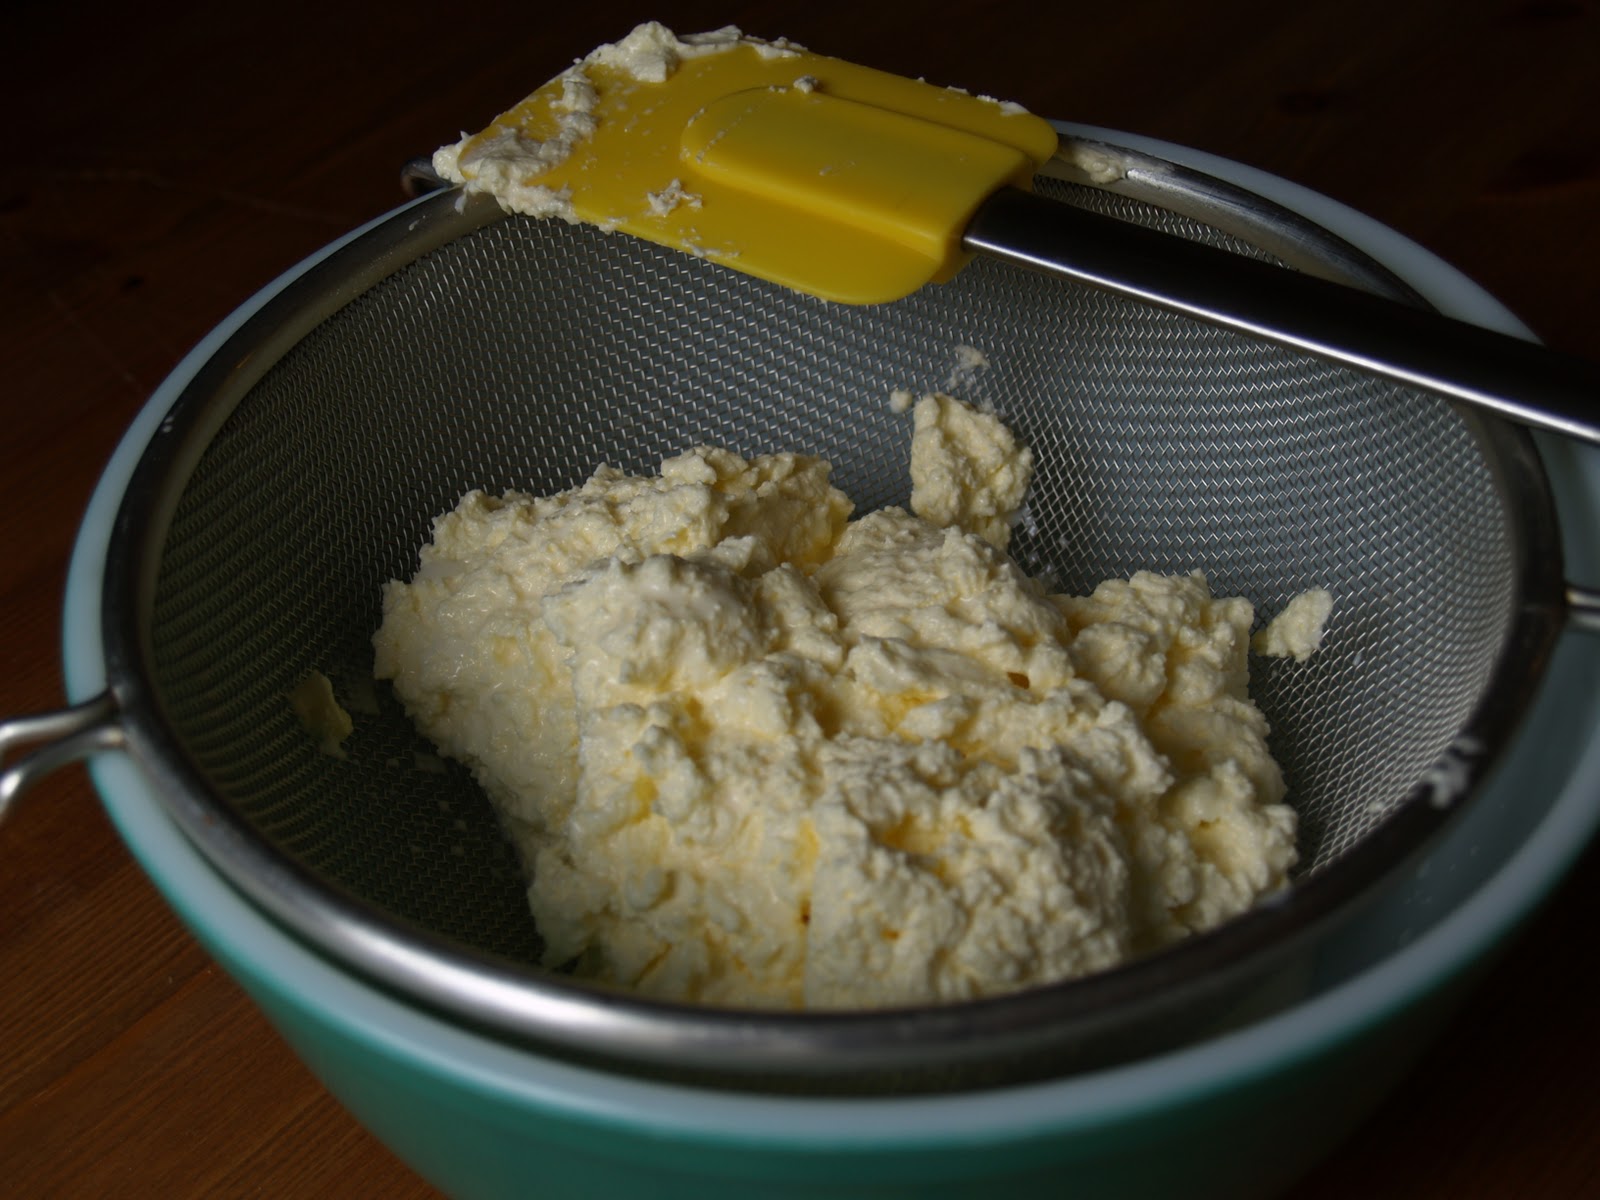
Turn out the contents of the processor into a small bowl lined with a fine mesh strainer.  The strainer will catch the butter. Discard the buttermilk (this is not the same type of buttermilk you buy in the store).  

Scrape the butter out into a large bowl and using a spatula press out and discard as much liquid as possible.  Repeat until there is little to no liquid left. 

Pour some of the ice water into the bowl of butter.  Work the water into the butter (this will rinse out any remaining buttermilk and in turn, keep the butter from spoiling).  Pour out water and as before, use the spatula to work out any remaining water in the butter. 

Once all the water has been removed, add the sea salt to the butter and stir to incorporate. If you prefer, shape butter into a log and roll between waxed paper and place in the refrigerator. Or place in a butter bell and store at room temperature for easy spreading.  

Yield: about 1 ¼ cups

Notes:

  • Generally, I never cook with my homemade butter. I like to save it for bread, toast, scones, you name it! 
  • Recently, I came across a French butter dish or butter bell. I learned it's been used to keep butter soft and fresh without the use of refrigeration since the late 19th century. You place your butter in a bell-shaped jar and invert it into another jar filled with a bit of water. The water provides an airtight seal, keeping it fresh at room temperature.