Thursday, April 19, 2012

DIY Wrapping Paper


Aaron's birthday is right around the corner and I felt inspired to make homemade wrapping paper for some of his gifts. I've always been a fan of using butcher's paper as wrapping paper, so I thought I'd start there and jazz it up a bit with some leftover paint I had lying around the apartment. I get so tired of spending money on wrapping paper that ends up getting wrinkled and destroyed in the closet or under the bed. Half the time I forget where I've stashed it. Creating your own allows you to make only what you need. 


Why would I spend time on something that's just going to be ripped apart, you ask? That's a perfectly logical question and one that I've asked myself. I don't really have an answer for it. All I know is that it makes the gift giving process that much more fun! Besides, it's not like you're creating an entire roll of gift wrap. Cut a piece of paper to the size you need and let your imagination run wild. Different shaped sponge brushes help to make quick, simple patterns. The best part is, homemade wrapping paper is imperfect, personalized, and entirely original. No one but the recipient will have a gift wrapped quite like it. 


Here's how to make it:
  • Begin by picking up a variety of sponge brushes and plain butcher or craft paper (gift bags work great for this too) from your local craft or art store. 
  • Simply cut a piece of paper large enough to fit the box you intend to wrap and decorate it using different colors and patterns.
  • Let the paint dry prior to wrapping.

Monday, April 16, 2012

Steak au Poivre


After searching for the quintessential Steak au Poivre recipe, I finally discovered it a couple of years ago through Saveur magazine. It has easily become one of my favorite ways to prepare steak. Aaron has been begging me to make this classic French dish for days, which originally became popular in the bistros of Normandy in the 19th century. It's no wonder it's still around today, as it's a beautiful steak covered in a luxurious sauce consisting of cognac and cream. A1 eat your heart out.


I picked up some gorgeous filet mignon steaks from Grazin' Angus at the farmer's market. I love how fast these are to make and yet the delectable sauce would have you think it took all day. The crushed peppercorns create a delicate crust for the steaks and are not hot as you might expect. Once the steaks are sauteed and the sauce is poured on, everything comes together in one harmonious bite. I served these steaks with roasted carrots and potatoes au gratin. I think if I had to choose a last meal, this might be it!


This sauce does require you to use the French technique, flambe (a.k.a. setting the pan on fire). Some of you just lost interest, I know. But don't, it's simply a fancy way to quickly burn off the alcohol in the pan. It sounds dangerous but it's not, in fact, I find it to be quite fun. Just remember to remove the pan from the heat before igniting the cognac, and keep your face averted. Always have a lid nearby to extinguish the flame if necessary. Keep in mind too, the height above your stove. I like to hold the pan off the stove when igniting it, so I don't have to worry about the flames reaching the fan unit, then I place it back on the stove to simmer out. Enjoy!


STEAK AU POIVRE

Slightly adapted from Saveur magazine, Issue 17

Ingredients:
4 Tbsp. whole black peppercorns
4 6-oz. beef filets, about 1½ to 2 inches thick, brought to room temperature
2 tbsp. butter
1 tbsp. vegetable oil
1/3 cup Cognac
1 cup beef stock, preferably low-sodium 
½ cup heavy cream
Sea salt to taste

Wrap the peppercorns in a clean dishtowel and crush using a heavy skillet or mallet (alternatively, you could place them in spice grinder or clean coffee grinder and pulse once or twice). The idea is that they be cracked, not ground. Transfer the peppercorns to a plate. Tie each filet with butcher's twine (if necessary) to keep them together during cooking. Roll the filets in the crushed peppercorns so that they are evenly coated. Season both sides of each filet with salt. 

Heat the butter and oil together in a large skillet over medium-high heat. Add filets to the pan and cook until well browned on each side, about 4 minutes per side for medium-rare (work in batches if your pan is too small to ensure even browning). Transfer steaks to a warm plate, remove butcher's twine, and cover loosely with foil to keep warm while you prepare the sauce. 

Add the Cognac to the hot pan and heat for a few moments under low heat. Turn off the heat, and very carefully ignite the Cognac with a long handled match or lighter, keeping your face averted (have a lid nearby to extinguish the flame if necessary). Allow the alcohol to burn off, for about a minute before adding the stock. Using a wooden spoon, scrape up any brown bits on the bottom of the pan and cook the liquid until reduced by half, about 4 minutes. Add the cream and cook, stirring occasionally until the sauce thickens slightly, about 3 to 5 minutes. Season sauce with salt to taste and pour over steaks.

Yield: 4 steaks

Thursday, April 12, 2012

Garlic Naan


Holy crap these are good! I can't tell you how happy perfecting this naan recipe has made me (and my tummy). Naan, which today can be found in nearly every grocery store in America, is an Indian leavened flat bread. It is traditionally made in a clay tandoor oven; the dough is stuck to the oven's walls to bake. For most of us, the next best thing is the broiler, stovetop, or grill. I've been wanting to make Madhur Jaffrey's recipe for naan (from An Invitation to Indian Cooking) for a while, so when a friend at work asked me if I had a naan recipe, I knew it was time to try it out. I'm so glad I did! My adapted recipe creates a beautifully doughy naan and can be made almost entirely of items lying around a well-stocked kitchen on any given day.

Proofing yeast


On my first attempt, I made Jaffrey's original recipe exactly as written, which resulted in rather thick, stiff, and chewy naan. This was due to my dough being far too stiff  from the very start. It was not pliable and elastic as it should have been, making it difficult to knead. Jaffrey's recipe did not require proofing the yeast or a second rise and I think those are both neccessary steps needed to create a perfect dough. The addition of a little more milk helped to loosen it up as well. 

Also, the dough needed to be much thinner before cooking. In my first go-around, as advised by Jaffrey, I stretched and flattened the dough by hand. In my second attempt, I tried rolling the dough out with a rolling pin to a thickness of about 1/8 inch. This created the exact texture I was aiming for. I also tried cooking the dough on the stovetop in a hot cast iron skillet as well as in the broiler. I was surprised to find that the stovetop method worked leagues better and created the bubbling golden brown dough I was aiming for. 


Smooth and elastic dough after kneading 


First rise

Deflating the dough 

As with most yeast breads, contrary to common belief, I find they allow you a great deal of free time. The rising dough does all the work for you and only requires you to knead for 10 minutes. You can mix all the ingredients together, knead, and place in a warm spot to rise for a couple of hours while you run errands, walk the dog, or live your terribly exciting life. When you return, you knead it and shape it again, letting it rise, allowing you to carry on with your life once more. I like to make the dough work to my schedule and not the other way around. You will be welcomed home by your risen dough, ready to roll out and cook just in time for dinner.

Dividing the dough


Second rise

Rolling the dough to 1/8 inch thick


GARLIC NAAN

Adapted from Madhur Jaffrey, An Invitation to Indian Cooking

Ingredients:
1¼ cup whole milk, warmed to 110 degrees
3 cups all-purpose flour, sifted
1 tsp. kosher salt
1 egg, beaten
2 tsp. sugar
1 tsp. baking powder
1  1/8 tsp. active dry yeast 
2 tbsp. vegetable oil or ghee, plus extra for cooking later (see notes below)
4 tbsp. plain Greek yogurt
2 to 3 cloves garlic, smashed and finely minced

In a small saucepan, heat the milk to 110 degrees F and set aside. Use an instant-read thermometer to be absolutely sure you've reached the right temperature (be careful not to overheat the milk, as this could kill the yeast, and your dough won't rise properly).  

Next, proof the yeast: add the yeast, sugar, and ½ cup of the warm milk to a small bowl and let rest for 10 minutes. After 10 minutes, the mixture should be nice and bubbly, proving that your yeast is alive and active. Meanwhile, sift the flour and salt into a large mixing bowl. 

Once the yeast mixture is bubbly, stir in the beaten egg, vegetable oil or ghee, yogurt, and baking powder. Mix well to combine and pour over the flour and salt mixture. Using a wooden spoon, mix the dough together, adding more warmed milk by the tablespoon until your dough begins to come together (you will probably not need all of the warmed milk, but it's good to have some extra if for some reason your dough becomes too stiff). Mix the dough together with your hands to fully incorporate the milk and flour (if it sticks ever so slightly to your hands that's ok, but you shouldn't have to scrape it off the bottom of the bowl or pry it off your fingers). If you add too much milk, simply add a little flour to the dough and knead to incorporate until you've reached the desired texture. Transfer the dough to a clean work surface dusted with flour. Knead the dough for 10 minutes, it should knead with ease and be soft, pliable, and extremely elastic (think pizza dough). Shape the dough into a ball.

Put a splash of vegetable oil or ghee in a large glass bowl, and roll the ball of dough around, so that it is evenly greased. Cover bowl with a clean damp cloth or plastic wrap, place in a warm spot in your kitchen, and let rise for 1 to 2 hours until it has doubled in size (I like to let the dough rise in the oven. Turn the oven onto 250 degrees F for about a minute and then it shut off- you don't want it to get too hot. Place the covered dough in the slightly warmed oven. Repeat with each rising session. If you're already baking something in the oven, simply place the bowl near it to stay warm). 

After the dough has risen, press it down and form into a log. Cut the log into 8 even pieces and form each piece into a ball. Place all 8 pieces on a floured baking sheet, and cover with a clean damp towel and let rise until doubled in volume again, about 1 to 2 hours.

After the second rise, dust a clean work surface with flour and use a rolling pin to roll out each ball of dough to 1/8 inch thick. Place a large cast iron skillet over high heat. When it is very hot, pour in just enough oil or ghee to coat the bottom of the pan, about 3 tbsp, and let it heat up for a moment (continue to add more oil to the pan as it becomes dry). Brush one side of your rolled out naan with water and place this side down in the pan. Cook over high heat for 30 seconds to a minute, until the naan begins to bubble up and become golden brown. Using tongs, flip the naan and cook 30 seconds to a minute on the other side. Remove the naan from the skillet and place on a paper towel lined plate. Repeat in the same manner until all of your naan are cooked. Serve immediately. 

Yield: 8 large naan

Notes:
  • Ghee is a form of clarified butter (butter that has been melted and removed of milk solids and water, enabling a higher smoke-point). You can buy it in specialty food stores, Indian markets, or make it yourself. 
  • Feel free to add to the dough one or a combination of the following: cumin seeds, black onion seeds (kalonji), poppy seeds, minced green chilies, chopped cilantro, mint, or other herbs. 
  • If you haven't managed to gobble up all your naan at dinner, store it in a gallon-sized zip-top bag. Place the naan directly on the rack of a preheated 300 degree F oven for a couple of minutes to reheat (although nothing can compare to freshly cooked naan). 

Monday, April 9, 2012

Split Pea Soup


Last week, the weather in NYC suddenly dropped and I found myself pulling out my heavy winter coat again. I thought I had stashed it away once and for all, but it seems it isn't so. Since the winter has been extremely mild this year, I'm the first one to admit what a wimp I've become when it gets even slightly cold (the other night I was running through the streets freezing my bum off, only to learn it was in the low 40s. I could have sworn it was in the single digits!). To warm myself up I made this comforting split pea soup. Aaron was away over the weekend, and after eating at questionable establishments on the road, I thought a hearty warm soup would be just the ticket to restore his traveled-out bones. 


I've always loved split pea soup. I can remember as a child whenever my family would drive to southern California (in pursuit of Disneyland, no doubt) we would stop at Pea Soup Andersen's. These may have been the only times I ate it fresh, as I don't recall ever cooking it at home unless it was out of a can. The recipe I've provided below uses smoked ham hock, which imparts delightful smoky undertones to the soup. Ham hock, or pork knuckle, is a very cheap cut of meat (the lower portion of the the hog's leg, consisting of meat, fat, gristle, connective tissues and bone), but the rewards are plenty. You can easily find it at good quality butcher shops or specialty food stores, and many grocery stores will order it for you if you call ahead. You can always substitute the ham hock with leftover diced ham, but the bone provides that much-coveted flavor.  


I have a recipe from Jamie Oliver for a vegetable soup in which he places a poached egg on top. This looked so good and I knew the combination would be equally splendid with split pea soup. Not to mention make a lovely presentation. With some crusty bread and a glass of red wine, in my opinion, this hearty meal nears perfection. 

Sadly, and with much regret, I must admit we only enjoyed one day of this soup. Running late and in a rush, I stupidly left my apartment with the soup sitting out all night. Yes, that's right. I walked in the kitchen the following morning (16 hours later) and was devastated to see my yellow pot filled with soup still sitting on the stovetop. NOOOOOOO!!! I couldn't believe it, I had even cleared a spot for it in the fridge! I melted, swore a lot, and emptied the contents of the pot into the trash. I felt a lot better after punching the couch a couple of times to relieve my anger (I normally wouldn't have been so mad... but I've done this before!) I reminded myself that at least this soup was made of extremely cheap ingredients. Nevertheless, I hate it when food goes to waste. No use crying over spoiled soup, I said (cursing under my breath). The only thing that made me feel better was marching back into the kitchen and start cooking. 


SPLIT PEA SOUP
Adapted from Patricia Murray, Bon Appetit, May 1996 

2 tbsp. unsalted butter
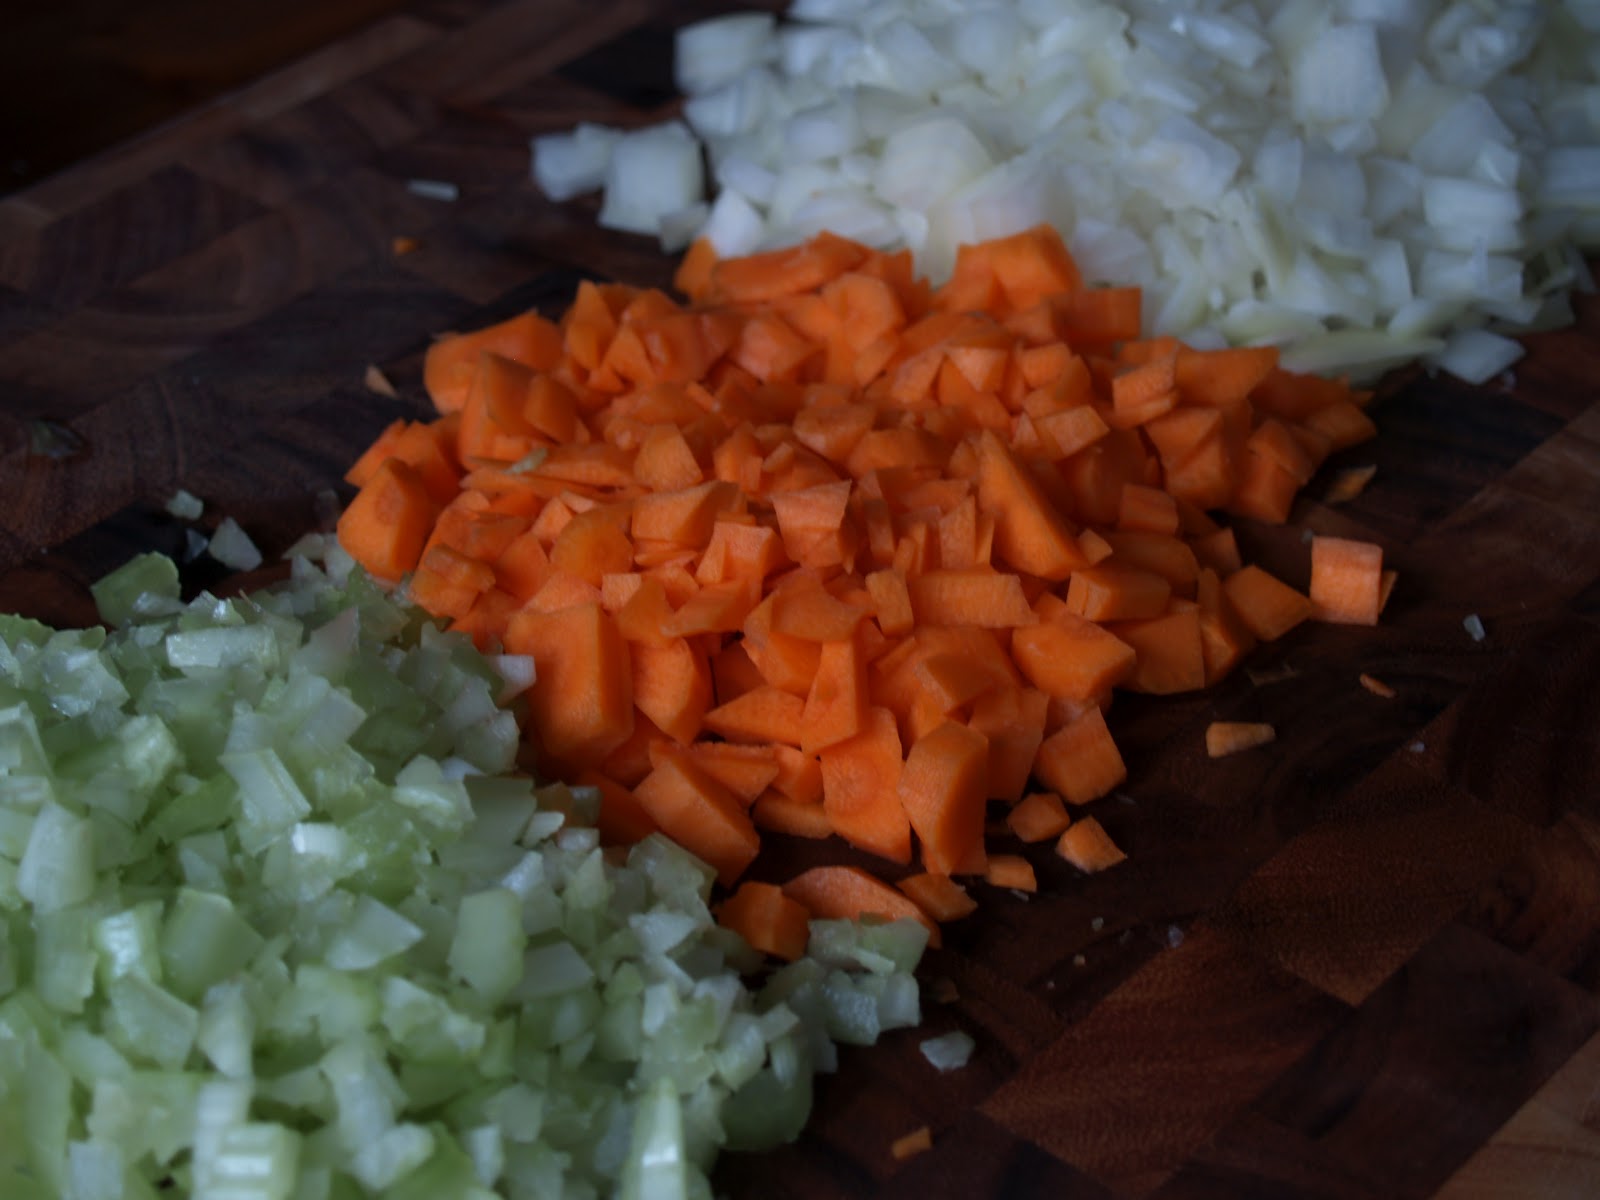
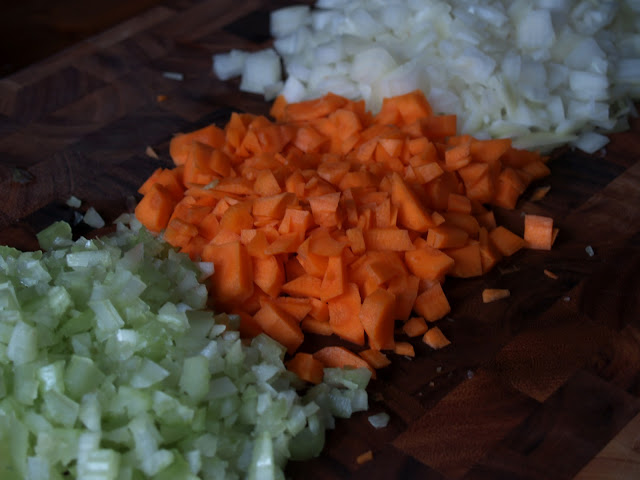
1 large yellow onion, chopped
1 cup chopped peeled carrots
1 cup chopped celery
3 cloves garlic, minced
1½ lbs. smoked ham hocks, brought to room temperature 
2 tsp. dried marjoram or oregano
2 bay leaves
1 tsp. whole black peppercorns
1 lb. green split peas (about 2¼ cups) 
2 quarts chicken stock or water (8 cups), or 4 cups chicken stock and 4 cups water
Kosher salt and pepper to taste
A small spice bag or cheesecloth

Start by placing the peppercorns and bay leaves in a spice bag or in a cheesecloth bundle tied with butcher's twine, and set aside. Melt the butter over medium heat in a large pot or Dutch oven. Add the onion, carrots, and celery, and sauté the vegetables until they become soft, about 8 minutes. Add the garlic, stir, and cook for a minute more. Place the ham hock in the pot, toss in the marjoram or oregano, and add the spice bag containing the peppercorns and bay leaves. Add the split peas and stock or water, stir the pot, and bring to a boil. Reduce heat to medium-low and cover the pot with the lid slightly ajar. Simmer for 2 hours, stirring every so often, and scrapping the bottom of the pot to avoid scorching. Flip the ham hock halfway through cooking.

Turn off the heat and transfer the ham hock to a bowl to cool slightly. Remove the spice bag and discard. Puree the soup using a stick blender (or puree in batches using a food processor or blender). Return the pureed soup to the pot. Season the soup with salt and pepper to taste, and keep warm over low heat. 

Cut the meat off the ham hock (it should pull right off the bone) and dice the meat. Ladle the soup into bowls and sprinkle with the diced ham. Garnish each bowl with grilled French bread brushed with olive oil and a poached egg (see notes below), if desired. 

Yield: about 6 servings

Notes:
  • If you prefer more ham in your soup, dice up some cooked thick-cut ham to add to the diced ham hock.
  • This soup freezes well. After defrosting, you may need to add a bit of water to thin it.
  • To poach the eggs (4 at a time), fill an 8 to 10-inch saucepan or deep skillet with 2½ to 3-inches of water. Add 1 tbsp. of white vinegar to the pan per quart of water used and 1 tsp. salt. Bring to a simmer. Break each of the eggs directly over the water, and let them fall in (sometimes I break each egg into a separate teacup before dropping them in the water to work more quickly). Maintain a simmer during the entire cooking process and do not let boil. Simmer the eggs for exactly 4 minutes and remove them using a slotted spoon, in the same order you placed them in the water (starting with the first egg). Immediately place the eggs in a bowl of ice water. The whites of the eggs should be set and the yolks should be soft when gently pushed with your finger. Cut off any stringy bits of egg white. Poach more eggs in the same manner. If making in advance, the eggs will keep well in a bowl of ice water in the refrigerator for several hours. If making the night before, drain the water and keep the eggs refrigerated in a well-sealed container. To reheat the eggs, place them in a saucepan of hot salted water for about 30 seconds to a minute to heat through. Serve immediately. 

Friday, April 6, 2012

Beet Pickled Eggs


A couple of weeks ago I read about pickled eggs in Laurie Colwin's book, More Home Cooking. Pickled eggs are peeled hard boiled eggs that are placed in a pickling brine for a number of days or weeks. These sounded so good, I thought I would see if I could find a few recipes. That's when I came across beet pickled eggs. Pickling the beets along with the eggs naturally dyes the eggs a brilliant fuchsia. I'm a huge fan of beets, so combing them with eggs made the world I live in a much happier place. The best part is, you don't need any prior experience or knowledge of pickling to make these, just a large jar and a bit of patience. As I looked more into it, I learned that beet pickled eggs originated in Pennsylvania Dutch country. Since this was all new to me, I was eager to give them a try. 


These eggs are really wonderful. They will make a stunning presentation as is, or incorporated into an Easter or spring inspired salad, or for deviled eggs. The longer you pickle the eggs, the more brine and color they absorb. After a few days they became striking little beauties, especially when cut in half to expose more color and their vibrant yellow yolks.


BEET PICKLED EGGS
Adapted from Simply Recipes 

Ingredients:
6 hard boiled eggs, peeled
1 large beet, peeled and cut into 1-inch sized pieces
1 cup beet juice
1 cup cider vinegar
1 large shallot or small yellow onion, sliced
2 cloves garlic, sliced
1/3 cup granulated sugar
5 cardamom pods
3 whole cloves
1 star anise pod
6 hard boiled eggs, peeled
A large jar with a lid (a ¾ liter jar fits the eggs perfectly- about 25 oz.)

Start by hard-boiling the eggs. Place the eggs in a medium-sized saucepan and cover with 2-inches of cold water. Bring just to a boil, cover, and remove from heat. Let sit for 12 minutes before submerging in a bowl of ice water. Place in the refrigerator until ready to use. 

Bring 1 cup of water to a boil in a small saucepan, then reduce to a simmer. Add the chopped beet, cover with the lid slightly ajar, and continue to simmer for 15 to 20 minutes, or until a fork easily pierces the beets. Remove from heat and set aside to cool.

In a medium saucepan, combine the beet juice (if you're left with less than a cup of beet juice after simmering, simply add enough water so that it equals 1 cup), vinegar, shallot, garlic, sugar, and spices. Bring to a boil and reduce to a simmer. Continue to simmer for 5 minutes or until all the sugar has dissolved and the onions are translucent. Remove from heat and set aside to cool.

Once the brine has cooled, place 3 eggs in the jar. Spoon in some of the onions and beets. Add the remaining eggs and spoon in the rest of the onions and beets. Pour in all of the brine. Tightly seal the jar and place in the refrigerator. Allow the eggs to pickle for 5 to 7 days to reach their optimal color. Keep refrigerated and use with 1 month.

Yield: 6 pickled eggs, 1 pickled beet

Notes:
  • Avoid using a fork to remove the eggs from the brine. Piercing them could cause the brine to bleed into the yolks and ruin their beautiful presentation. Use your fingers or a spoon instead.


Tuesday, April 3, 2012

Turning the Rye


A few weeks ago, on St. Patrick's Day, I began volunteering at Battery Park's Urban Farm just steps from the edge of Manhattan island. It is the first farm on the site since 1625, when the Dutch planted theirs. The garden was built in the shape of a wild turkey, designed after Zelda, the local turkey who mysteriously appeared one day and lives in the park. It is in a strange location, surrounded by skyscrapers, subway stations, the Hudson River, and Lady Liberty.


The majority of my day consisted of turing the rye. As I learned, rye is a common lush green cover crop (it looks like tall grass) that is "turned" using a pitchfork or shovel, or by hand, and then broken up, providing nutrients for the soil. This is a major step in preparing the garden prior to planting spring and summer vegetables.


Ryegrass is often planted in the fall and allowed to grow through the winter. Its major contributing factors keep the soil loose, minimizing compaction from rain and snow, and help to prevent soil erosion from wind. The rye is allowed to grow as long as possible before being turned under (dug up under the roots and then flipped, so the soil holding the roots is exposed) and then the soil, rye, and their roots are broken up using shovels. As the rye decomposes, it enriches the soil by giving off nitrogen, further improving its overall structure. It will be fun to see how the soil evolves over the coming months and transforms itself into a thriving garden.


I had a lovely morning, contributing in a small way to this wonderful community garden, grown in the most unlikely of places. Before I knew it, I was lost in the repetitive rhythm of turning the rye, you would think I was anywhere but Manhattan. That is until I was screamed at by a herd of drunken marauding souls dressed entirely in green yelling, "Happy St. Patrick's Day you f**king hippies! Thanks for saving the environment!" And with that, I was instantly brought back to reality and knew right where I was.