Sunday, January 26, 2014

Creole Jambalaya


I thought jambalaya would be the perfect comfort food to make last week on a snowy winter's night. In fact, it's an ideal meal to make throughout the winter months; it's a filling one pot meal that really sticks to your bones. For inspiration and guidance I referred to Howard Mitcham's Creole Gumbo and All that Jazz and Paul Prudhomme's Louisiana Kitchen, two holy grails when it comes to Louisiana cooking.


According to Mitcham's Creole Gumbo, and John D. Folse's The Encyclopedia of Cajun and Creole Cuisine, the now famous Creole-Cajun stew is a close cousin to Spanish paella. In the early 18th century, Spanish settlers brought paella to New Orleans, but since traditional Spanish ingredients for the dish- such as clams, mussels and saffron- were not available, the recipe was adapted using indigenous ingredients. Oysters and crawfish replaced clams and mussels, and saffron, an expensive and difficult commodity to come by in the New World, was often substituted with tomatoes. Jambalaya was also influenced by Africans living in Louisiana, who called their rice 'yaya.' The French later named the dish 'Jambon a la Yaya' (meaning ham with rice), which was later shortened to simply, 'jambalaya'. 


Though many variations and methods of the dish exist, jambalaya was traditionally made by adding rice to leftovers or other odds and ends that happened to be lying around the kitchen in order to stretch them as long as possible. Many poor Cajun families likely ate jambalaya several times a week out of necessity, particularly during the Depression. Later, it was popularized outside of Louisiana by the hit Hank William's song, Jambalaya and has since become a celebrated classic. Though the list of ingredients looks long, making this dish as it is intended- using leftover chicken and a few stray slices of deli ham etc.- cut down on its intimidation factor and make it more practical. For more Louisiana dishes see here.


CREOLE JAMBALAYA
Adapted from Creole Gumbo and All That Jazz, by Howard Mitcham and Chef Paul Prudhomme's Louisiana Kitchen, by Paul Prudhomme

Serves 8 to 10

Ingredients:
2 (16 ounce) cans beef broth, plus more as needed
4 tablespoons (1/2 stick) unsalted butter
1 pound Andouille sausage, cut into 1/2-inch rings (see notes below)
1/2 pound smoked ham, diced
4 tablespoons flour
2 medium white onions, finely chopped
2 to 3 large scallions (white and green parts), chopped
1 cup finely chopped green bell pepper
1 cup finely chopped celery
4 garlic cloves, minced
1 (28 ounce) can whole plum tomatoes, drained and chopped
1 bay leaf
1/2 teaspoon dried or fresh thyme
1/8 teaspoon ground cumin
1/8 teaspoon ground cloves
1/8 teaspoon ground allspice
1/8 to 1/4 teaspoon cayenne pepper 
1/2 pound cooked chicken, diced
2 pounds shrimp, peeled (reserve the shells for another use, such as seafood stock)
2 cups long grain white rice
Salt and freshly ground black pepper, to taste


Bring the beef broth to a boil in a small saucepan. Cover, remove from heat, and set aside. 

Melt the butter in a large pot or Dutch oven over medium heat. Add the sausage and ham and cook, stirring occasionally, until they are lightly browned. Stir in the flour. Add the onions, scallions, green pepper, celery, and a pinch of salt, and cook until the vegetables are soft and almost translucent, about 8 minutes. Add the garlic and cook for 1 minute more.

Stir in the chopped tomatoes along with any juices that have accumulated on the cutting board. Add the bay leaf and stir in the thyme, cumin, cloves, allspice, and cayenne. Add the hot beef broth to the pot and stir to incorporate. Add the shrimp and chicken. Stir in the rice and season to taste with salt and pepper. There should be enough liquid in the pot to just cover the ingredients. Add more broth or water, as necessary.

Bring the liquid to a boil, then reduce the heat to low and cover. Cook the rice at a low simmer, occasionally stirring and scraping the bottom of the pot until done, 30 to 35 minutes. Jambalaya should be moist, but not soupy. Taste to adjust seasonings and serve with a cold beer or glass of full-bodied red wine. 

Notes:
  • If you can't find Andouille sausage at your local butcher or market, substitute it with another smoked pork sausage, such as kielbasa. 

Saturday, January 18, 2014

Carbonnades à la Flamande


Carbonnades à la flamande, or simply, carbonnade, is a classic Belgian stew made from beef and onions braised in beer. It is a close cousin to the red wine-based French boeuf bourguignon minus the carrots and mushrooms, though you could certainly add them if you wanted to break with tradition. The stew is traditionally flavored with a little brown sugar and a splash of apple cider vinegar or mustard, which further compliment its unique sweet and sour flavor.


I first made this dish when I spotted it flipping through Julia Child's 'Mastering the Art of French Cooking' a number of years ago. It's a great winter dish, especially when there's a polar vortex upon us! I find it's a nice break from the more common red wine-based stews and braises that are typical throughout the season. Traditionally, the type of beer used most likely depended on the region in which the dish was cooked. Keeping that in mind, I've never been too obsessive over which beer to use. Over the years I've used different varieties, but I most commonly use a dark Belgian-style ale. Try a few types of Belgian beers and see what you prefer (don't judge, but I've even used Miller Highlife in a pinch, and though it wasn't as rich or dark as an Abbey-style beer, it still tasted great. However, a darker, slightly bitter-sour tasting beer is ideal). 


As with most braises, low and slow is key. I made this stew first thing in the morning and reheated it for dinner later in the day. It tastes even better a day or two after cooking, making it a great guest-friendly meal to be prepared in advance. Serve carbonnade with some crusty bread, potatoes or buttered noodles, and of course, a Belgian-style beer (or a full bodied red, if you prefer)!


CARBONNADES À LA FLAMANDE 
Adapted from Mastering the Art of French Cooking, Child, Bertholle, Beck  

Serves 6

Ingredients:
2 to 3 cups beef broth
2 tablespoons olive oil or vegetable oil, plus more as needed
4 slices (about 4 ounces) thick-cut bacon, diced
3 pounds chuck roast, cut into 2-inch by 4-inch slices, about 1/2-inch thick
Salt and freshly ground black pepper, as needed
All-purpose four, as needed
1 1/2 pounds yellow onions (about 5 medium), sliced 1/4-inch thick
4 garlic cloves, minced
1 pint (2 cups) dark Abbey-style Belgian beer
2 tablespoons brown sugar
3 sprigs flat leaf parsley
4 sprigs thyme
1 bay leaf
2 tablespoon unsalted butter, at room temperature
3 tablespoons all-purpose flour 
2 tablespoons apple cider vinegar (or red wine vinegar)
1 tablespoon chopped flat leaf parsley, for garnish


Preheat the oven to 275°F. 

Bring the beef broth to a simmer in a small saucepan, shut off the heat, and cover the pot to keep warm. Set aside.

In a large Dutch oven or pot, heat 1 tablespoon olive oil or vegetable oil over medium heat. Add the bacon, stirring occasionally, until it has begun to brown. Use a slotted spoon to transfer the bacon to a large plate or casserole dish. Set aside. 

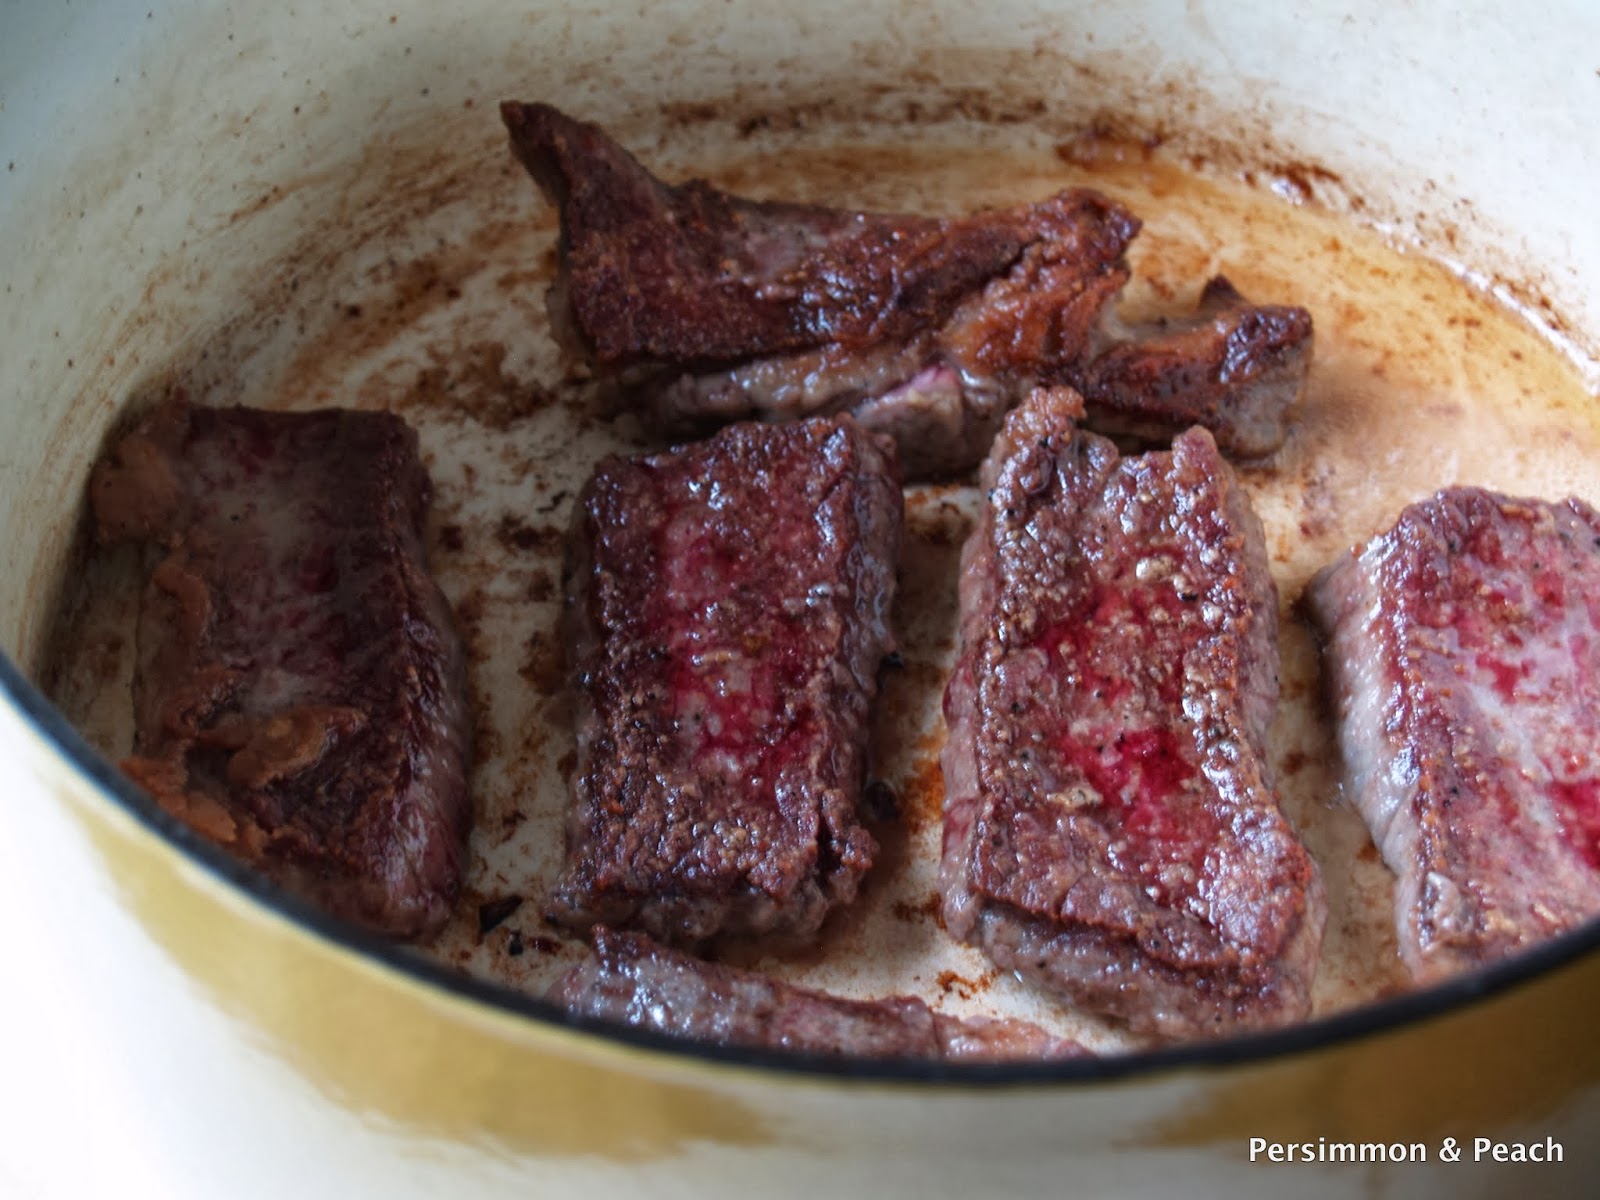
Thoroughly dry the cut beef with paper towels (to ensure good browning) and generously season with salt and pepper. In a large bowl, toss the beef with just enough flour to lightly coat. Add another tablespoon of olive oil or vegetable oil to the pot. Quickly saute the beef in small batches over medium heat until it is nicely browned on both sides. Transfer the meat to the plate or casserole dish with the bacon. Continue sauteing in the same manner until all the beef is browned, adding more olive oil or vegetable oil as necessary. Set aside.

Add the onions to the pot and saute over medium heat, stirring occasionally, until they are  caramelized, 20 to 25 minutes. Add the garlic and cook for a minute more. 

Pour in half of the beer and using a wooden spoon, scrape up the brown bits on the bottom of the pan. Bring the beer to a simmer and allow it to reduce, about 4 minutes. Return the beef and bacon back to the pot along with any juices that have accumulated. Stir in the brown sugar. Pour in the remaining beer and enough warmed beef stock to almost cover the meat. To make the bouquet garni (herb bundle), tie the parsley, thyme, and bay leaf together using butcher's twine (for ease in removing later) and add to the pot. Bring to a simmer, cover the pot with a tight fitting lid, and place it in the oven for 1 1/4 to 1 1/2 hours, or until the meat is very tender when pierced with a fork. 

When the stew is done, transfer it to the stovetop. Use a spoon to skim off any fat that has risen to the surface and discard. Make a beurre manie (a thickening agent of butter and flour): combine the butter and flour in a small bowl and blend until smooth using a fork. Stir the beurre manie and vinegar into the stew and bring it to a boil. Reduce the heat and let it simmer uncovered for 10 minutes. Remove the bouquet garni and discard. Season to taste with salt and pepper and serve. Garnish each plate with chopped parsley. Serve carbonnade with some crusty bread, potatoes or buttered egg noodles, and of course, a Belgian-style beer (or a full bodied red, if you prefer).

Alternatively, let the stew cool, cover, and refrigerate. To reheat, bring to a simmer on the stovetop, stirring occasionally. Cover the pot, reduce heat slightly, and simmer gently for about 10 minutes prior to serving. 

Sunday, December 15, 2013

Holiday Gift Guide: Good Food Reads


I thought it would be fun to put together a list of some of my favorite food related books that would make wonderful holiday gifts for the cook(s) in your family. After all, there's more to read than the now consummate Omnivore's Dilemma, Blood, Bone's and Butter, Kitchen Confidential, and the great works of M.F.K. Fisher. In general, I find it's hard to buy gifts for people who enjoy cooking because you don't know what cookbooks or cooking gadgets already live in their kitchen. If you're desperate for some last minute gift ideas, hopefully this list will help! For more good food reads see here. Here's the list (in no particular order) of 10 books that will make great gifts this holiday season:


The Apprentice: My Life in the Kitchen
By Jacques Pepin

Jacques Pepin's bestselling memoir traces his life from his childhood working in old world French kitchens to becoming one of the most celebrated and famous chefs in the world today. Pepin sheds light on being a pioneer in America's coming of age in the world of food. An insightful and inspiring firsthand account of what it takes to become a great chef.


As Always, Julia: The Letters of Julia Child & Avis DeVoto
Edited by Joan Reardon 
As Always, Julia, is a collection of letters between Child and her close friend and pen pal, Avis DeVoto. Their correspondence sheds light on the struggles and frustrations of publishing 'Mastering the Art of French Cooking' and reveals a very personal and private Child just before the success of her first cookbook and becoming an American icon. A fascinating and informative read for Julia Child fans.


Bringing It to the Table: On Farming and Food
By Wendell Berry

Long before "organic produce" was available in every American supermarket, Wendell Berry was the embodiment of mindful eating and farming. 'Bringing It to the Table' is a collection of Berry's educated, direct, and thoughtful essays from the past thirty years, which explore the responsible practices and principles of eating and farming well. His eloquent writing answers many difficult questions pertaining to the often confusing and misunderstood world of modern agriculture. A must read for anyone who enjoyed Omnivore's Dilemma. 


Home Cooking: A Writer in the Kitchen
By Laurie Colwin
Laurie Colwin's memoir on cooking and food will have you laughing out loud. Published in the late 80's, 'Home Cooking' has since become a classic for many cooks. Colwin's often irreverent humor celebrates both her triumphant and disastrous meals.  Whether an amateur or professional cook, Laurie Colwin feels like your best friend in the kitchen, and is a constant reminder to have fun and not take cooking (or life) too seriously. 


Ideas In Food: Great Recipes and Why They Work
By Aki Kamozawa & Alexander Talbot

'Ideas in Food' by husband and wife chefs Aki Kamozawa and Aki Kamozawa, shares newfound knowledge and recipes that break the rules of many traditional cooking techniques. This book takes a unique in-depth look at many aspects of molecular gastronomy from the home cook's perspective. It's the perfect handbook for the experimental cook.


Mastering the Art of Soviet Cooking: A Memoir of Food and Longing
By Anya Von Bremzen
Anya Von Bremzen's recently published book has garnered a lot of buzz in the food world, and with good reason. Her intensely personal and intimate memoir of life and eating in the USSR is paralleled in stark contrast with her eventual move to the US years later. Von Bremzen's thoughtful and observant writing weaves food, family, and politics together in an unforgettable way.


One Souffle at a Time: A Memoir of Food and France
By Anne Willan

Anne Willan's memoir recounts her creation and time as an instructor at the legendary La Varenne Cooking School in France amidst a male-dominated food culture. Willan recounts the birth of the modern day food obsession and brings the sights and smells of French cooking to life. A fascinating look into the life and teachings of an influential chef. 


Provence, 1970: M.F.K. Fisher, Julia Child, James Beard, and the Reinvention of American Taste
By Luke Barr
'Provence, 1970,' written by the grandnephew of M.F.K. Fisher, pieces together the intimate dinner parties and private thoughts and letters of some of America's most influential culinary minds. The cast of characters includes M.F.K. Fisher, Julia Child, James Beard and Richard Olney. A fascinating page-turner that takes place on the eve of America's culinary reinvention; it's so engaging it reads like fiction. This was one of my favorites of the year!  


Whiskey Women: The Untold Story of How Women Saved Bourbon, Scotch, and Irish Whiskey
By Fred Minnick 

'Whiskey Women' tells the story of influential women throughout history, from Mesopotamia to Prohibition, who have shaped the liquor industry as we know it today. An empowering and informative look at the way women have influenced, developed, and marketed the liquor industry. This is a great read for the whiskey drinker in your family!


Wine & War: The French, the Nazis, and the Battle for France's Greatest Treasure
By Donald & Petie Kladstrup
'Wine and War' takes a historical look at the wine industry in Nazi occupied France during World War II. It tells the story of many winemakers who risked it all to protect their wine from falling into the hands of the Third Reich. An inspiring and triumphant look at one of the darkest chapters in French history. This is a perfect read for the wine and history lover in your family.


Saturday, December 7, 2013

End Table Makeover


Living in New York City I hear myself say all too often, "If only I had a garage I could_____." As every New Yorker knows, space has its limitations which requires most of who live here to get creative. If it can't be suspended from the ceiling, hung on the wall, or stored in a suitcase inside another suitcase under the bed, it probably has to go. Sometimes I feel having an apartment in the city is akin to living inside a set of Russian nesting dolls. In any case, I'd been determined to refinish an end table which Aaron and I've had since college. We bought it at a used furniture store in Boston off of Boylston St. for a whopping $30 and has since become the perfect table to hold our record player. It has just enough drawer space to hold takeout menus, a small flashlight, and the occasional safety pin. Over the years we've become attached to it, knowing it was a well-made piece, but fully aware it was an eyesore with its chipped and scratched finish. It had great potential and just needed a little love in the form of sanding and a fresh coat of paint. However, my lofty plans were always discouraged by the blatant reality that there just wasn't any space to take on such a project. If I only had a garage…. 


A couple months ago, I finally bit the bullet and decided to tackle this table once and for all. Luckily for us, we have a small "balcony" (in reality it's just a glorified flower box, which is only accessible by climbing out the window) with just enough room to shove the end table into a 2 foot space. We refer to it affectionately as "the terrace." By New York standards, it ain't bad! The so-called terrace is where was able to sand down the entire table with a bandana covering my nose and mouth, looking like a wild west bandit (I'm sure our neighbors have a delightful opinion of us). 


Since the table was in such bad shape, and we already have enough mismatched wood furniture in the room, we decided to paint it rather than re-stain it. The entire project only took me two days to complete from start to finish.  I thought a crackle finish would suit this piece well and give it some added character. It's a process that seems like it would take a long time, but is actually quite simple and only takes three coats of paint. 


Here's how to achieve a crackle finish on a project in 10 easy steps:
  1. Choose two contrasting colors of flat-finished paint (the greater the contrast the more intense the crackle finish will be) at your local hardware store, as well as clear crackle medium finish (if your local hardware store doesn't carry it, your local craft store will). Also purchase a clear satin finish, if desired.
  2. In a well ventilated area, sand your piece of furniture to remove any existing stain or finish. 
  3. Wipe the piece down with a damp cloth to remove any dust or debris.
  4. Place your piece of furniture on a drop cloth and remove any drawers. Remove any hardware from the drawers and set aside.
  5. Paint your piece with a single coat of your desired base paint and allow it to dry completely, preferably overnight.
  6. Apply a coat of crack-medium and allow it to dry for 30 minutes to 1 hour, but not more than 4 hours (follow the manufacturer's directions for best results). 
  7. Paint the piece with your chosen top coat in long even stokes and let it dry completely (you will see that the top coat will begin to crackle immediately).
  8. Allow the piece to dry for at least 24 hours before replacing any hardware or putting anything on top of it. 
  9. If desired, use a fine-grit sandpaper to gently sand the edges of the piece, giving it a worn look and further exposing the base coat. Wipe the furniture clean with a damp cloth.
  10. If desired, paint the piece with a clear satin finish to protect the finish (however, leaving the piece unfinished will give it the most authentic worn appearance). Let the furniture dry for at least 24 hours before placing anything on top of it. 

Thursday, October 31, 2013

Salted Caramels


I've been making these salted caramels for a number of years. There's nothing quite like homemade rich and creamy caramel. I've made them for practically every occasion under the sun, and still never get sick of them. I love this recipe because it's consistently reliable and always turns out perfectly soft, chewy caramel. 


The sea salt adds another depth of flavor to the candy, making it a bit more sophisticated than just pieces of cut caramel. If you're new to making caramel, the most difficult part is knowing when the sugar mixture is the right color before adding the cream. The best way to learn is by trial and error. If you add the cream too soon, you'll end up with a light taffy-like candy. If the sugar darkens too much, it will begin to smoke and burn. The only thing to do is let it cool and toss it; clean the pan and start again. You only need to burn caramel once to know your boundaries, and it's a good learning experience. You can use a candy thermometer as a guide while cooking the sugar syrup, but I prefer to eyeball it; the color is what's most important. If you decide to use a thermometer, the closer the sugar gets to 325 degrees F, the darker and richer the caramel will be, but do not exceed 325 degrees F, or it will burn.


Homemade candies are such a special treat, and perfect for a grown up Halloween party. Aaron and I are having a few folks over Halloween night to get into costume before we hit the town. I thought it would be fun to provide some homemade sweets to get us in the spirit. For more Halloween treat ideas check out my recipes for: homemade candy corn, cracker jacks, caramel apples, pumpkin ice cream, cinnamon red hots, creepy witch's fingers, ganache covered brownies, and s'mores. Trick or treat!


SALTED CARAMELS
Slightly adapted from Ina Garten, Food Network Magazine 

Ingredients:
Butter, for greasing
Vegetable oil, for brushing
1½ cups sugar
¼ cup light corn syrup
1 cup heavy cream
5 tablespoons unsalted butter
1 teaspoon sea salt (preferably fleur de sel), plus more as needed 
½ teaspoon vanilla extract

Grease an 8 x 8-inch or 7 x 11-inch baking pan with butter and line with parchment paper, allowing it to drape over two sides (the butter will hold the parchment in place and keep it from curling in the pan). Very lightly brush with oil and set aside.

In a 4-quart heavy-bottomed saucepan, combine ¼ cup water, the sugar, and corn syrup and bring to a boil over medium-high heat. Boil until the mixture until it is a warm golden brown, about 10 to 15 minutes. Do not stir the sugar mixture, just carefully swirl the pan, if need be. Pay close attention to the sugar as it begins to color, as it can burn quickly. (If it begins to smoke and burn, set it aside to cool slightly and discard. Clean the saucepan and start again).

Meanwhile, combine the cream, 5 tablespoons butter, and 1 teaspoon salt in a small saucepan and bring to a simmer over medium-low heat, stirring occasionally. Remove from heat and set aside.

When the sugar mixture has reached the desired color, turn off the heat and slowly add the cream and butter mixture to the sugar mixture. Be careful, as it will bubble up violently. Stir in the vanilla using a wooden spoon and place a candy thermometer in the caramel. Cook over medium-low heat for 8 to 10 minutes, or until the mixture reaches 248 degrees F (firm ball) then immediately remove it from the heat. 

Carefully pour the hot caramel into the prepared pan. Place the caramel in the refrigerator 
and let cool until firm, but still pliable, 20 to 30 minutes.

Remove the caramel from the refrigerator and lift it out of the pan using the parchment paper and transfer to a cutting board. Roll one side (or the long side if you used a 7 x 11-inch pan) into a log, stopping at the center of the square. Roll the other side of the caramel into a log to meet the other log. Cut the caramel in half where the two logs meet. You should have two logs measuring 8 or 11-inches long, depending on the size of your pan. Cut each log into 3/4-inch pieces. 

Pour some sea salt on a small plate and lightly dip each of the caramels in the salt. Wrap the caramels in 4 x 5-inch parchment pieces and twist the ends to seal. Store the caramels in a zip-top bag at room temperature. Use within 1 to 2 weeks. 

Notes:
  • Do not substitute waxed paper for parchment, or the caramel will melt the wax and stick to the paper.
  • It is very important to use a 4-quart saucepan to make the caramels to ensure that the hot sugar mixture won't overflow when adding the cream and butter mixture.